Upgrade To 12" Front Brakes
Posted: Mon Mar 10, 2008 10:32 am
Use this information at your own risk... I take no responsibility for any failures when doing this modification to your vehicle. You are fitting a part to the car that was not intended for it so the chance of some issue is always present.
***This post is a work in progress... I will update it as I complete the project.***
Larger rotors will absorb and radiate more heat allowing more use of the brakes when needed.
Dual piston calipers offer more bite, and provide braking pressure along a larger surface area (due to larger pads), which aids in faster stopping.
One thing to keep in mind is that larger rotors weigh more. Thus, your rotational mass will increase. However, keep in mind that you will be switching from a cast iron knuckle to a cast aluminum piece. You'll also be switching from a cast iron caliper to a cast aluminum caliper. While your rotational mass will increase, your unsprung weight will decrease. I'll collect weights as I go along.
Weight Comparisons
Knuckles
Stock - 9.7 lbs
N-body - 4.1 lbs
Hubs
Stock - 5.4 lbs
N-body - 7.2 lbs
Rotors
Stock - 11.6 lbs
F-body - 18.7 lbs
Outer CV
Stock -
N-body - 5 lbs
Calipers (with pads)
Stock - 9.7
C5 (including F-body abutment bracket) -
***DISCLAIMER***
This upgrade will require you to have dual bolt pattern wheels, as doing this upgrade will change your wheel pattern in the front to 5x115.
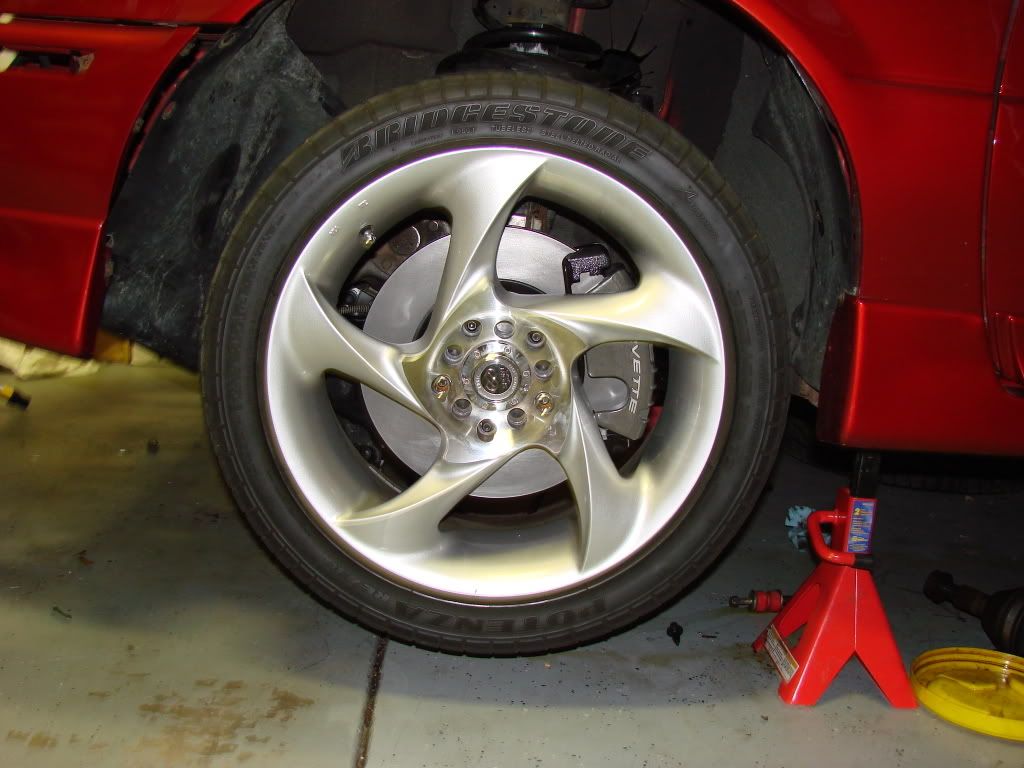
You will more than likely need 17" wheels, as this setup doesn't fit under MOST 16" wheels... it might on some, but check clearances before you install. I know that the brake setup will clear the 97-03 Grand Prix Hi-polish Torque Star wheels (I have these brakes on my GTP).
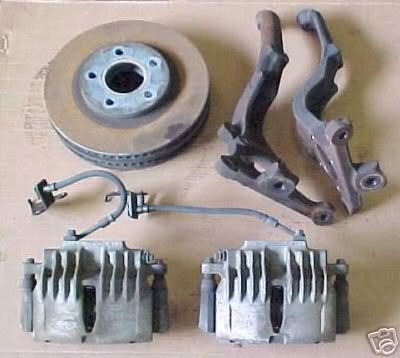
Parts Needed:
99-04 N-body Aluminum Spindles and strut knuckle bolts (Grand Am, Alero, Malibu)
99-04 N-body Front hubs
99-04 N-body Front lower ball joints
99-04 N-body Outer CV joint
98-02 F-body Front Rotors (users choice in brand/style)
98-02 F-body Calipers (must have the abutment bracket)
98-02 F-body Brake pads (users choice in brand)
Other parts that work:
63010220ERL x2 3an to 10mm(3/8) Banjo 20" Hose << Aftermarket SS line that works with the F-body and N-body upgrade depending on which your doing
989534ERL x2 Brake Adapter 3an to 10mm x 1.0 Female NOT Inverted Flare. << Adapt factory Lines to 3an Stainless steel lines. Double check your factory lines, if they've been replaced they may be a different thread and possibly inverted flare type.
C5 Corvette Calipers (have a different casting, reduces flex in the calipers)
*Note* If using C5 calipers, purchase brake pads for an F-body car, as the pads used are based on which abutment bracket will work, not the caliper. C5 abutment brackets will not bolt up to these knuckles.
Benefits to using a C5 caliper are that the caliper is pressure cast, instead of gravity cast. This helps increase the life and strength of the caliper. As mentioned above, the caliper also has a different, more rigid casting. On the C5 caliper, the ribs cover the entire top of the caliper, where as the F-body calipers, only half of the caliper is ribbed.
F-body caliper:
C5 caliper:
More information (thanks to Brendan)
theres just a couple of parts you said that can be changed. Â this is from a post where many people have done it this way. ive seen the post on some grand prix site about the f-body swap.
QUOTE1) Order these parts:
- 98-02 fbody caliper brackets (front) (P/N: 18026163) $61/each
- 97-04 Corvette calipers
---grey calipers: (P/N: 12530682)(P/N: 12530683)$100/each
---red (zo6) calipers: (P/N: 88895128)(P/N: 88895129) $96/each
- 98-02 fbody brake pads (front)
- 00-05 Impala rotors (front)
- 97-02 corvette anti-rattle clip
* all part numbers are GM numbers.
** the calipers are available at auto part stores for less, but are not GM original parts.
More Information: http://www.grandamgt.com/forum/showthread.php?t=62144
Installation:
You will need to remove your CV axles, knuckle assembly, calipers, rotors, and ball joints.
Install the new ball joints into your control arm.
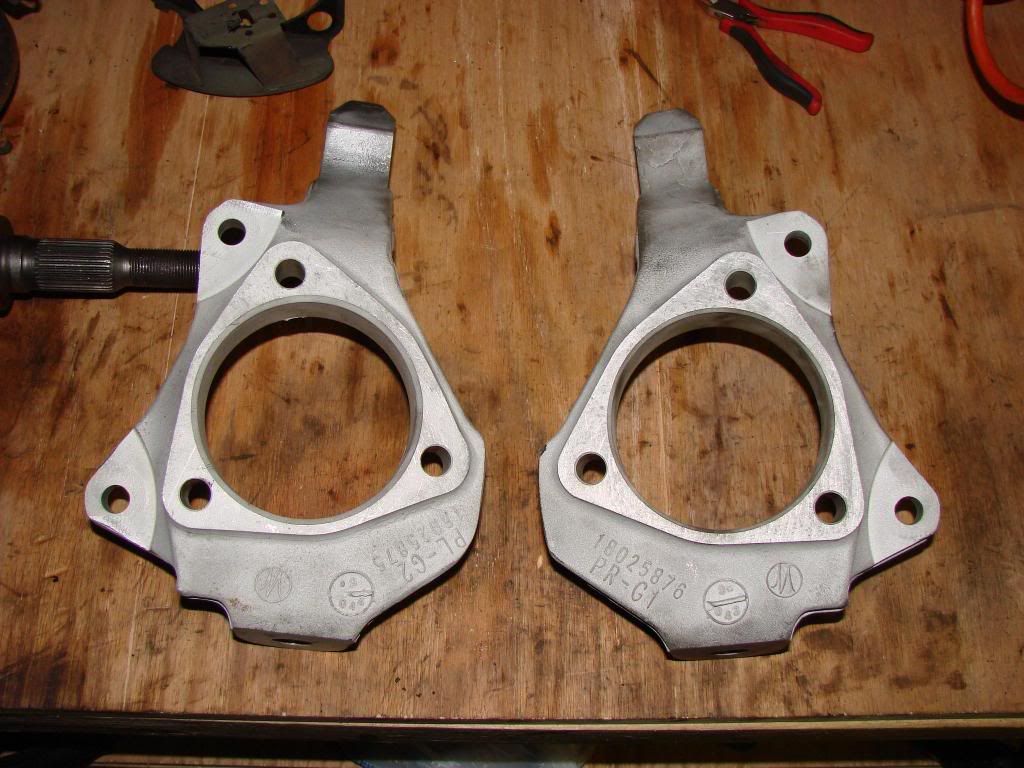
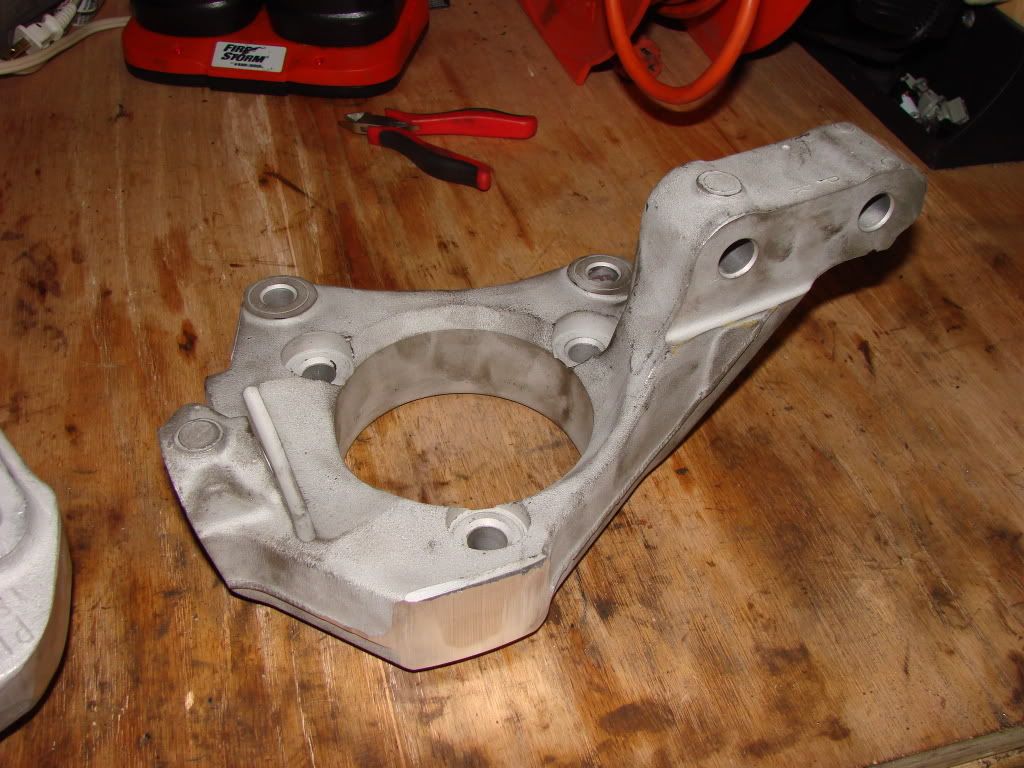
The N-body spindles look like this:
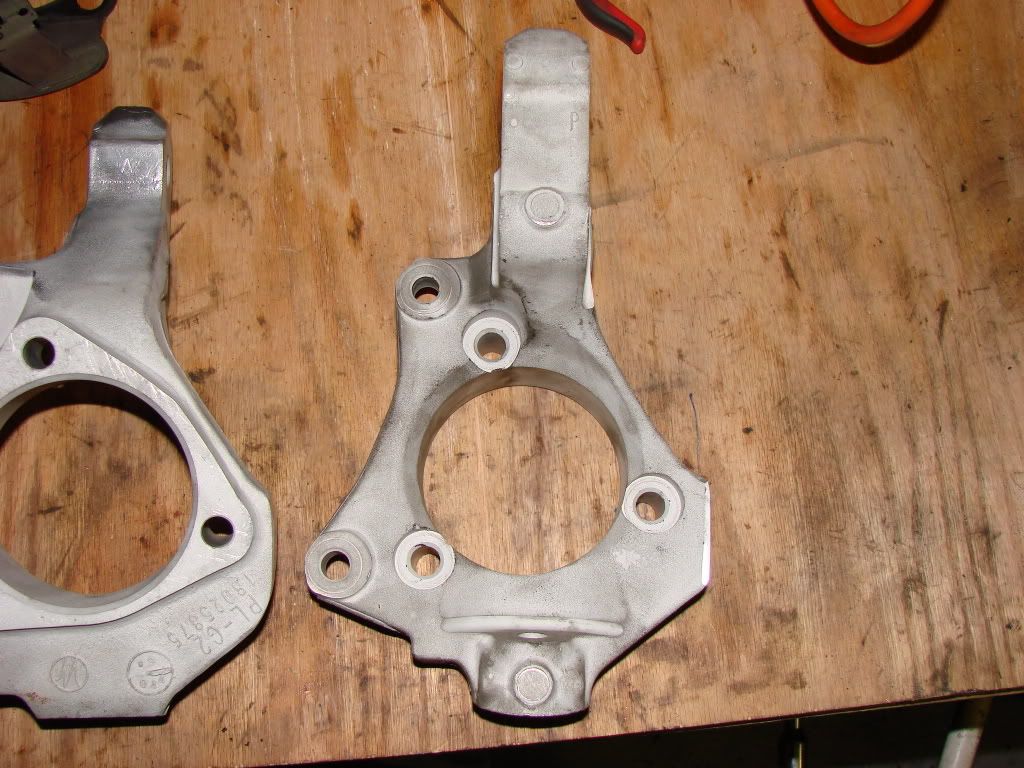
Notice how there is an extra portion on the knuckle... N-bodys use the spindle/knuckle for steering, where as L-bodys use the struts. The extra part will have to be removed, as seen below.
Since we are using N-body knuckles, we are going to have to use N-body hubs. This is why you'll need dual bolt pattern wheels, as the N-bodys have 5x115 bolt patterns. You could have an adapter sleeve made to fit into the N-body knuckle, and use an L-body hub to retain your wheels, but this won't work on ABS cars since there isn't a spot to mount the ABS sensor on the N-body knuckles. To get that to work, you'd have to find a spot to mount the sensor, and mimic the mounting style used on the L-body knuckles so your ABS will still work. If you go this route, you won't have to mess with the axles.
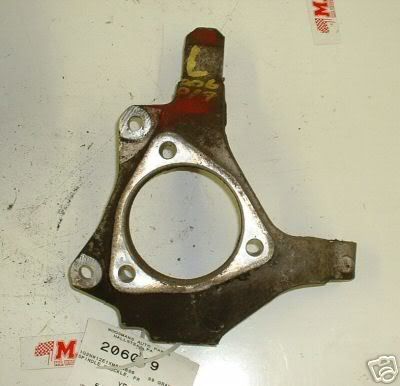
Here is the bracket that the ABS sensor mounts to on the N-body. This goes between the hub and the knuckle.

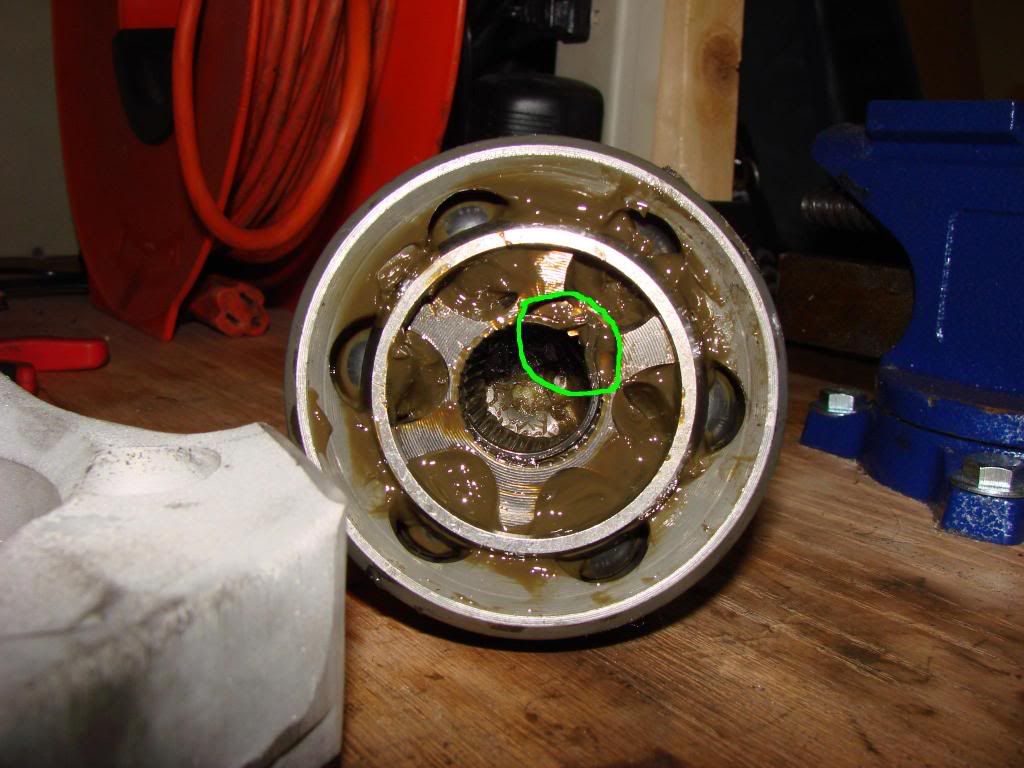
Now we need to switch the Outer CV from the N-body axles onto the L-body axles. To remove the Outer CV, you have to remove the metal banding on the boot, pull the boot down, and spread the C-clip that keeps the Outer CV on the axle. Follow this procedure for both axles, and just swap them, making sure that you keep the race cage facing the same way upon reinstallation (so that you will have access to the C-clip if you have to swap axles down the road).
C-clip
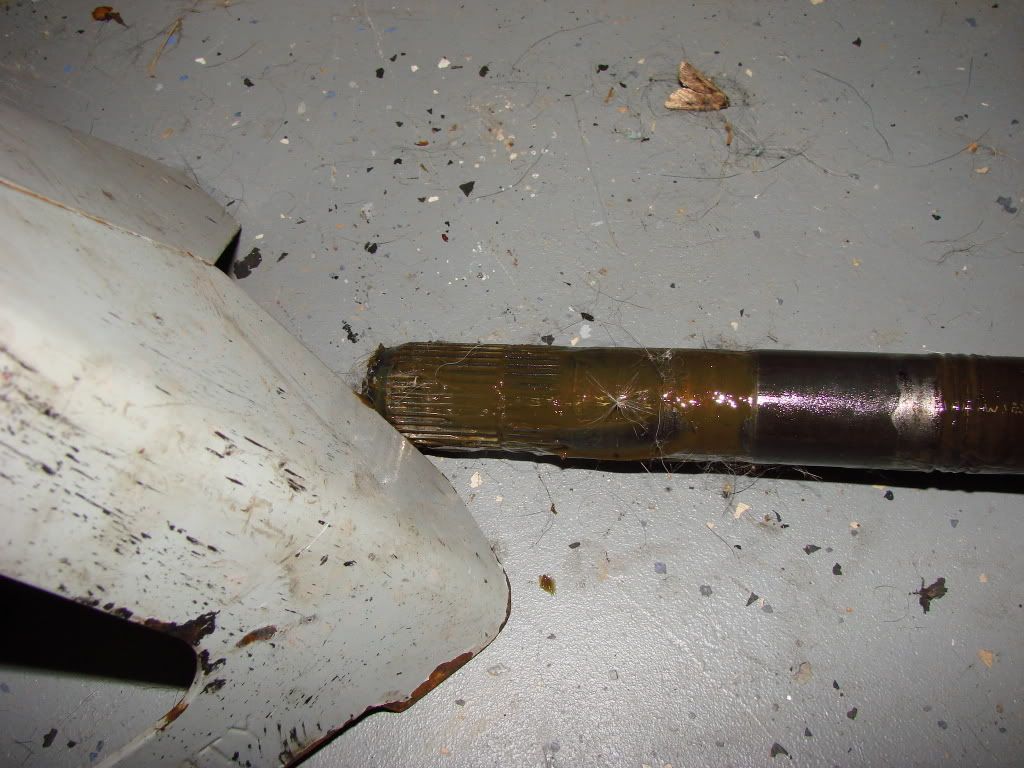
Axle w/ removed Outer CV
When you put the axles back together, make sure to use wheel bearing grease for CV's, and not the tube grease that you put into ball joints and tie rods.
Install the axles back into your car.
Install the hub into the knuckles.
Install the spindle assembly (knuckle and hub bearing) into the car, putting the axle through the hub. Make sure to use the strut knuckle bolts from the N-body, as the holes in the knuckle are smaller than the L-body holes.
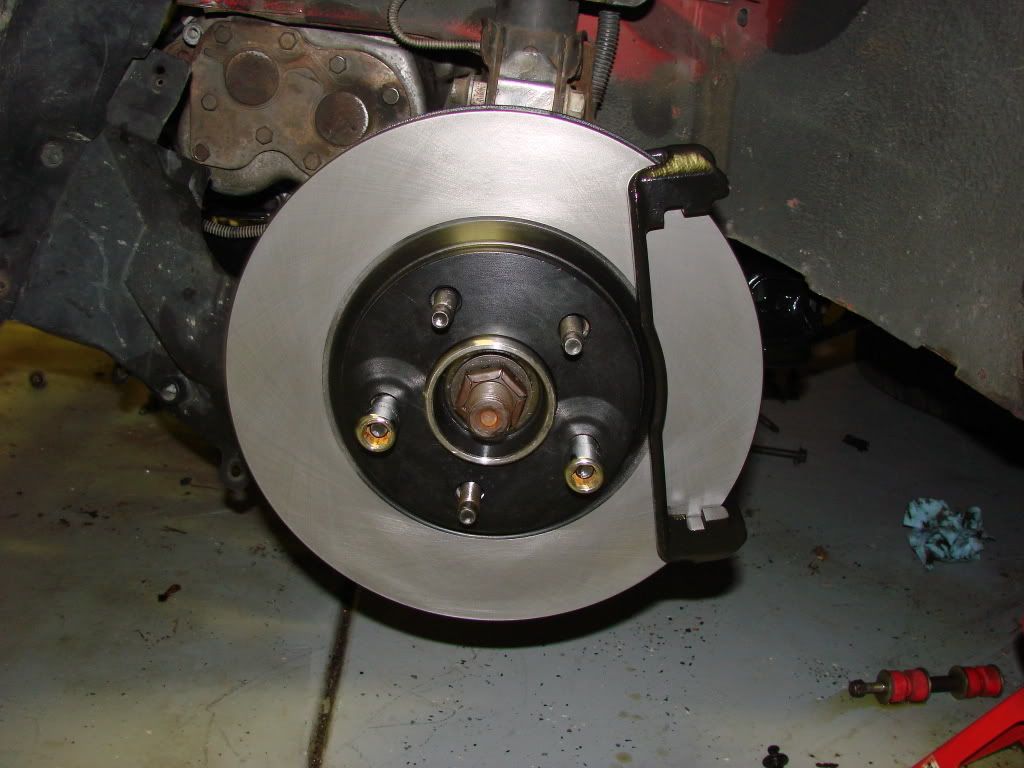
Put the F-body rotor on.
Install the abutment bracket.
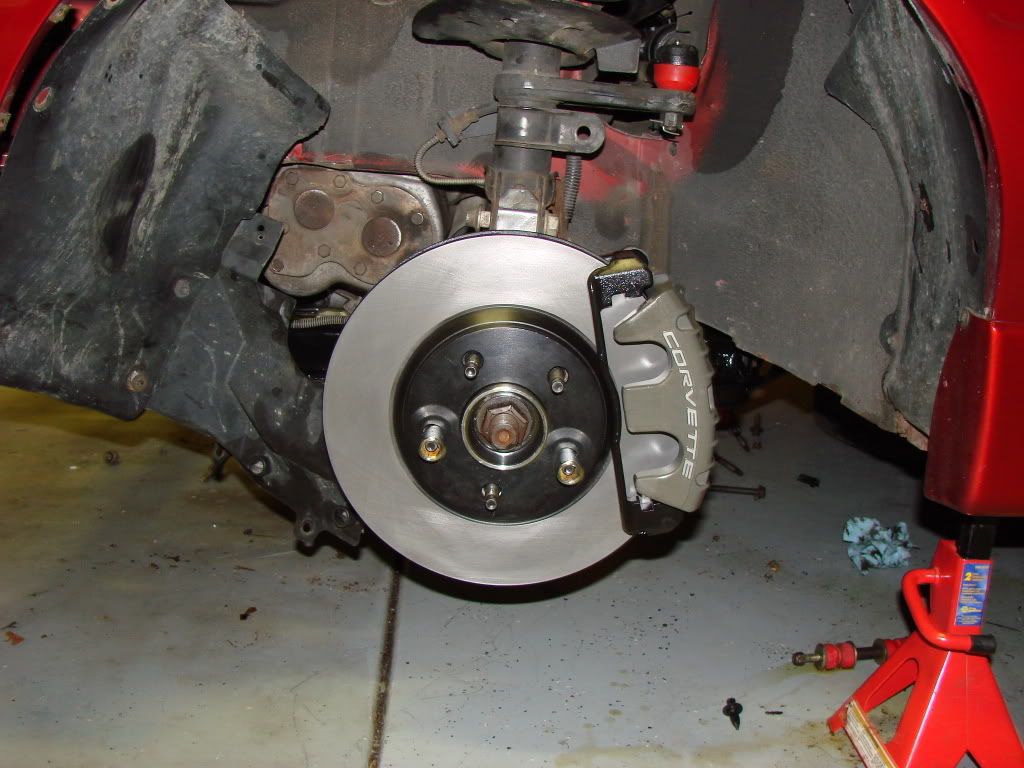
Install the pads, then the calipers of your choice, making sure to have the bleeder screws pointing up.
Bleed the brakes, and enjoy your new-found stopping power! MAKE SURE TO CHECK CLEARANCES OF YOUR BRAKE LINE BEFORE GOING ON A TEST DRIVE! YOU DO NOT WANT THE LINES TO RUB ON YOUR TIRES OR ANY OTHER SUSPENSION/STEERING COMPONENT!
More information that may help you with the swap: http://www.j-body.org/forums/read.php?f ... 30&t=99830
Here are some more semi-finished pics (I still need to get brake lines and my pads aren't installed in these pics).

***This post is a work in progress... I will update it as I complete the project.***
Larger rotors will absorb and radiate more heat allowing more use of the brakes when needed.
Dual piston calipers offer more bite, and provide braking pressure along a larger surface area (due to larger pads), which aids in faster stopping.
One thing to keep in mind is that larger rotors weigh more. Thus, your rotational mass will increase. However, keep in mind that you will be switching from a cast iron knuckle to a cast aluminum piece. You'll also be switching from a cast iron caliper to a cast aluminum caliper. While your rotational mass will increase, your unsprung weight will decrease. I'll collect weights as I go along.
Weight Comparisons
Knuckles
Stock - 9.7 lbs
N-body - 4.1 lbs
Hubs
Stock - 5.4 lbs
N-body - 7.2 lbs
Rotors
Stock - 11.6 lbs
F-body - 18.7 lbs
Outer CV
Stock -
N-body - 5 lbs
Calipers (with pads)
Stock - 9.7
C5 (including F-body abutment bracket) -
***DISCLAIMER***
This upgrade will require you to have dual bolt pattern wheels, as doing this upgrade will change your wheel pattern in the front to 5x115.
You will more than likely need 17" wheels, as this setup doesn't fit under MOST 16" wheels... it might on some, but check clearances before you install. I know that the brake setup will clear the 97-03 Grand Prix Hi-polish Torque Star wheels (I have these brakes on my GTP).
Parts Needed:
99-04 N-body Aluminum Spindles and strut knuckle bolts (Grand Am, Alero, Malibu)
99-04 N-body Front hubs
99-04 N-body Front lower ball joints
99-04 N-body Outer CV joint
98-02 F-body Front Rotors (users choice in brand/style)
98-02 F-body Calipers (must have the abutment bracket)
98-02 F-body Brake pads (users choice in brand)
Other parts that work:
63010220ERL x2 3an to 10mm(3/8) Banjo 20" Hose << Aftermarket SS line that works with the F-body and N-body upgrade depending on which your doing
989534ERL x2 Brake Adapter 3an to 10mm x 1.0 Female NOT Inverted Flare. << Adapt factory Lines to 3an Stainless steel lines. Double check your factory lines, if they've been replaced they may be a different thread and possibly inverted flare type.
C5 Corvette Calipers (have a different casting, reduces flex in the calipers)
*Note* If using C5 calipers, purchase brake pads for an F-body car, as the pads used are based on which abutment bracket will work, not the caliper. C5 abutment brackets will not bolt up to these knuckles.
Benefits to using a C5 caliper are that the caliper is pressure cast, instead of gravity cast. This helps increase the life and strength of the caliper. As mentioned above, the caliper also has a different, more rigid casting. On the C5 caliper, the ribs cover the entire top of the caliper, where as the F-body calipers, only half of the caliper is ribbed.
F-body caliper:
C5 caliper:
More information (thanks to Brendan)
theres just a couple of parts you said that can be changed. Â this is from a post where many people have done it this way. ive seen the post on some grand prix site about the f-body swap.
QUOTE1) Order these parts:
- 98-02 fbody caliper brackets (front) (P/N: 18026163) $61/each
- 97-04 Corvette calipers
---grey calipers: (P/N: 12530682)(P/N: 12530683)$100/each
---red (zo6) calipers: (P/N: 88895128)(P/N: 88895129) $96/each
- 98-02 fbody brake pads (front)
- 00-05 Impala rotors (front)
- 97-02 corvette anti-rattle clip
* all part numbers are GM numbers.
** the calipers are available at auto part stores for less, but are not GM original parts.
More Information: http://www.grandamgt.com/forum/showthread.php?t=62144
Installation:
You will need to remove your CV axles, knuckle assembly, calipers, rotors, and ball joints.
Install the new ball joints into your control arm.
The N-body spindles look like this:
Notice how there is an extra portion on the knuckle... N-bodys use the spindle/knuckle for steering, where as L-bodys use the struts. The extra part will have to be removed, as seen below.
Since we are using N-body knuckles, we are going to have to use N-body hubs. This is why you'll need dual bolt pattern wheels, as the N-bodys have 5x115 bolt patterns. You could have an adapter sleeve made to fit into the N-body knuckle, and use an L-body hub to retain your wheels, but this won't work on ABS cars since there isn't a spot to mount the ABS sensor on the N-body knuckles. To get that to work, you'd have to find a spot to mount the sensor, and mimic the mounting style used on the L-body knuckles so your ABS will still work. If you go this route, you won't have to mess with the axles.
Here is the bracket that the ABS sensor mounts to on the N-body. This goes between the hub and the knuckle.
Now we need to switch the Outer CV from the N-body axles onto the L-body axles. To remove the Outer CV, you have to remove the metal banding on the boot, pull the boot down, and spread the C-clip that keeps the Outer CV on the axle. Follow this procedure for both axles, and just swap them, making sure that you keep the race cage facing the same way upon reinstallation (so that you will have access to the C-clip if you have to swap axles down the road).
C-clip
Axle w/ removed Outer CV
When you put the axles back together, make sure to use wheel bearing grease for CV's, and not the tube grease that you put into ball joints and tie rods.
Install the axles back into your car.
Install the hub into the knuckles.
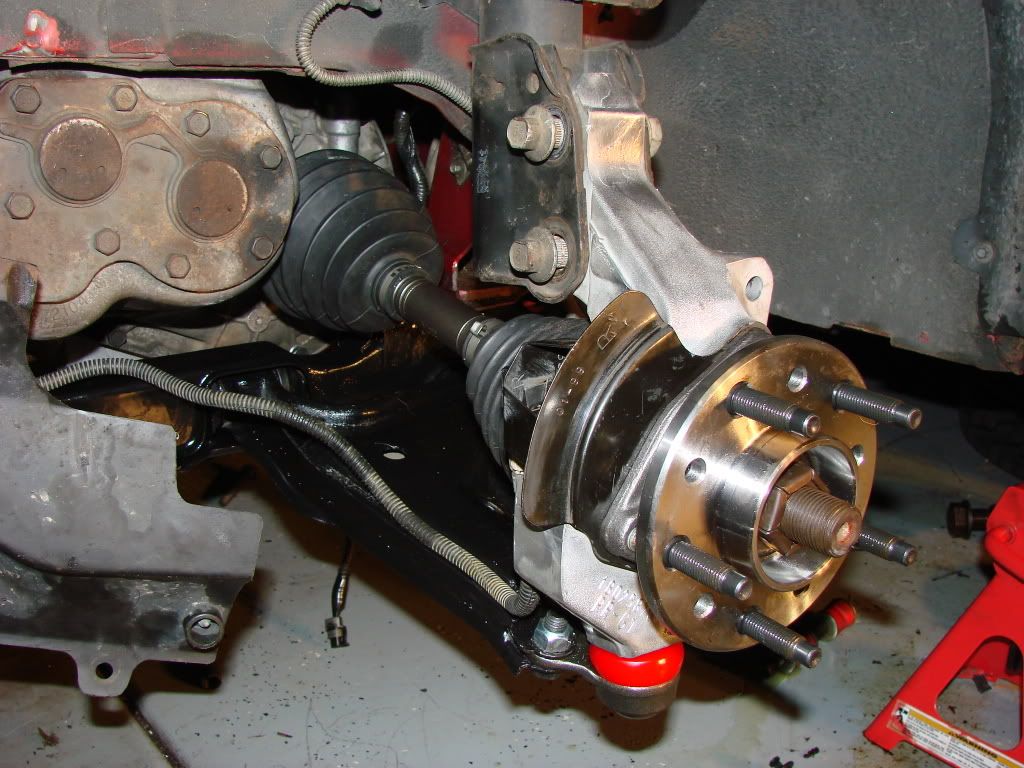
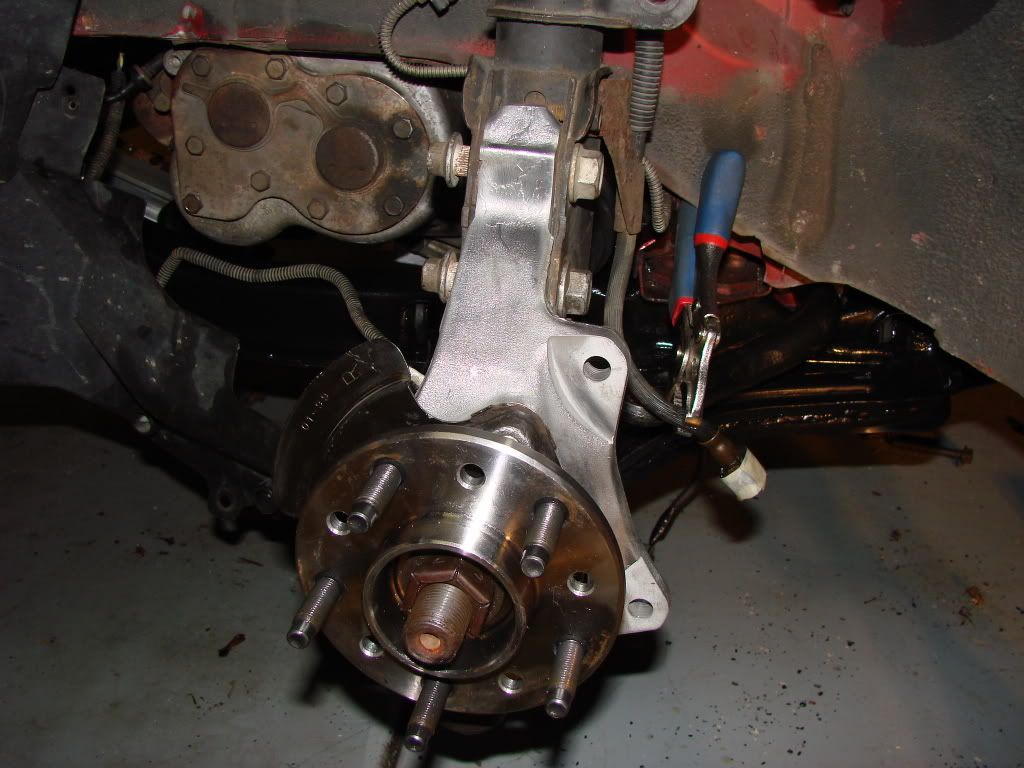
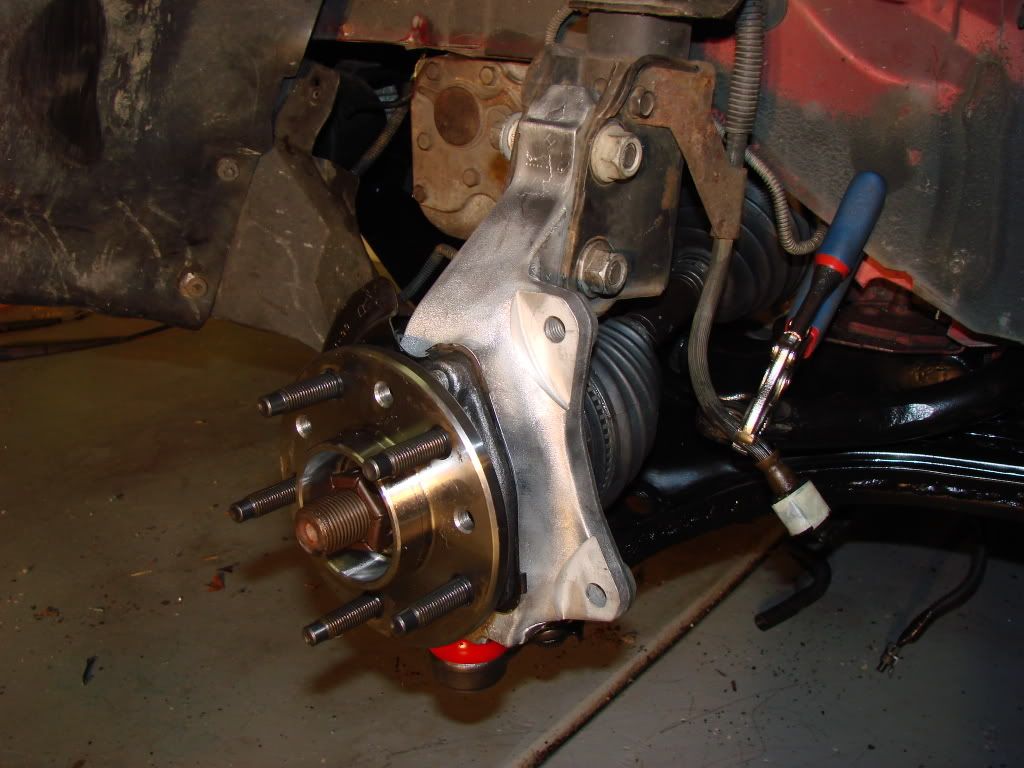
Install the spindle assembly (knuckle and hub bearing) into the car, putting the axle through the hub. Make sure to use the strut knuckle bolts from the N-body, as the holes in the knuckle are smaller than the L-body holes.
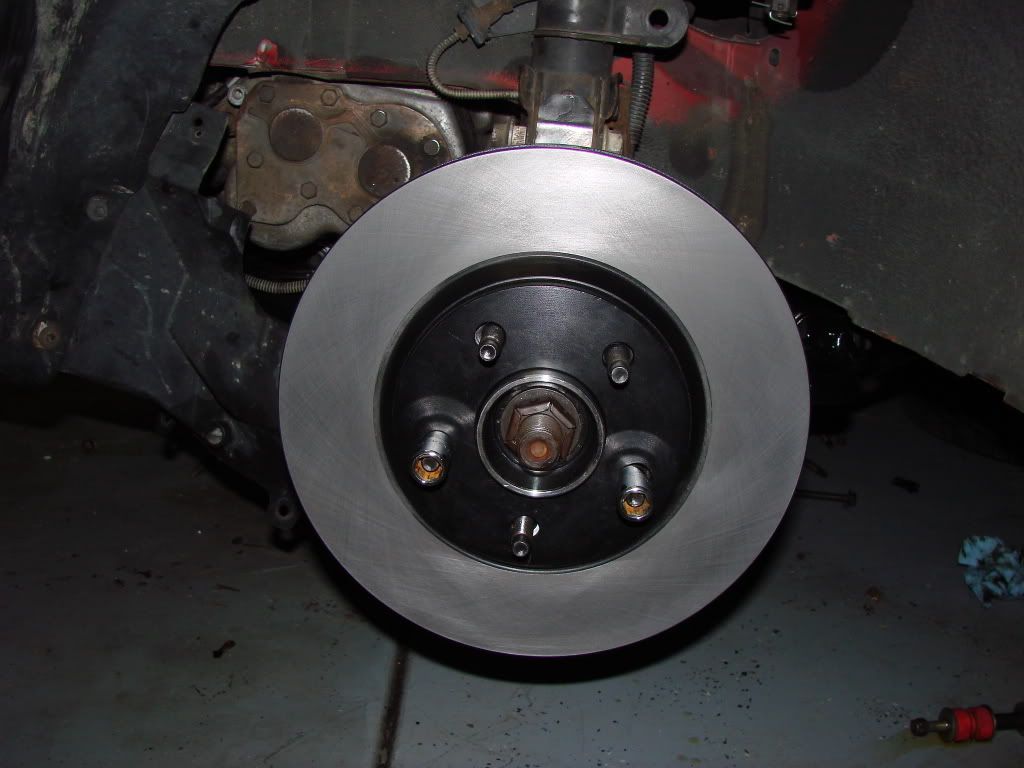
Put the F-body rotor on.
Install the abutment bracket.
Install the pads, then the calipers of your choice, making sure to have the bleeder screws pointing up.
Bleed the brakes, and enjoy your new-found stopping power! MAKE SURE TO CHECK CLEARANCES OF YOUR BRAKE LINE BEFORE GOING ON A TEST DRIVE! YOU DO NOT WANT THE LINES TO RUB ON YOUR TIRES OR ANY OTHER SUSPENSION/STEERING COMPONENT!
More information that may help you with the swap: http://www.j-body.org/forums/read.php?f ... 30&t=99830
Here are some more semi-finished pics (I still need to get brake lines and my pads aren't installed in these pics).