Dash removal thread? need help!

Dash removal thread? need help!
Ok so i found a newer style mint blue dash, where is the thread on the how to removal?
or anyone have a list of exactly what to do?
would like to go tomarrow morning need help asap, thanx!
or anyone have a list of exactly what to do?
would like to go tomarrow morning need help asap, thanx!
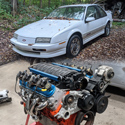
1 Of 1 Street Legal Centri S/c Beretta's In Existance
Re: Dash removal thread? need help!
I'm an expert at dash removal. And I will tell you its a pain in the ass, but straight forward.
I'm not sure if there is a thread on this board atm, there was on Bstuff. I plan to make one at some point.
Where are you located?
I'm not sure if there is a thread on this board atm, there was on Bstuff. I plan to make one at some point.
Where are you located?

My Motortopia
Bfest Committee 2012, 2013, 2014
Bfest AND Bust 2012 Winner: First ever clutch swap at Berettafest!
Bfest 2013 Watermelon Award: Boob shaped hood dents FTW
Re: Dash removal thread? need help!
southwest pa
1 Of 1 Street Legal Centri S/c Beretta's In Existance
-
woody90gtz
- Registered User
- Posts: 4703
- Joined: Thu Jul 11, 2002 8:45 pm
- Location: Walton, NY
- Contact:
Re: Dash removal thread? need help!
Just unhook everything and unscrew it. There are a lot of little screws, but it's not rocket science.
91 "SS" - WOT 3400/5spd - 13.29@101.6 - World's fastest N/A FWD Beretta
96 "T56" LS/6spd/8.8 RWD swap - 13.45@104.7 lol
GEARHEAD dezign youtube
96 "T56" LS/6spd/8.8 RWD swap - 13.45@104.7 lol
GEARHEAD dezign youtube

Re: Dash removal thread? need help!
from an old Bstuff thread
Tools:
Socket Wrench
Socket Extension
Socket Adapter
14mm Socket
10mm Socket
7mm Socket
5.5mm Socket
Pliers
Procedure:
1. Remove the air conditioning vents. The vents are easy to remove and should pop right out. If not, use a flathead screwdriver and carefully pop each vent out.
2. Remove the stereo. There are a few steps to this, and they are the following: First take off the stereo bezel by removing the lower two 5.5mm bolts. The bezel then will come right off. After the bezel is removed, take your 7mm socket and remove the 4 bolts holding the radio in. Now remove the radio. Be careful when removing the electrical connections. Also, be extra careful with the vacuum lines as to not break the tabs holding it on.
Remove the panel underneath the steering column. There should only be 3 7mm bolts, 2 7mm nuts, and 2 phillips head screws. The 2 7mm nuts/bolts will be against the firewall.
4. Remove the two phillips head screws holding the driver's side map holder in. Pull the map holder out.
5. Remove the headlight and windshield washer buttons. They should pop right out. Use a flathead screwdriver if needed. Be careful when removing the electrical connections.
6. Remove the dash cluster bezel by removing the upper 2 7mm bolts underneath the top lip of the dash hat.
7. Remove the dash cluster by taking out the 4 5.5mm bolts. You'll need your extension for this.
8. Open up glove box and remove the 4 7mm bolts holding it in. Remove the glove box.
9. Remove the upper bolt on the brace in the glove box area [inside the dash]
10. Drop steering column by removing the 2 14mm bolts holding column to dash.
11. Remove ALDL connector by removing the 2 7mm bolts.
12. Remove the 5.5mm bolt in the back of the dash cluster holder.
13. Remove the 2 5.5mm bolts holding the fuse box in. The first 5.5mm bolt can be removed before the dash is removed. It will be located on a brace. The other 5.5mm might have to be removed after the dash is pulled out some. I waited until after I pulled the dash out a few inches so that I could get to the bolt.
14. Remove the 10mm nut located near the hood release latch on the driver's side.
15. Remove the lower glove box panel by removing the 3 7mm bolts and 2 7mm nuts. The 2 7mm nuts will be located against the firewall, similar to the driver's side.
16. Remove the 10mm bolt on top of the glove box area bracket. There are 2, but you removed the other one earlier, unless you removed both before, skip this step.
17. Remove the 10mm nut located on the lower passenger side area. This was a little annoying to remove. I suggest using a pair of pliers to aid in the removal of the nut. You'll probably have to get on your back to remove the nut.
18. Remove speaker grills on the dashboard. They should pop right off. Use a flathead screwdriver to make things easier. After the speaker grills are removed, remove the 7mm bolts from each of them. Also remove the speakers themselves.
19. Remove the defrost vent of the dashboard and remove the 2 7mm bolts that are underneath.
20. Make sure the hoses are removed from the dashboard. These are not the vacuum hoses. They are the defrost hoses.
21. Pull the dash out carefully, once the dash is moved out a couple of inches go ahead and remove the last 5.5mm fuse box bolt [unless you already have]. Once this is done, you'll need to push up on the dash and then pull out. Do NOT pull hard on the dash. There are a lot of wires that run through the rear of the dashboard itself and will need to be removed from the dashboard before pulling off the dashboard. To clear the wires from the dashboard you'll need to remove all the bolts behind the dashboard that hold the air ducts on. Do NOT cut the wires. Below are a few of the bolts that hold the wires unto the dash. Make sure all the bolts behind the dash are removed and carefully remove the wires from the dashboard.
22. Now pull the dash out. The air duct structure should not be coming off with the dash, as the wires will still be wrapped around some areas of the air duct structure. Remove the dashboard.
23. Once the dashboard is removed, carefully remove the air duct structure from the wires. Remember do not cut the wires!

1990 GTZ Quad 4 HO
Re: Dash removal thread? need help!
Hi, I was trying to remove the dash cluster bezel (88 year) after unscrewing 2 bolts. When trying to pull it out, I noticed that the bezel has some plastic lips behind the steering column assembly.What else do I have to remove? Any idea? Thanks in advance.
88 Beretta V6 2.8 M/T
Weird car in Peru, weird member in Bnet
Weird car in Peru, weird member in Bnet