My 96 Build
-
3X00-Modified

- Administrator
- Posts: 10920
- Joined: Thu Jul 05, 2007 9:18 am
- Location: Brooklyn CT
Re: My 96 Build
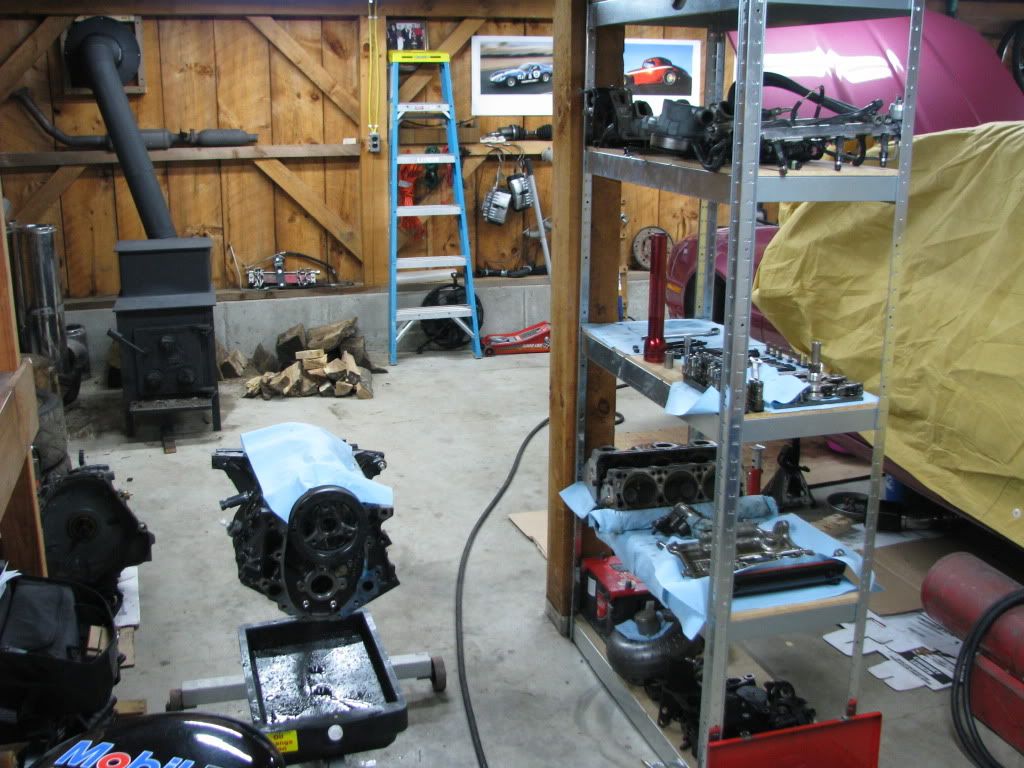
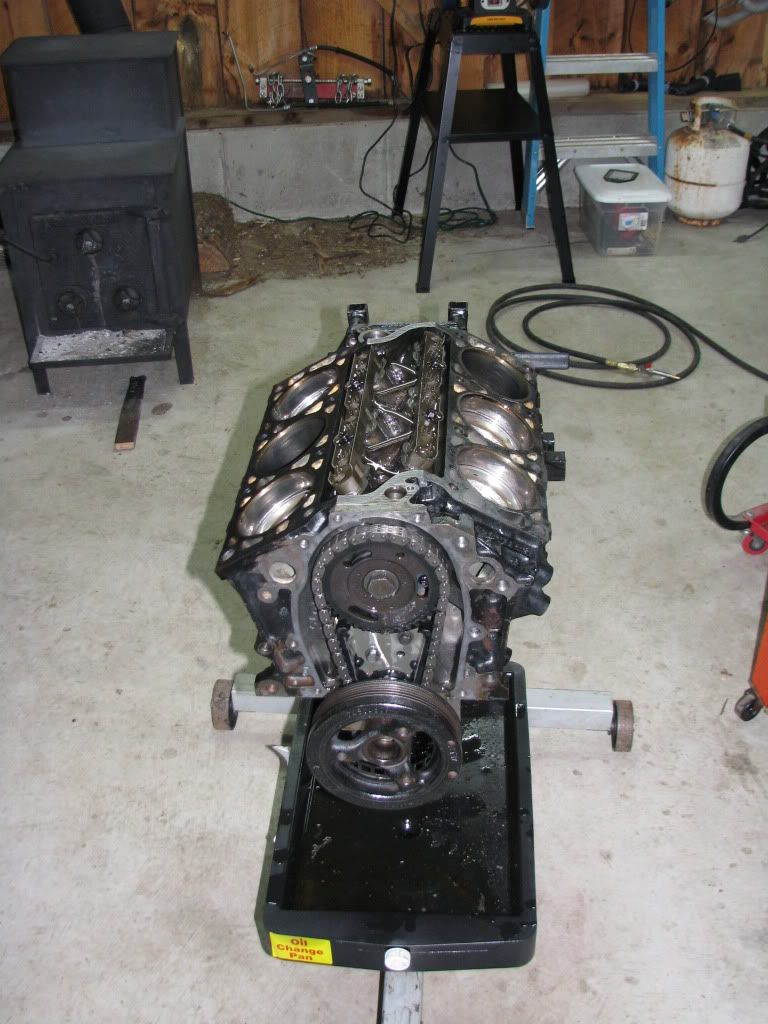
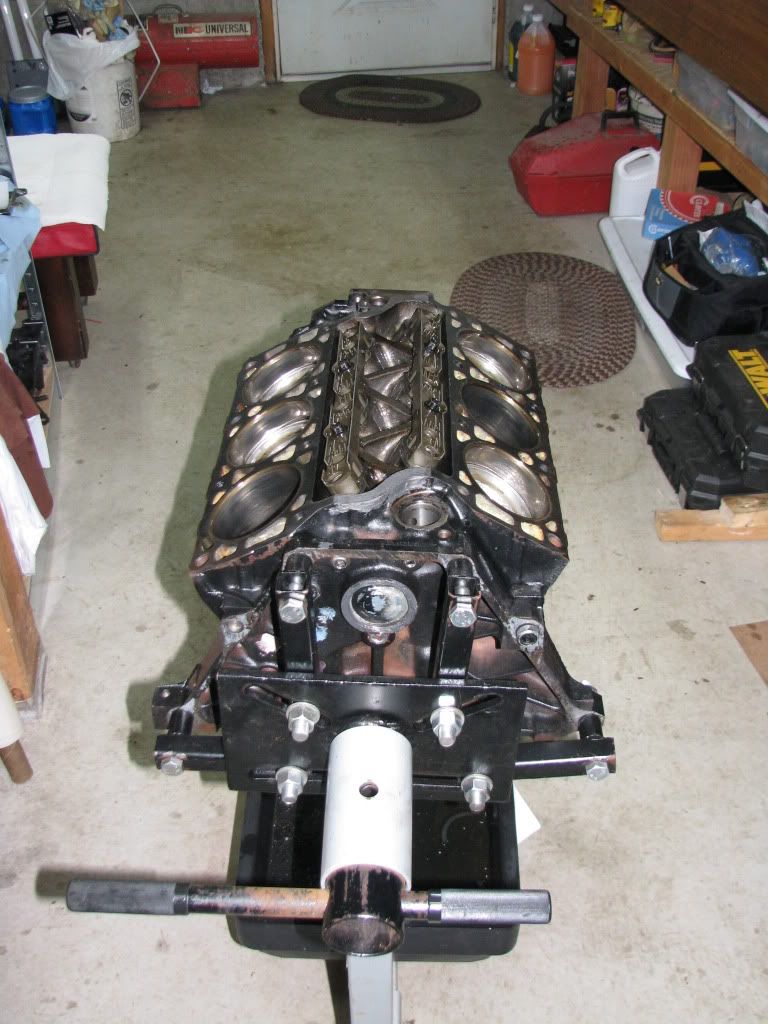
Made some progress yesterday.
Pics
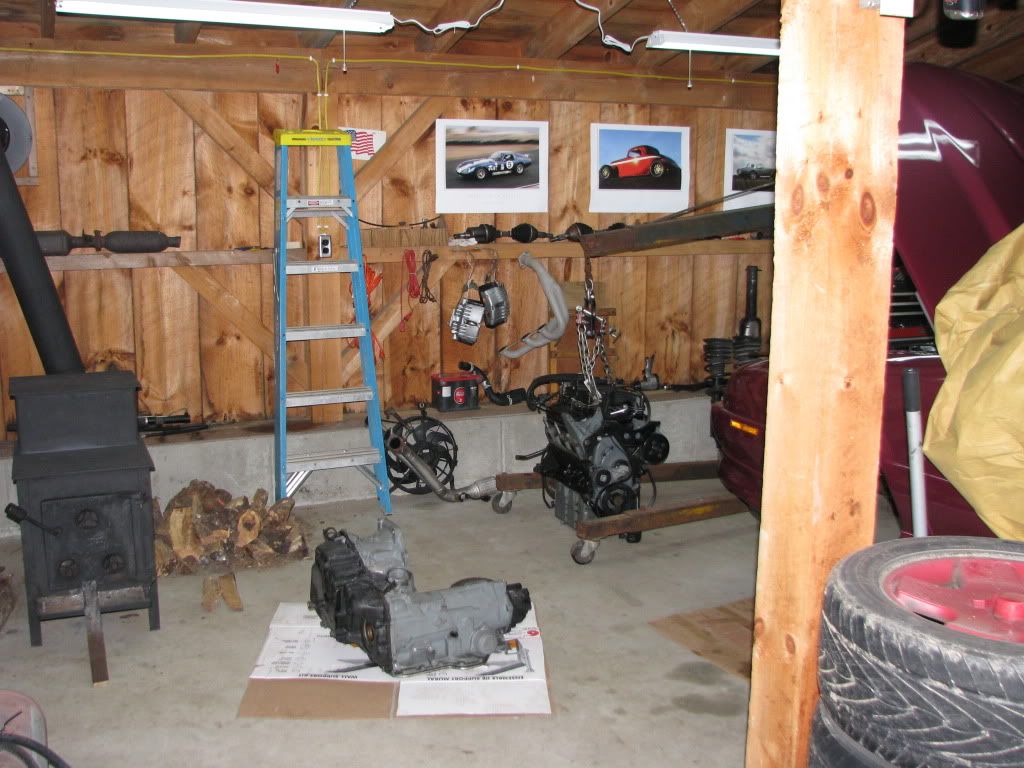
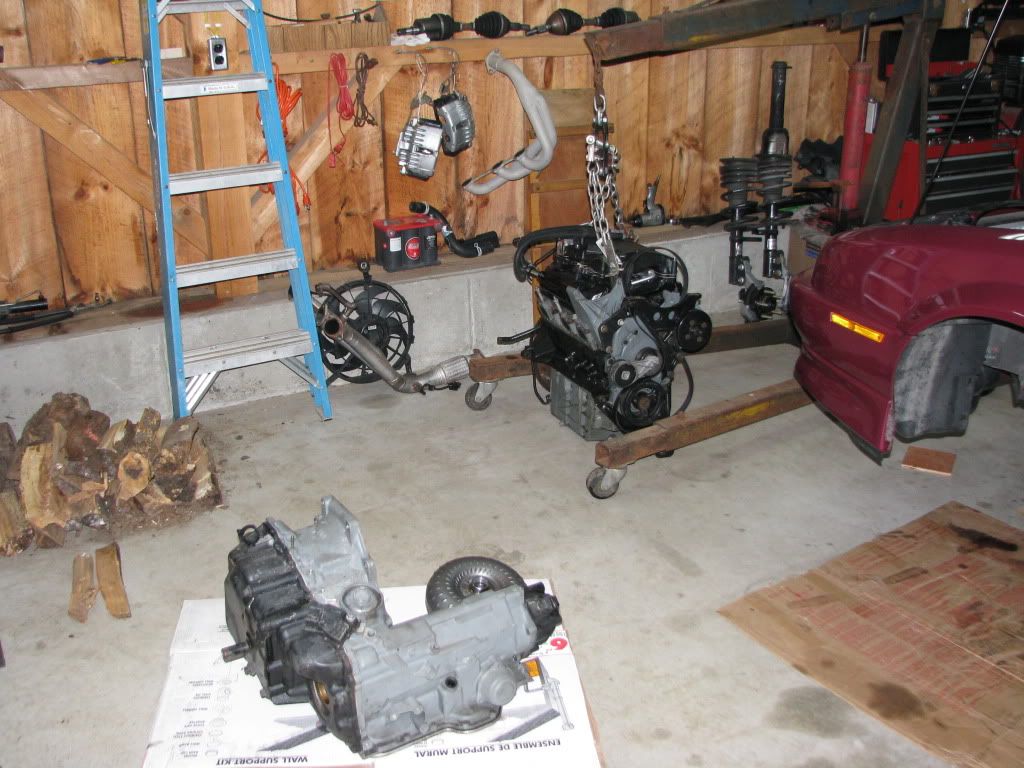

Took longer than I wanted to get the drive line out but I was also screwing around with my stove and stuff.
Time to get my engine stand to the house so I can start working on the motor now.
Pics
Took longer than I wanted to get the drive line out but I was also screwing around with my stove and stuff.
Time to get my engine stand to the house so I can start working on the motor now.
-
3X00-Modified
- Administrator
- Posts: 10920
- Joined: Thu Jul 05, 2007 9:18 am
- Location: Brooklyn CT
Re: My 96 Build
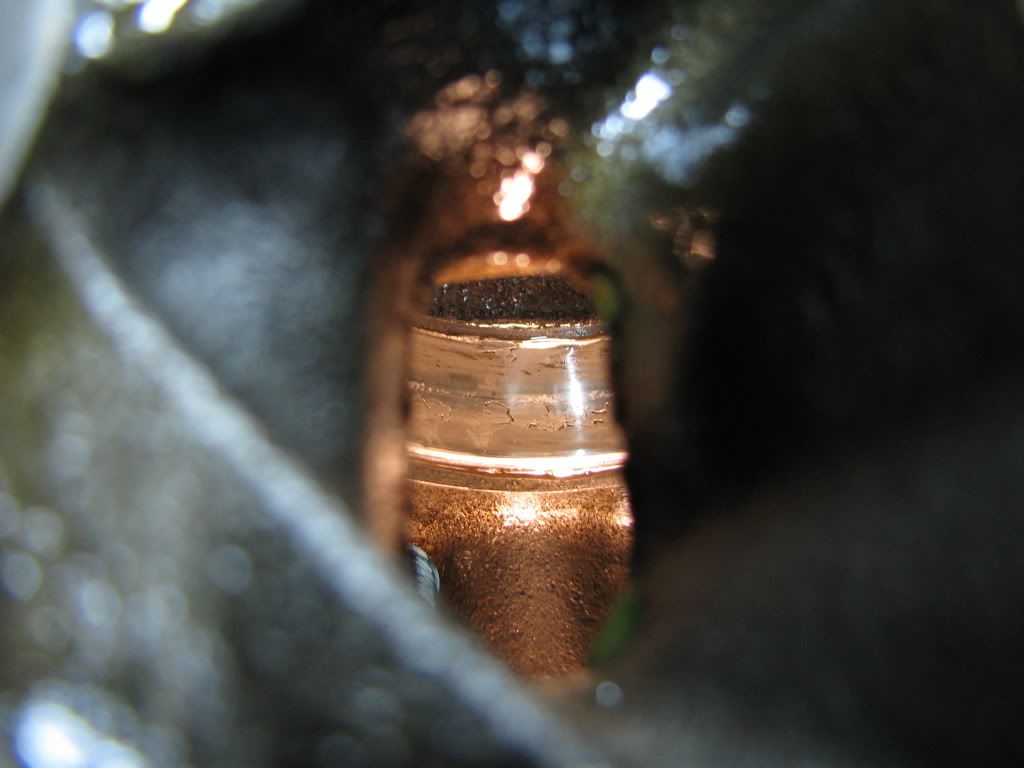
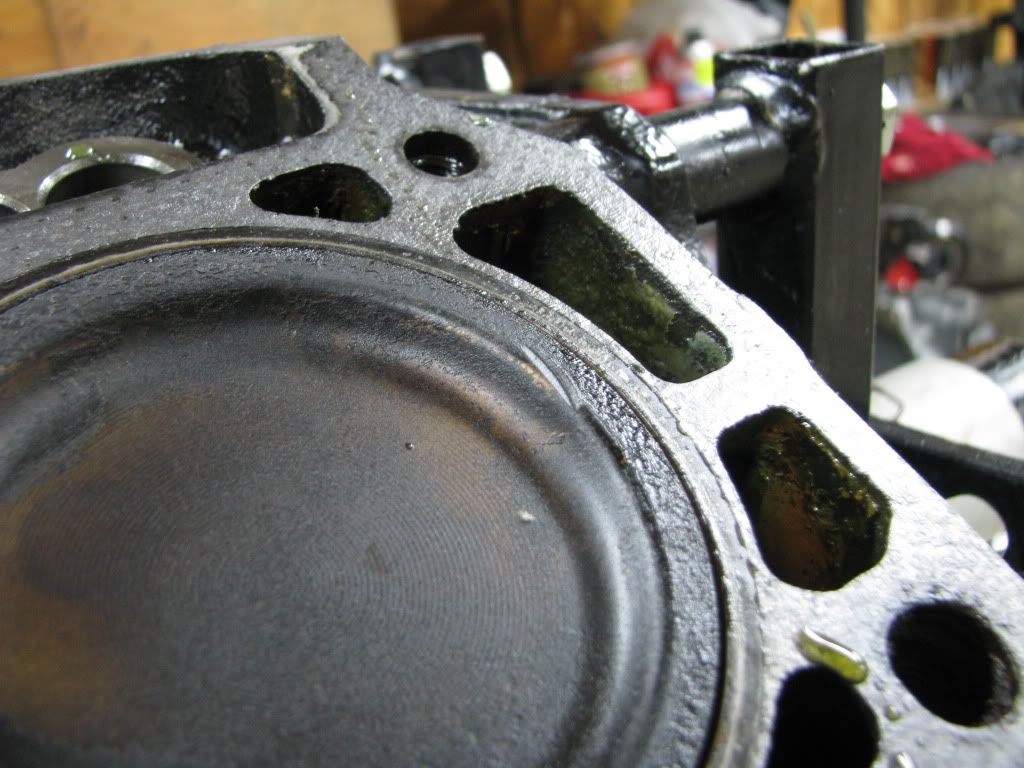
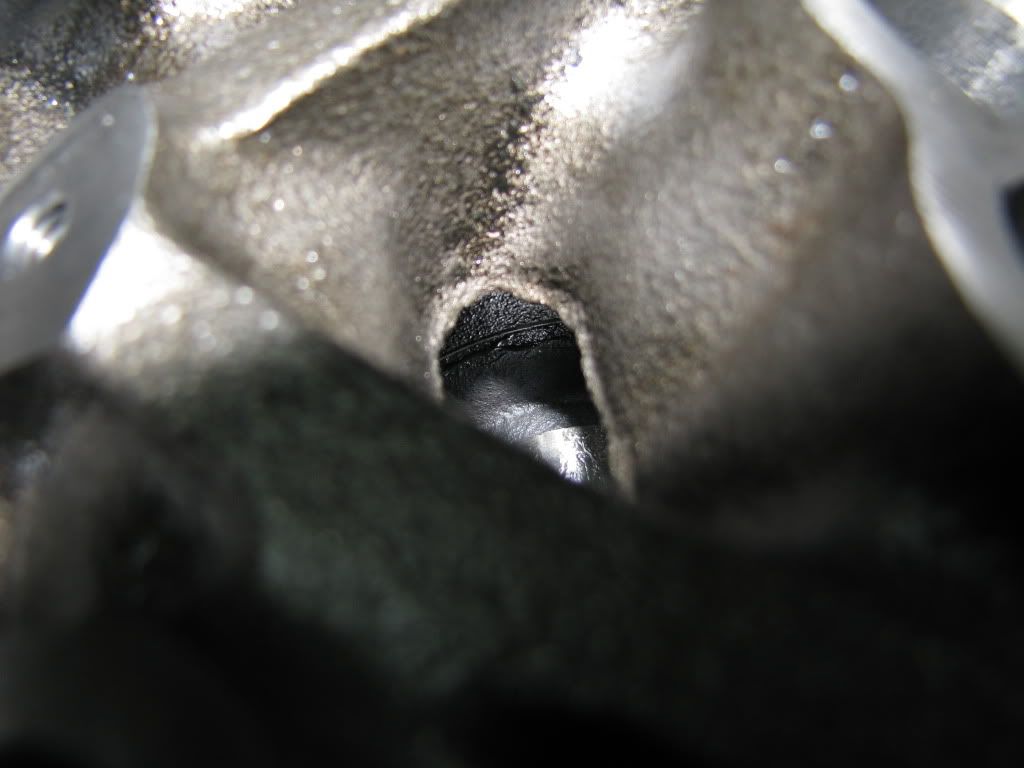
So, Dave... Did you replace your pistons when you found this?

Effin stretched timing chain must be the cause of this since the marks are nice and coated with carbon so it wasn't a recent hit. Could have easily been one from 2008 when I ran my 13.996 with that stretched bioch and was hitting 6750 rpm over and over again... LOL
Valves also have no marking on them right now, they have a nice tan color to them.
-
3X00-Modified
- Administrator
- Posts: 10920
- Joined: Thu Jul 05, 2007 9:18 am
- Location: Brooklyn CT
Re: My 96 Build
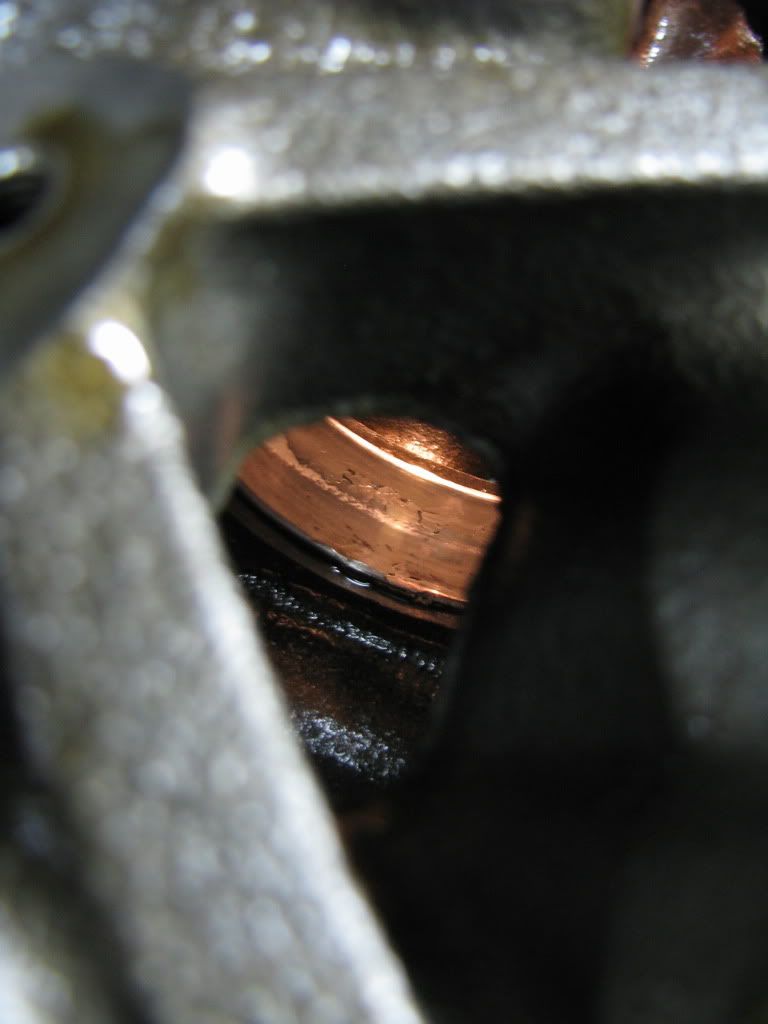
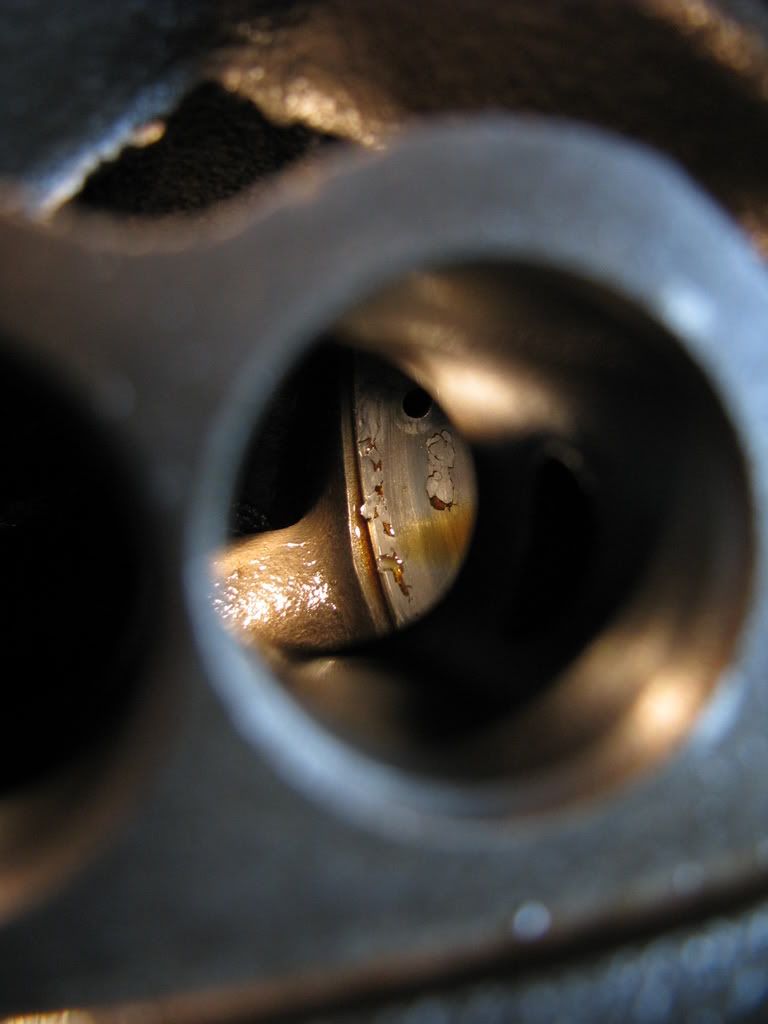
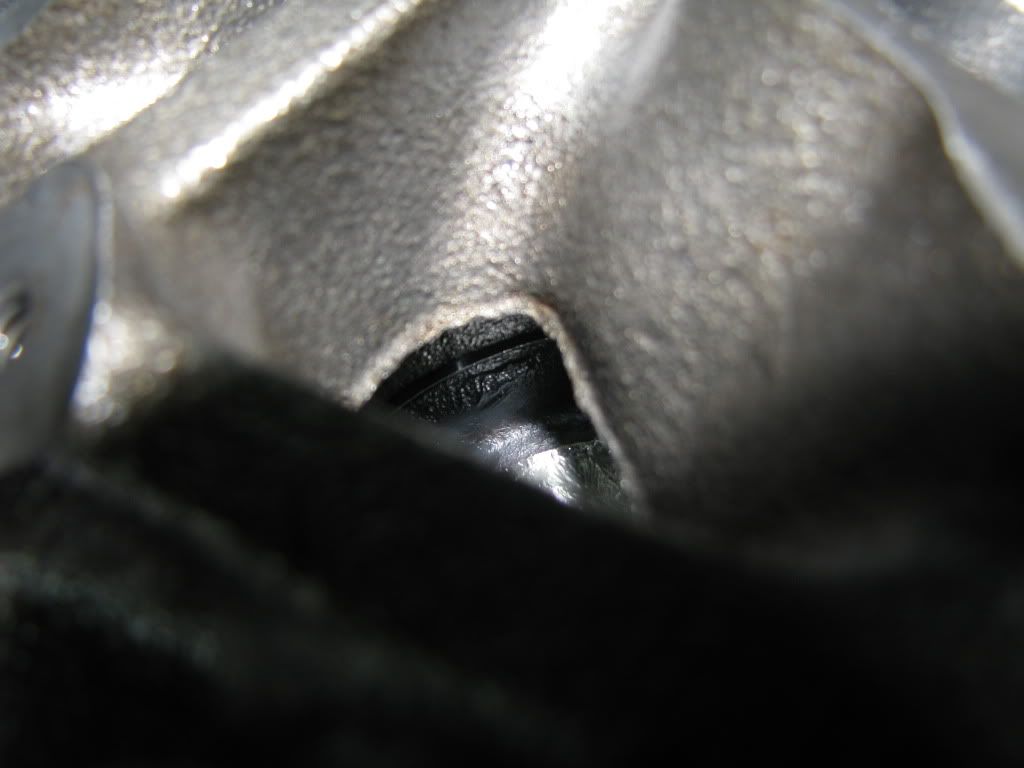
Ok cool, I was hoping you would say that. Did you ever notice an issue with the valves after that happened? It didn't look like they were bent any to me, but I didn't get them out of the head yet.
And yes the cam duration is 240@.50 as noted though I don't think this is a regular occurrence, I think it was a one time thing when my timing chain went to hell, because it was BADLY stretched.
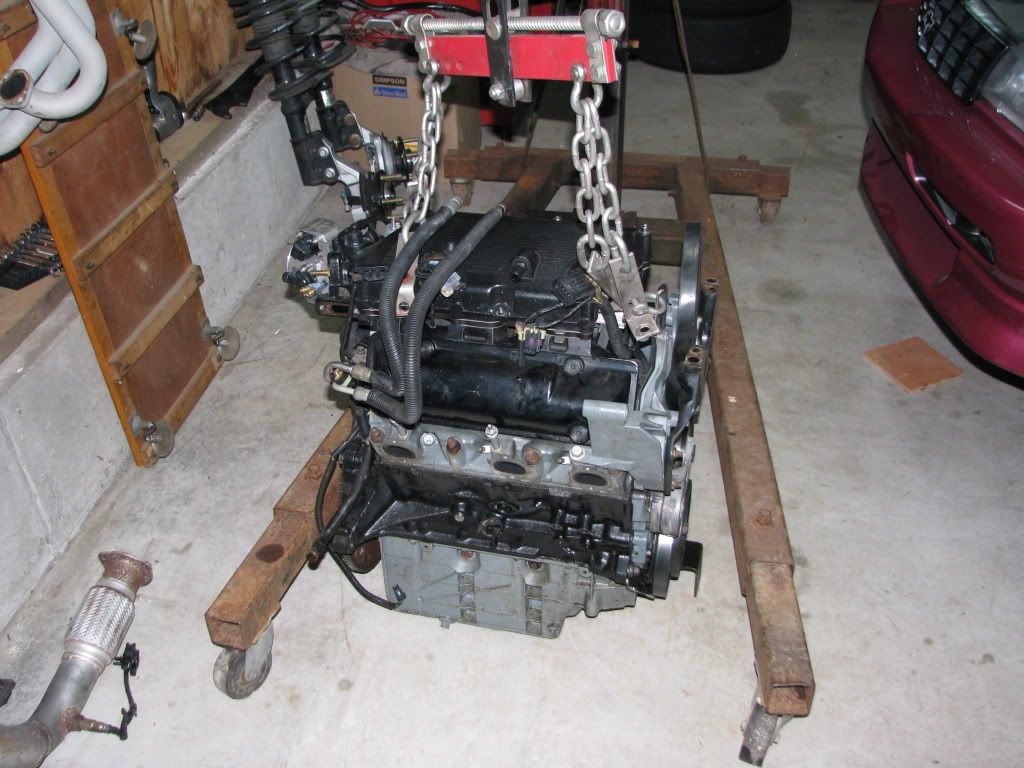
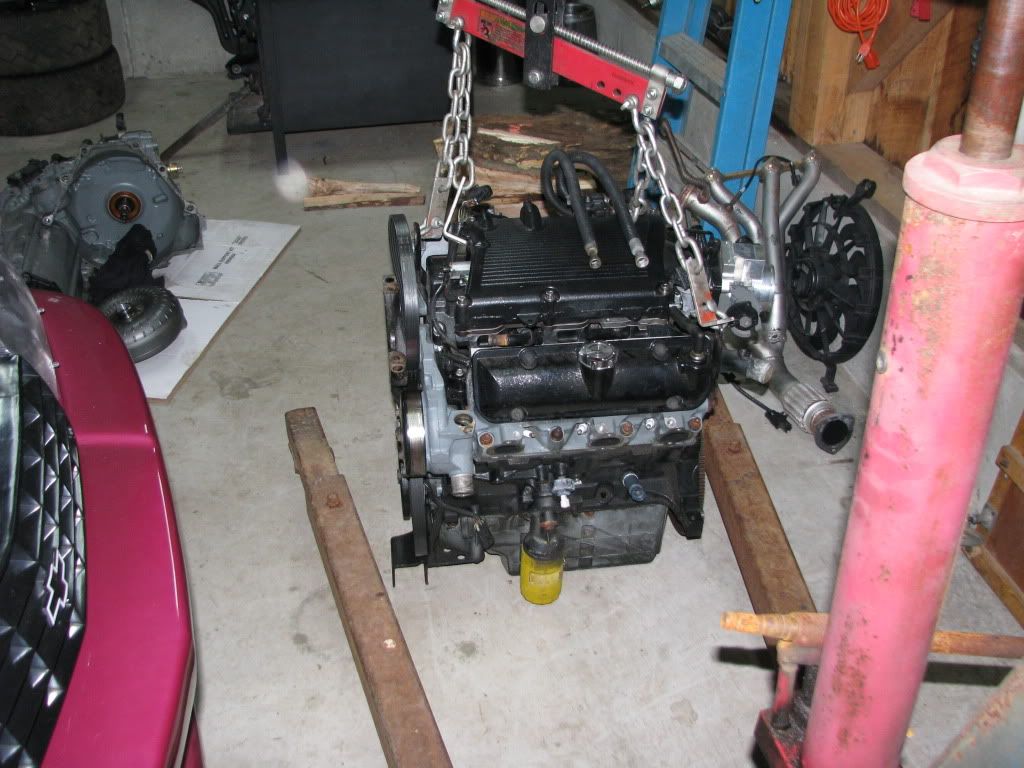
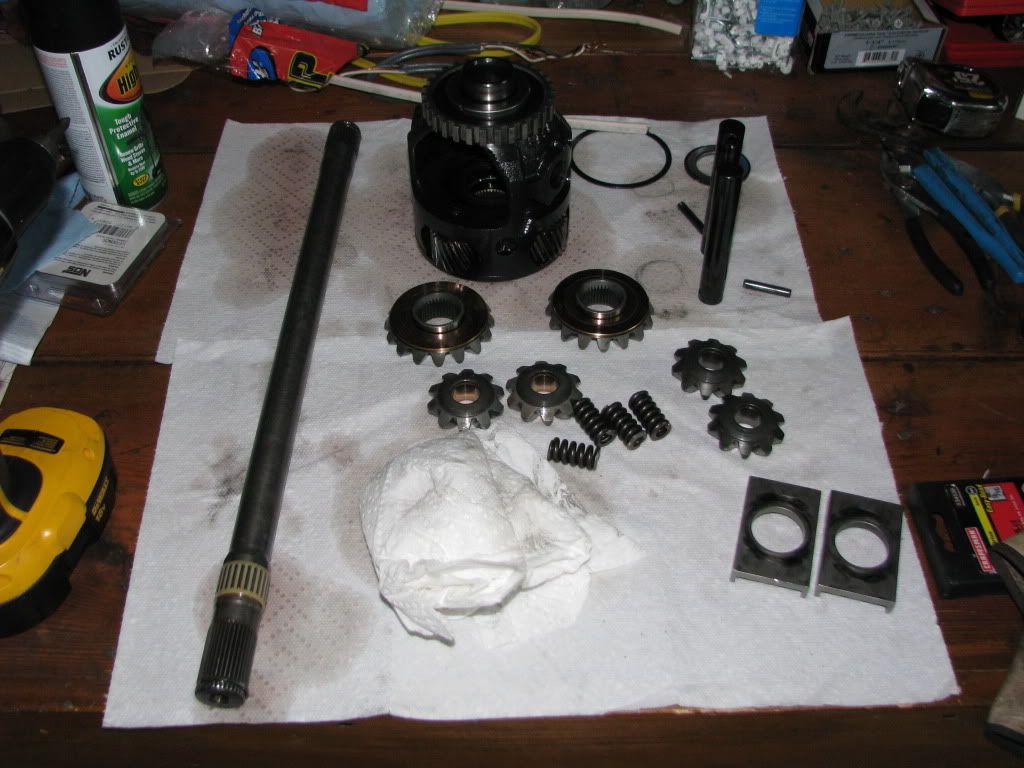
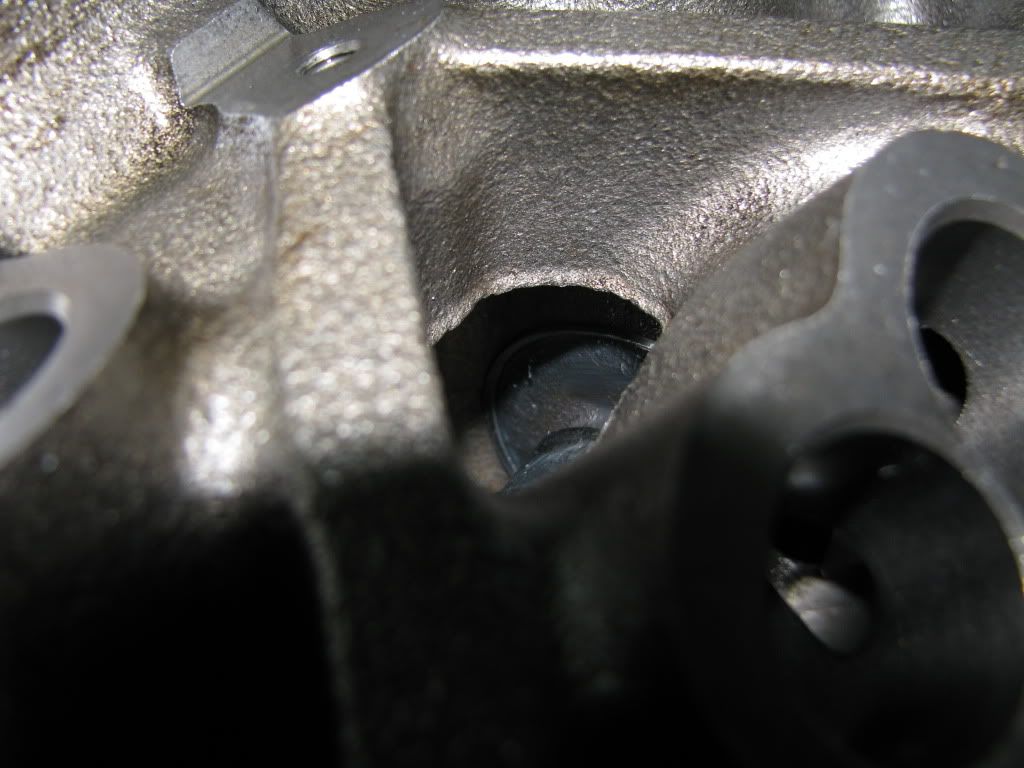
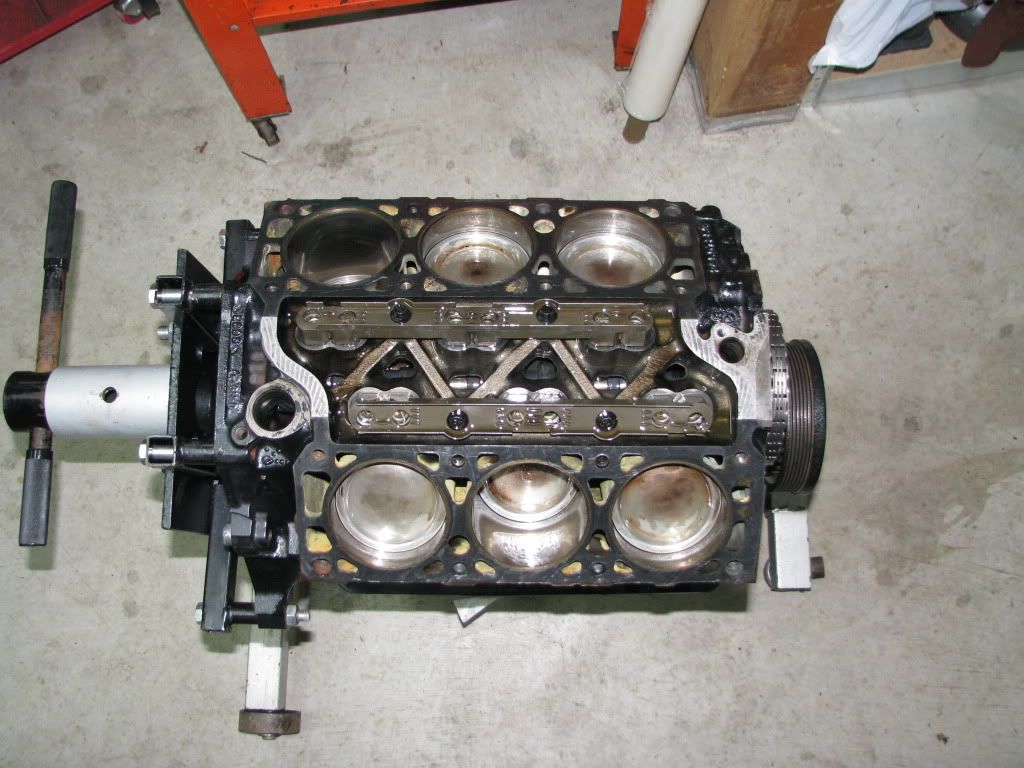
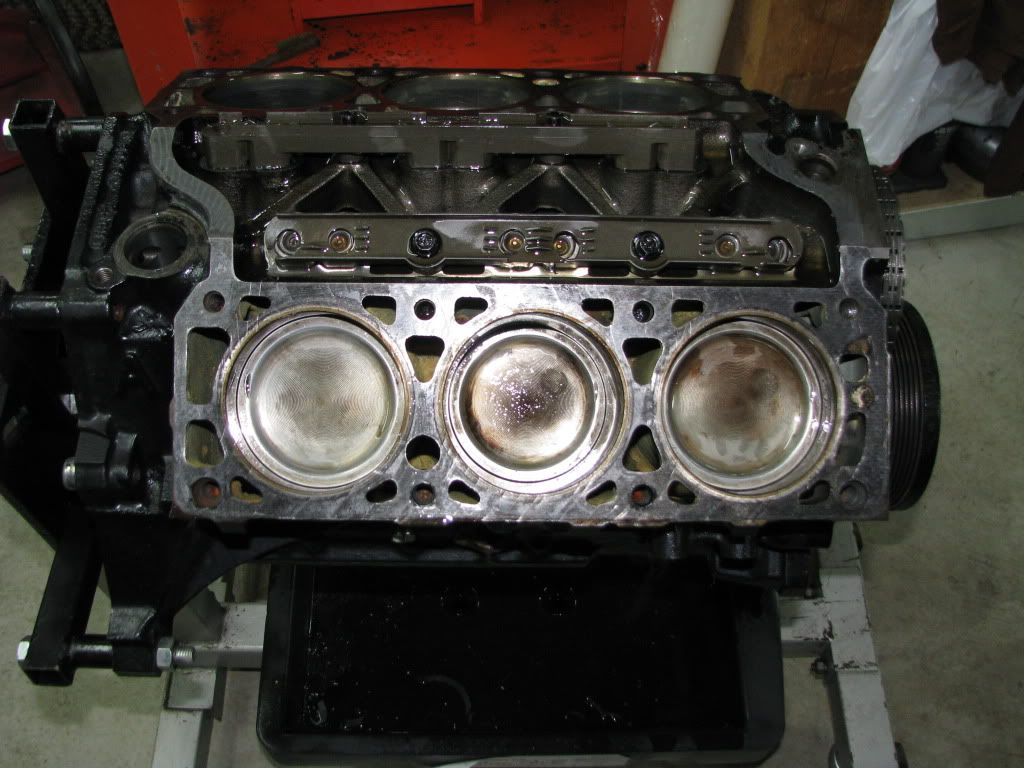
More Pics
You cant complain about these bearings.
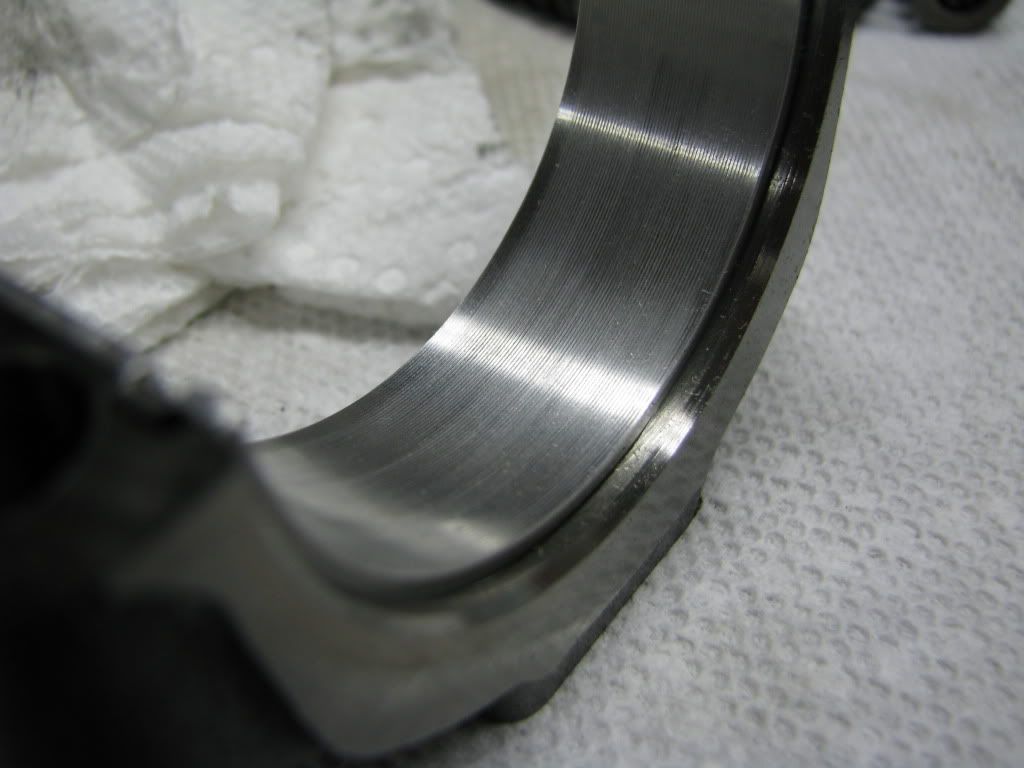
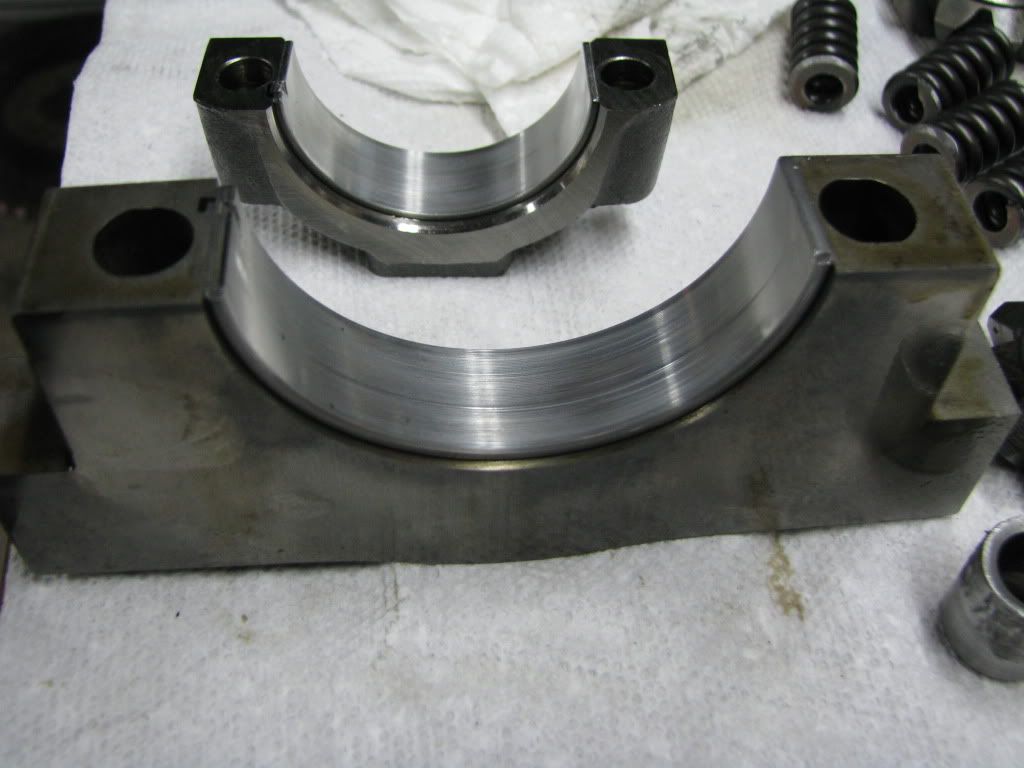
But these on the other hand... YUCK! second time this happened too... Time for SBC bearings.
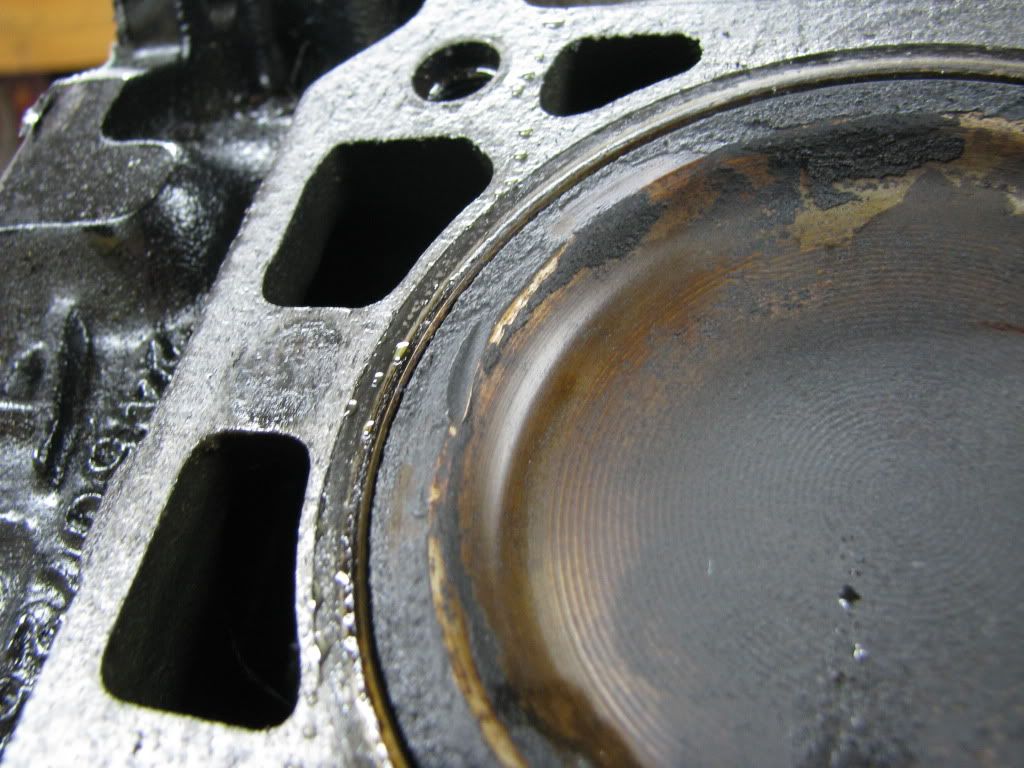
Total destruction
Better pics of the pistons
And yes the cam duration is 240@.50 as noted though I don't think this is a regular occurrence, I think it was a one time thing when my timing chain went to hell, because it was BADLY stretched.
More Pics
You cant complain about these bearings.
But these on the other hand... YUCK! second time this happened too... Time for SBC bearings.
Total destruction
Better pics of the pistons
-
3X00-Modified
- Administrator
- Posts: 10920
- Joined: Thu Jul 05, 2007 9:18 am
- Location: Brooklyn CT
Re: My 96 Build
I'm half tempted to replace all the bearings with Clevite's just to be sure they will last. Granted my lower end looks beautiful, but Better safe that sorry?
These are the part numbers I have... PLEASE chime in if I'm way off here.
Cam bearings
SH1349S Material: AL-3
Rod Bearings
CB1238P Material: TM-77
or
CB1238A Material: AL-5
Main Bearings
MS2037P Material: TM-77
or
MS2037A Material: AL-5 (Cant seem to find standard size though)
Which do you guys recommend? the Aluminum ones? or the TriMetal for the rod and crank? I'm already definitely planning on going with the AL-3 cam ones since the babbitt Sealed power ones I've used have BOTH now shown signs of being over stressed.
-
3X00-Modified
- Administrator
- Posts: 10920
- Joined: Thu Jul 05, 2007 9:18 am
- Location: Brooklyn CT
Re: My 96 Build
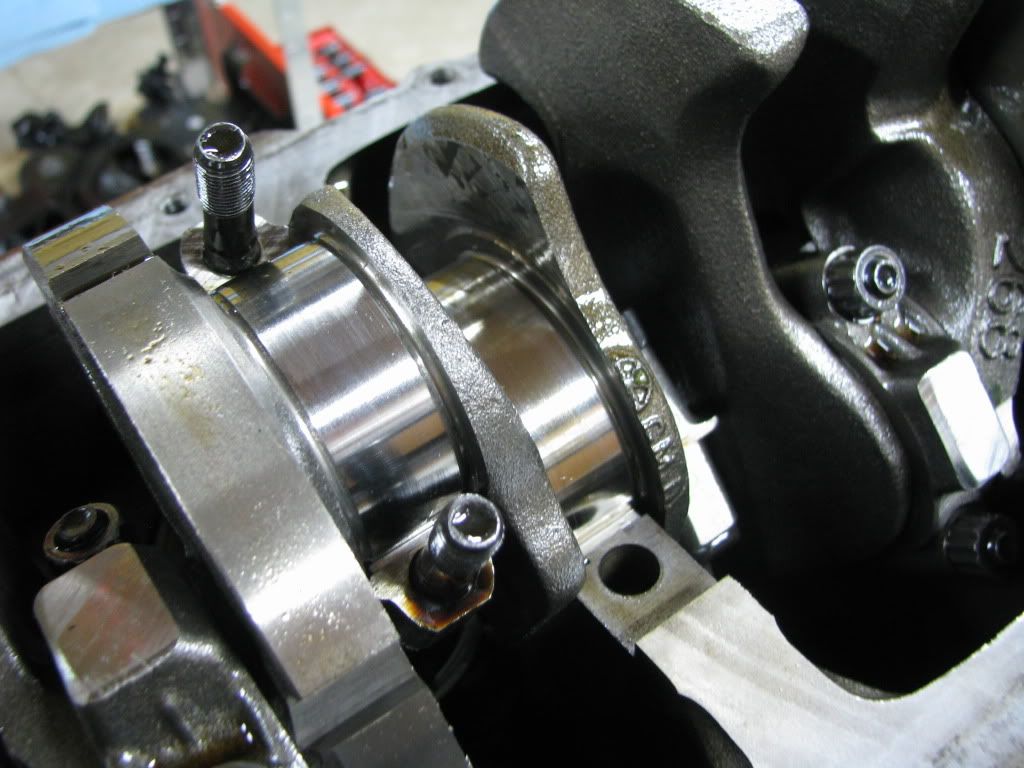
Ok I just noticed, this is the SECOND set of cam bearings that I had do this to me... I used stock ones on the Milzy cam and they just got shiny and showed some copper after a while, but the same Sealed power set that I put in my 3400 that went in my first car had the same pitting and stuff... and that was a STOCK setup...
Pic from when I took that apart...
I guess I'm staying FAR away from Sealed Power Cam Bearings and Cloyes timing sets as far as aftermarket stuff goes... They are all crap even in a stock application. Their rod bearings held up fine though. Mains had to be replaced after 60k...
Pic from when I took that apart...
I guess I'm staying FAR away from Sealed Power Cam Bearings and Cloyes timing sets as far as aftermarket stuff goes... They are all crap even in a stock application. Their rod bearings held up fine though. Mains had to be replaced after 60k...
-
3X00-Modified
- Administrator
- Posts: 10920
- Joined: Thu Jul 05, 2007 9:18 am
- Location: Brooklyn CT
Re: My 96 Build
I want to clarify that's EXACTLY what my stock 3400 cam bearings looked like after 15k of abuse with my Milzy cam. There was NO pitting like all these sealed power ones have done to me.
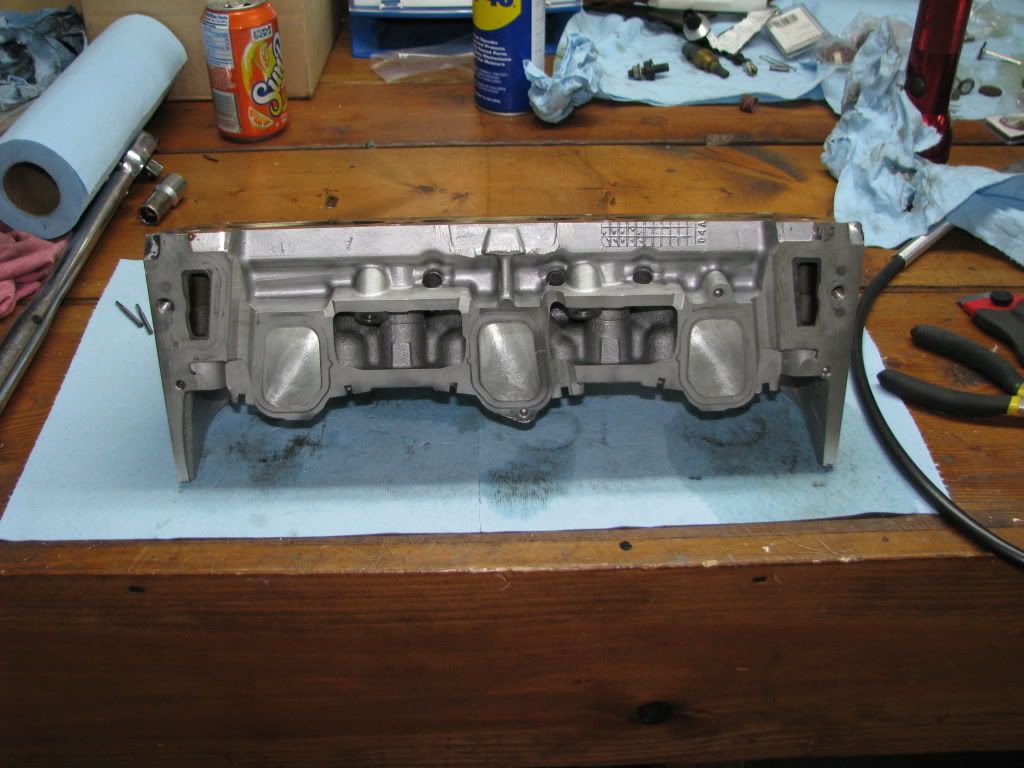
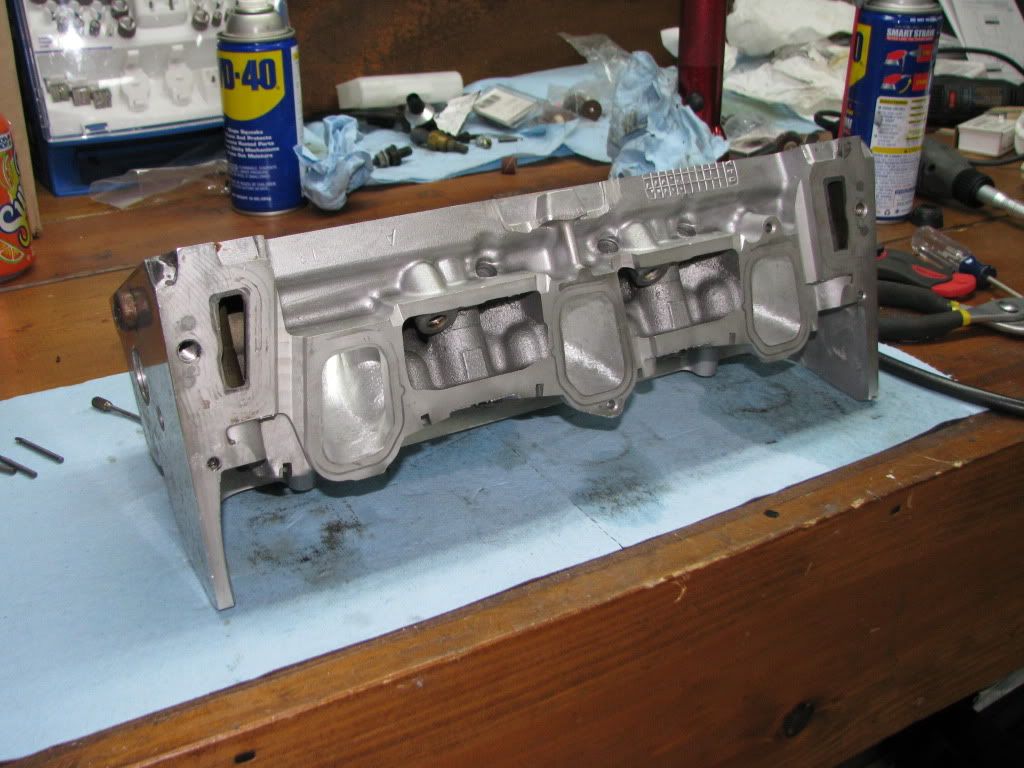
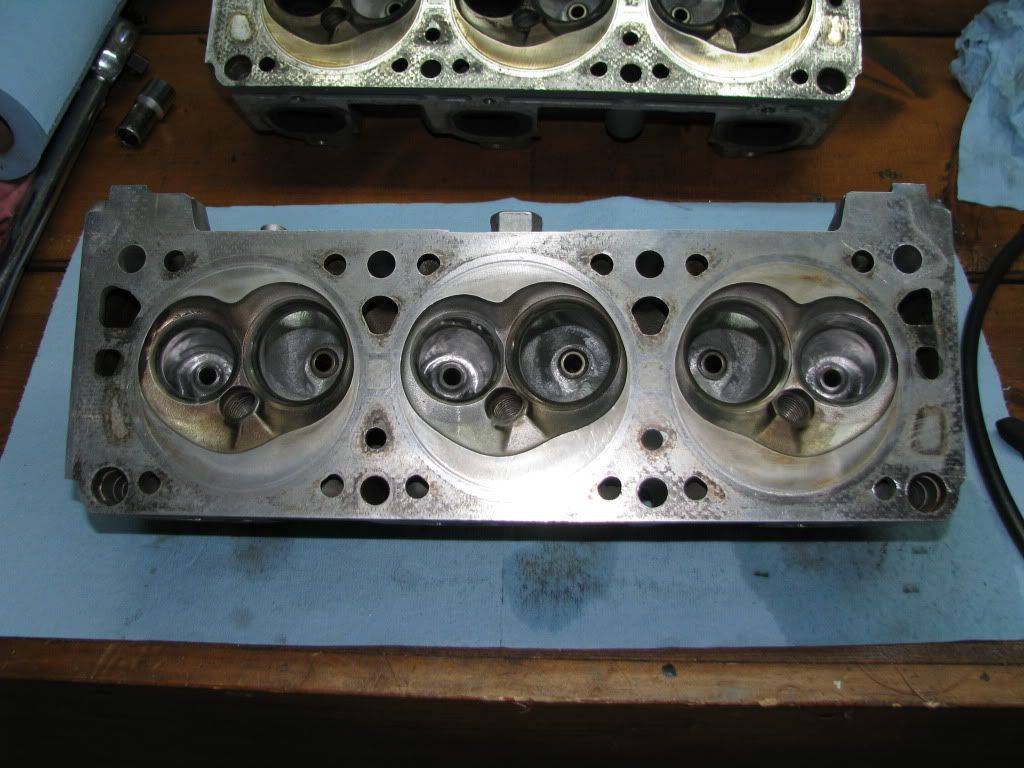
Little update, here is my porting progress.
What I started with and did two years ago to gasket match...
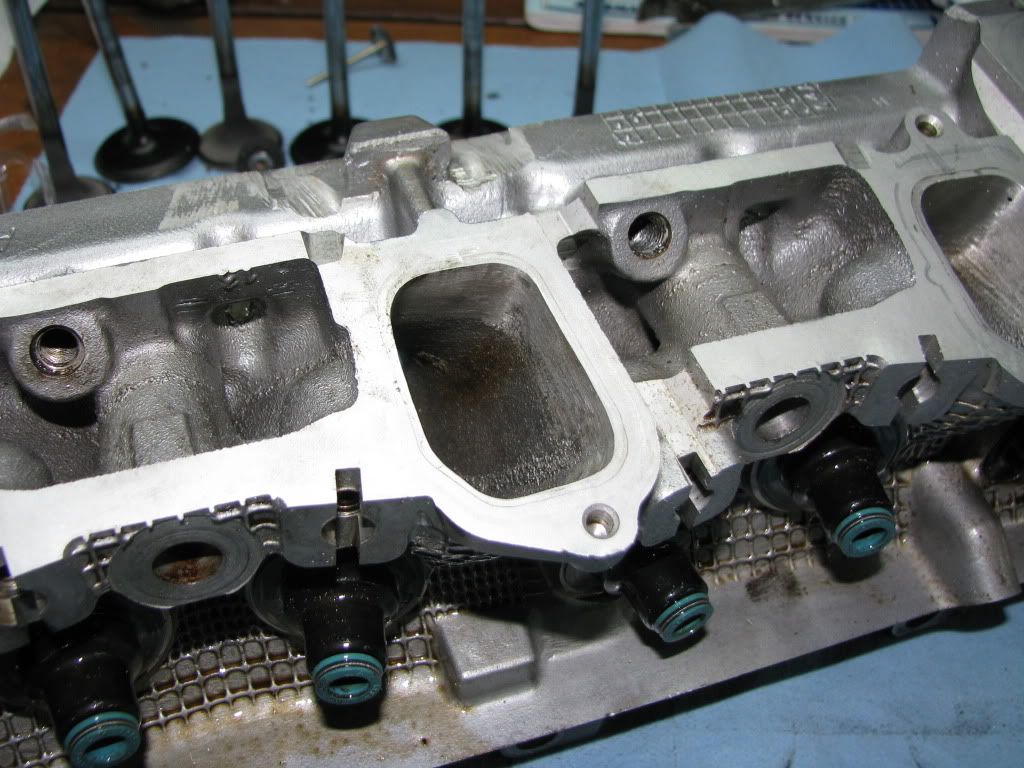
This is what I have now, thanks to the insight of Dave and Ben.
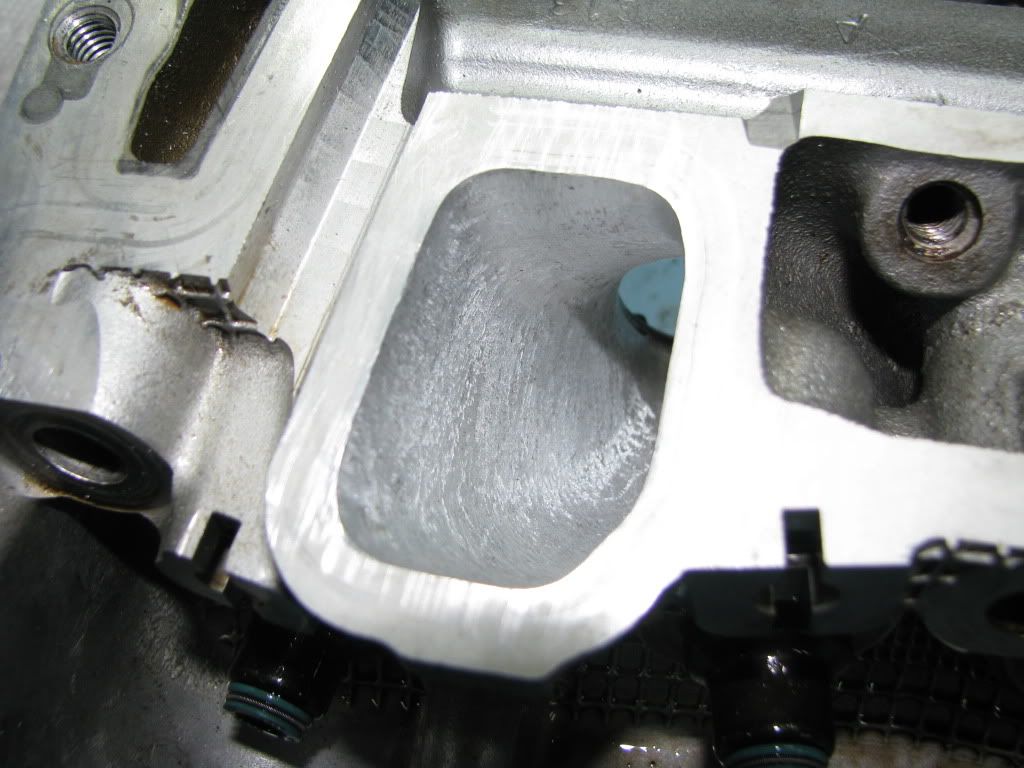
Still gotta work it a bit more but for the most part this port is about done.
Little update, here is my porting progress.
What I started with and did two years ago to gasket match...
This is what I have now, thanks to the insight of Dave and Ben.
Still gotta work it a bit more but for the most part this port is about done.
-
3X00-Modified
- Administrator
- Posts: 10920
- Joined: Thu Jul 05, 2007 9:18 am
- Location: Brooklyn CT
Re: My 96 Build
A few updates.
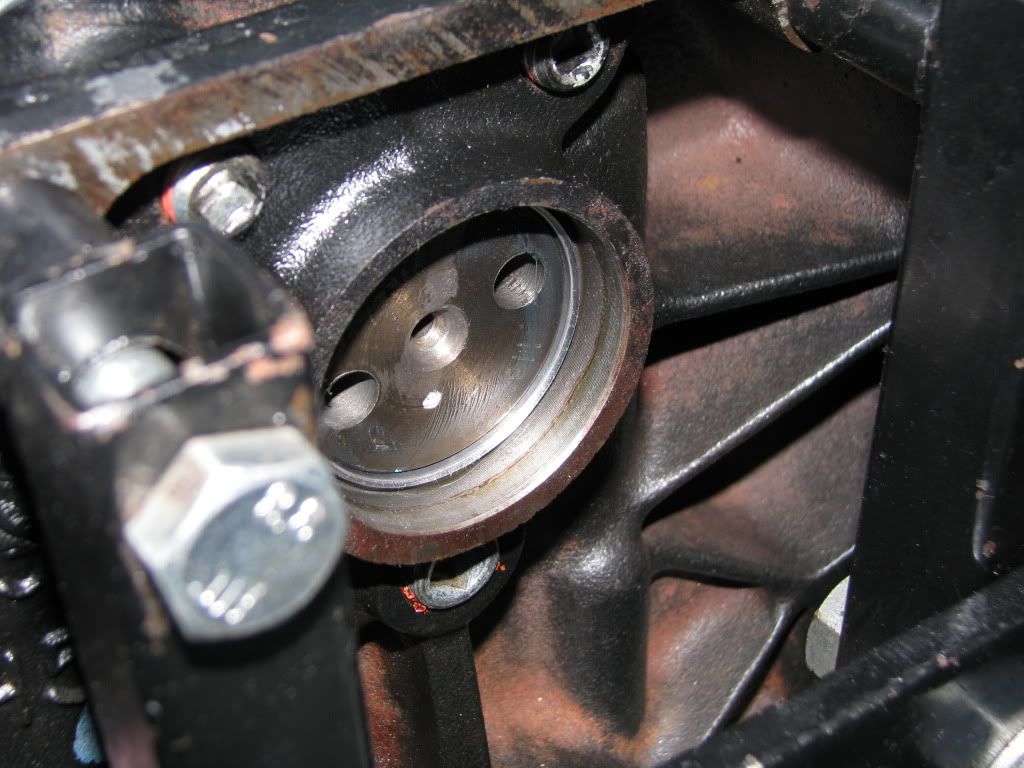
Cam bearings in... Hard to see but gives you a general idea that the whole journal is touched by the new bearings
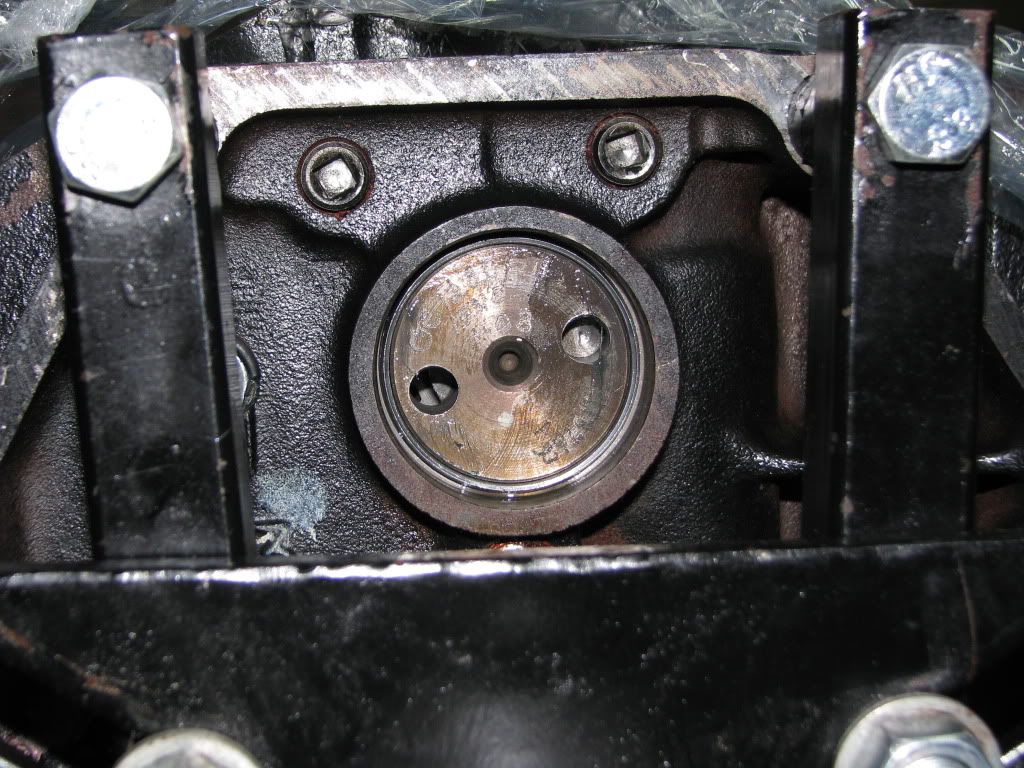
And some pics of the short block back together.

Cam bearings in... Hard to see but gives you a general idea that the whole journal is touched by the new bearings
And some pics of the short block back together.
-
3X00-Modified
- Administrator
- Posts: 10920
- Joined: Thu Jul 05, 2007 9:18 am
- Location: Brooklyn CT
Re: My 96 Build
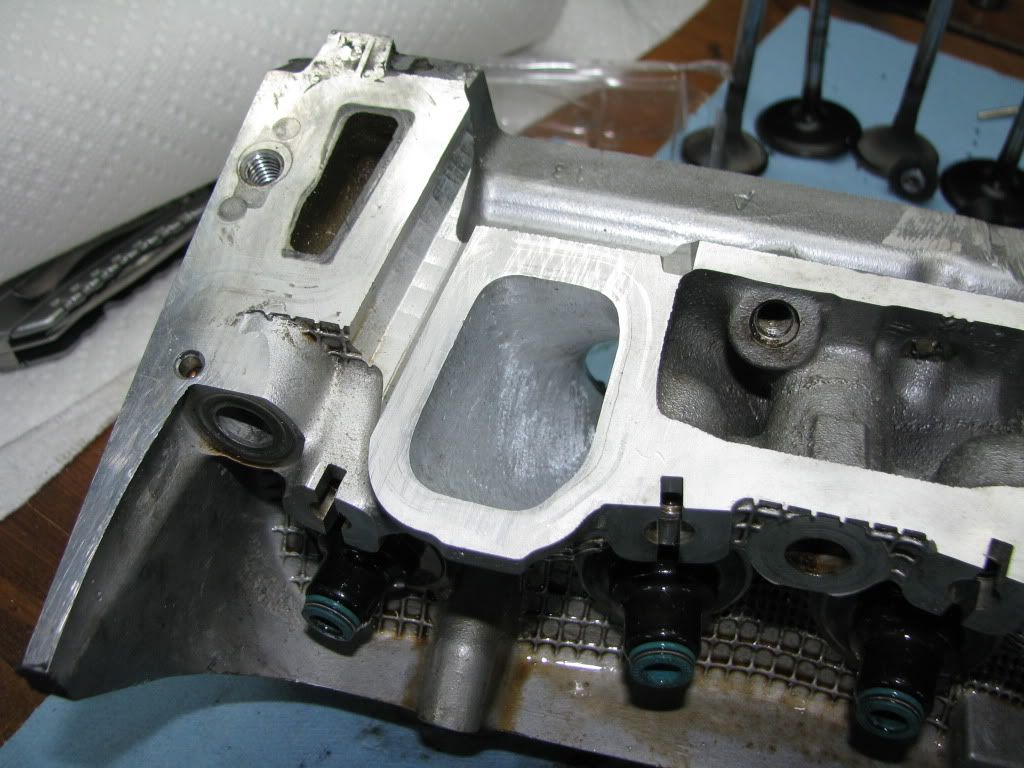
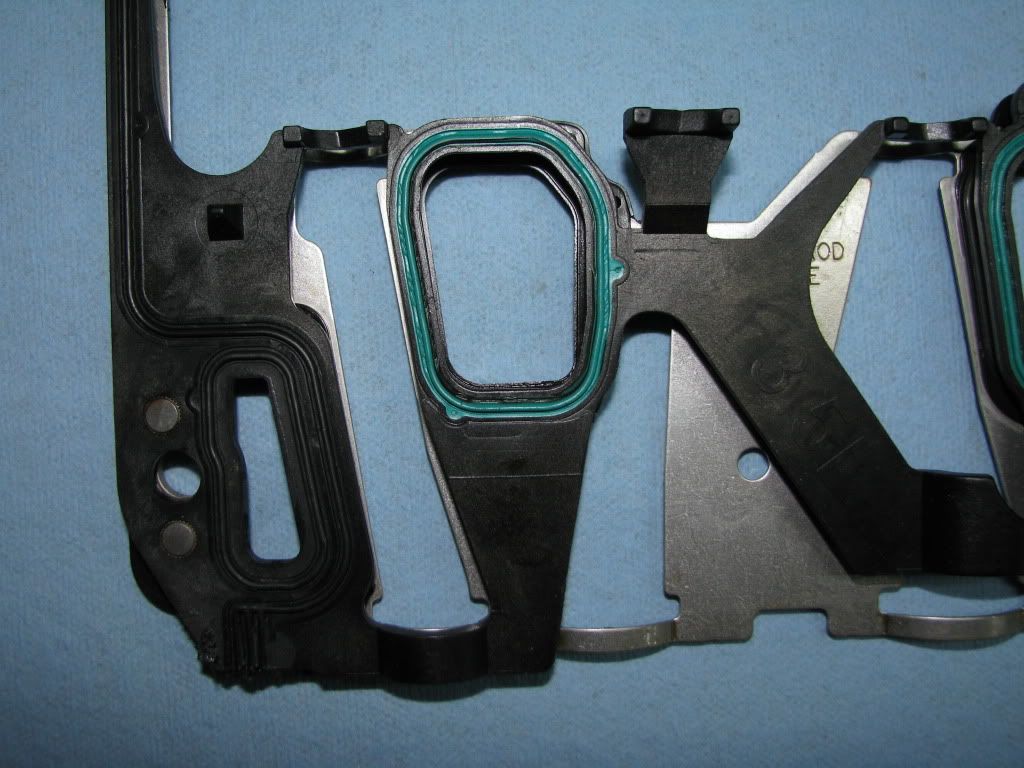
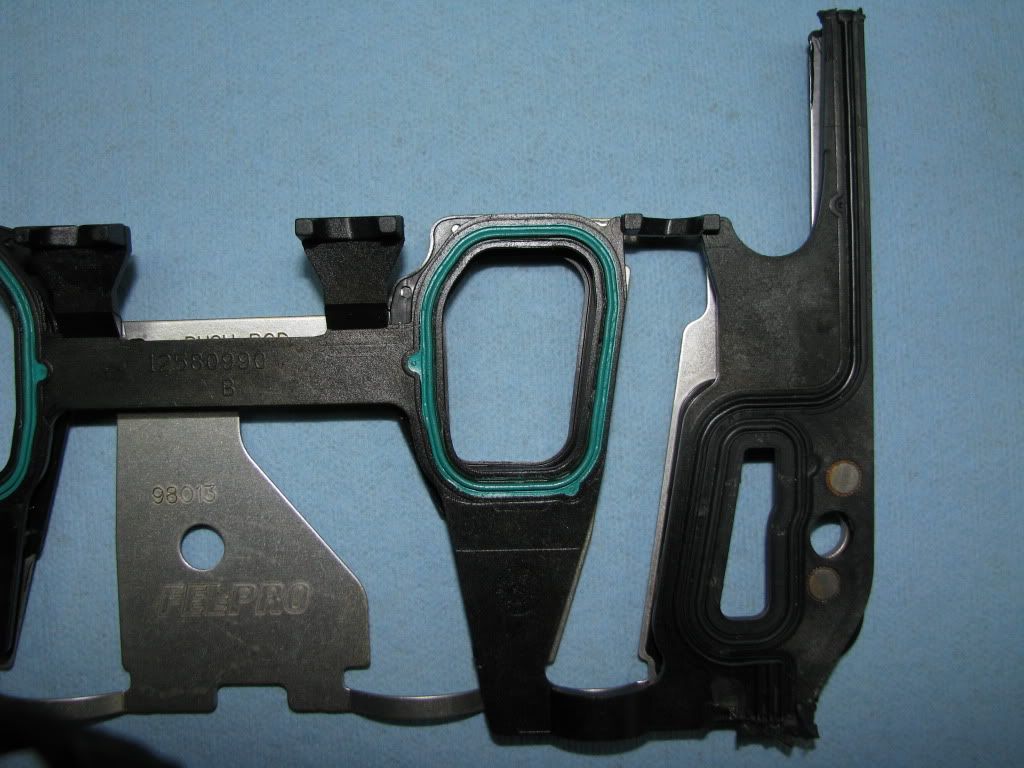
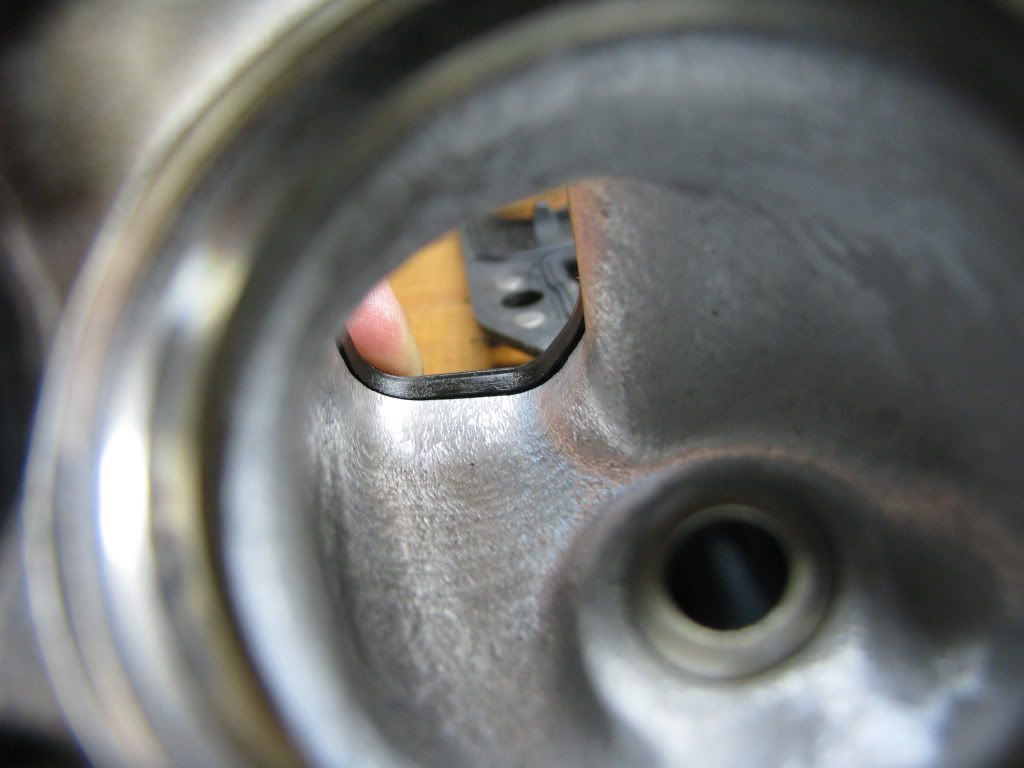
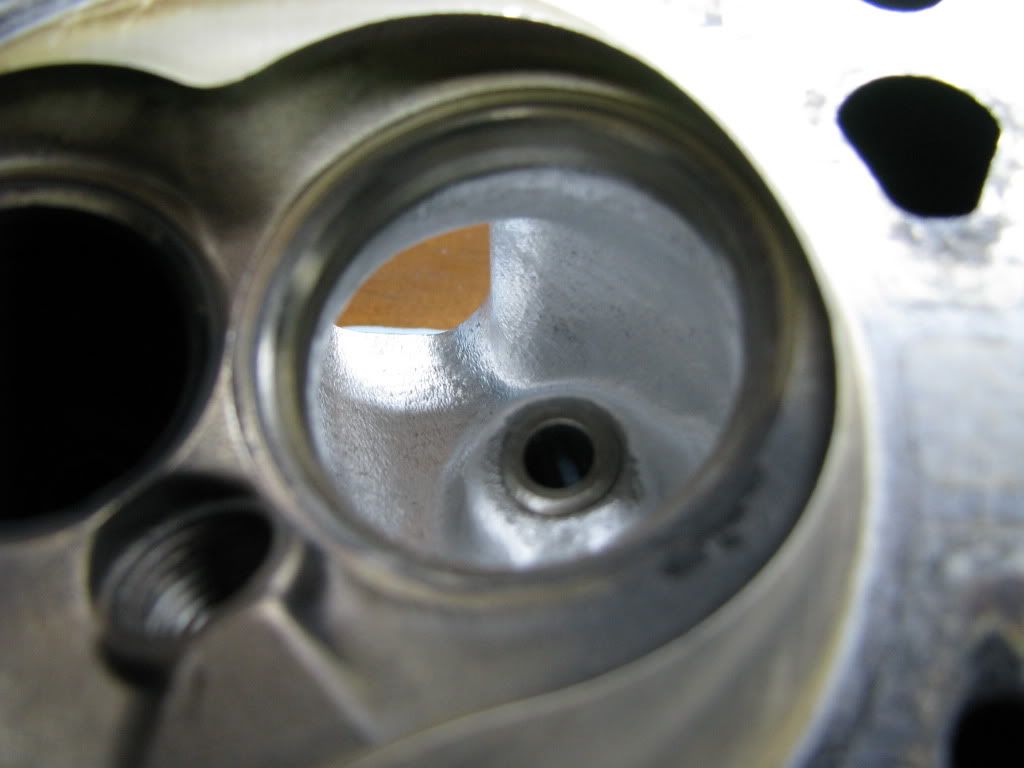
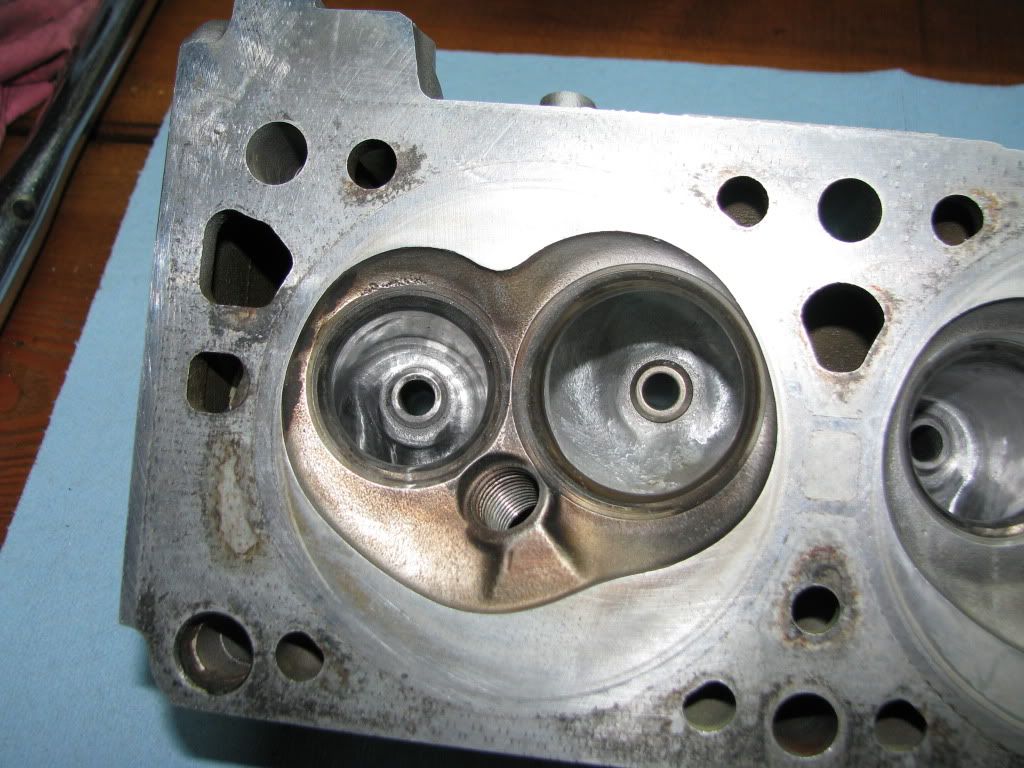
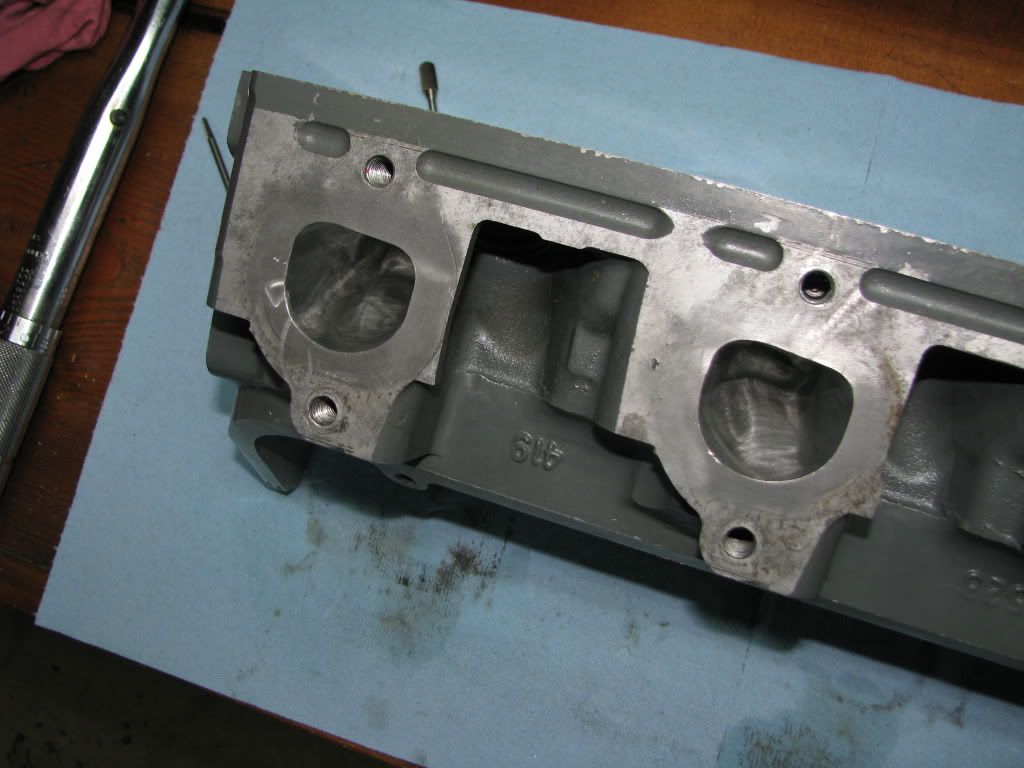
You can see if varries on which area overlaps for each port, so if you start with a stock gasket and then go to a felpro and even DON'T go "over" the stock size then you will have overlap from the felpro.
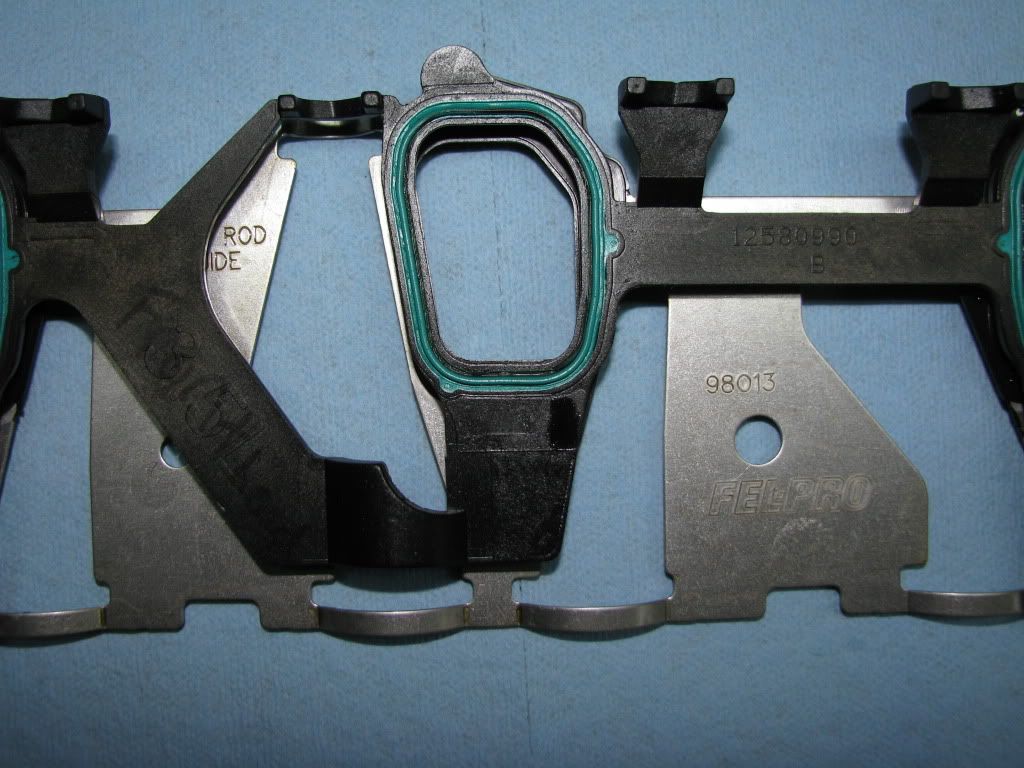
I don't think I went oversized on this... then again I'm not versed at porting.
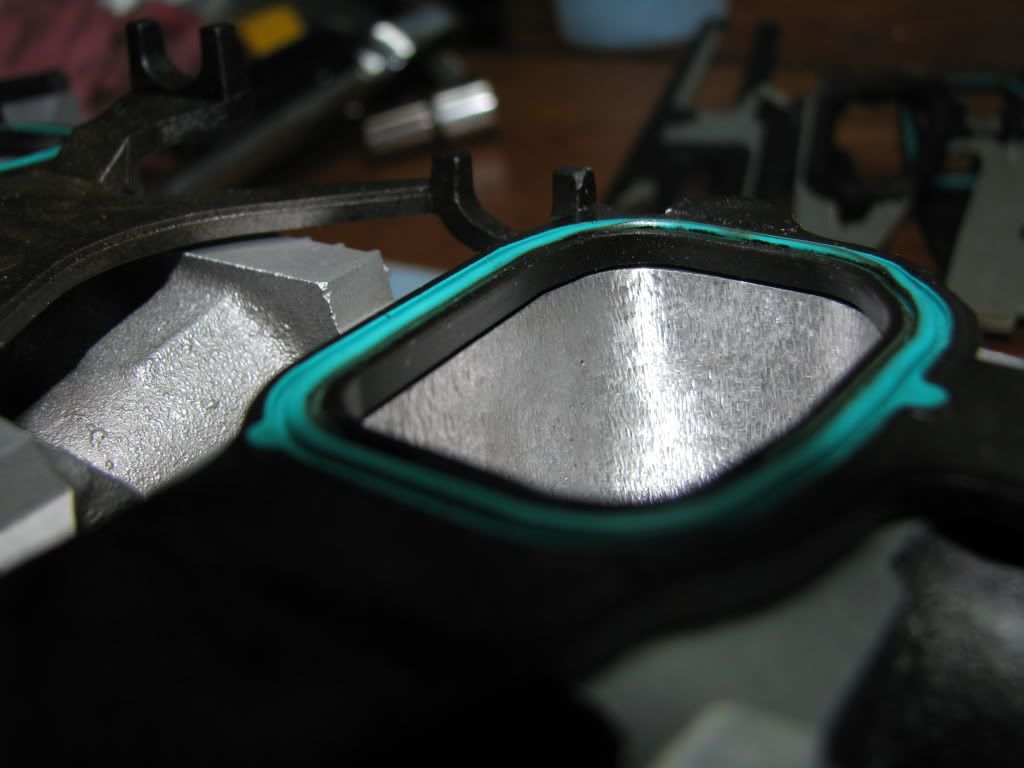
The other thing is, if I go slightly over, or see a tiny spot that overlaps with the plastic I can trim that just a tiny bit to fix it, there is enough plastic there to trim it a little, where the Felpro's its the rubber and you can't trim that to correct an error.
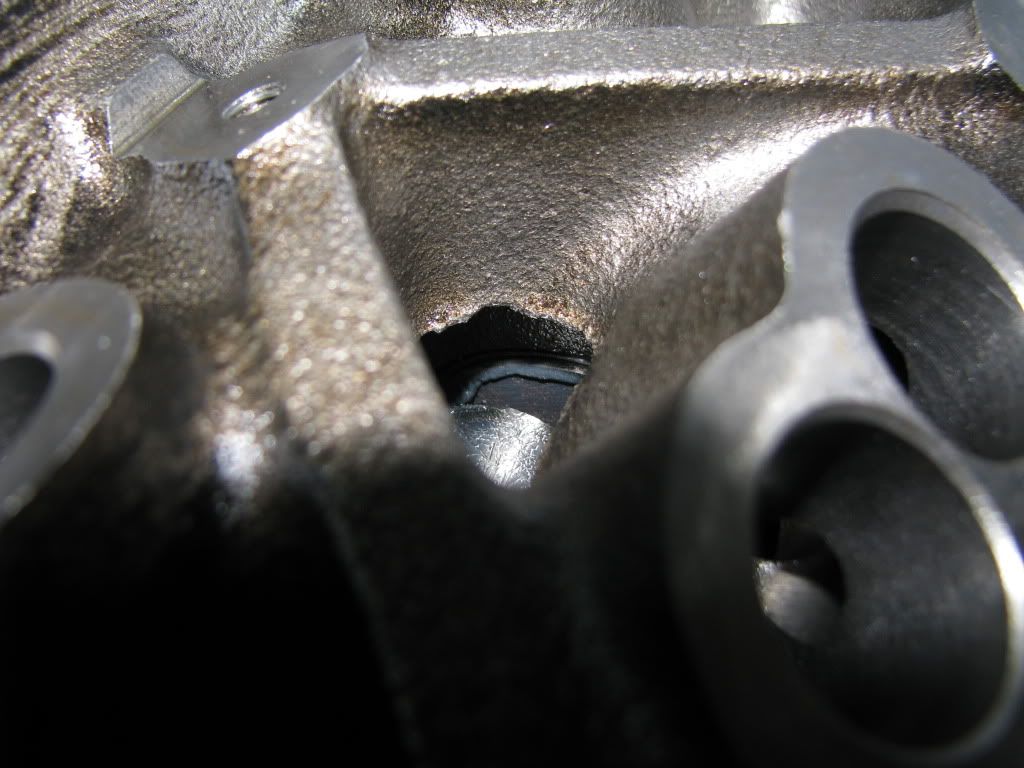
The Felpro overlap

And yes I have a tiny bit in the right corner where it overlaps, I'll admit to that being slightly over cut, but no where near how much overlaps everywhere with the felpro's
I don't think I went oversized on this... then again I'm not versed at porting.
The other thing is, if I go slightly over, or see a tiny spot that overlaps with the plastic I can trim that just a tiny bit to fix it, there is enough plastic there to trim it a little, where the Felpro's its the rubber and you can't trim that to correct an error.
The Felpro overlap
And yes I have a tiny bit in the right corner where it overlaps, I'll admit to that being slightly over cut, but no where near how much overlaps everywhere with the felpro's
-
3X00-Modified
- Administrator
- Posts: 10920
- Joined: Thu Jul 05, 2007 9:18 am
- Location: Brooklyn CT
Re: My 96 Build
Finally this motor is getting the port work it deserves, Talk about time consuming.

Head Half done
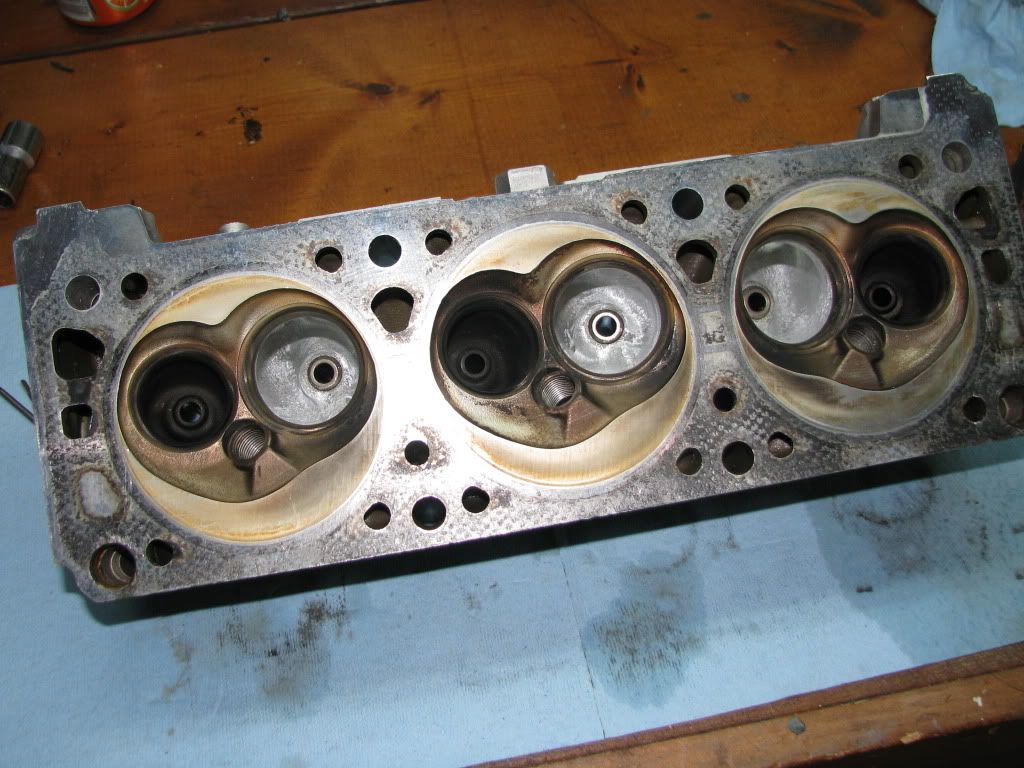
The other completed head.

Head Half done
The other completed head.
-
3X00-Modified
- Administrator
- Posts: 10920
- Joined: Thu Jul 05, 2007 9:18 am
- Location: Brooklyn CT
Re: My 96 Build
Gotta find something to keep me busy till cometic gets the gasket thing straightened out...
My custom trans stand.
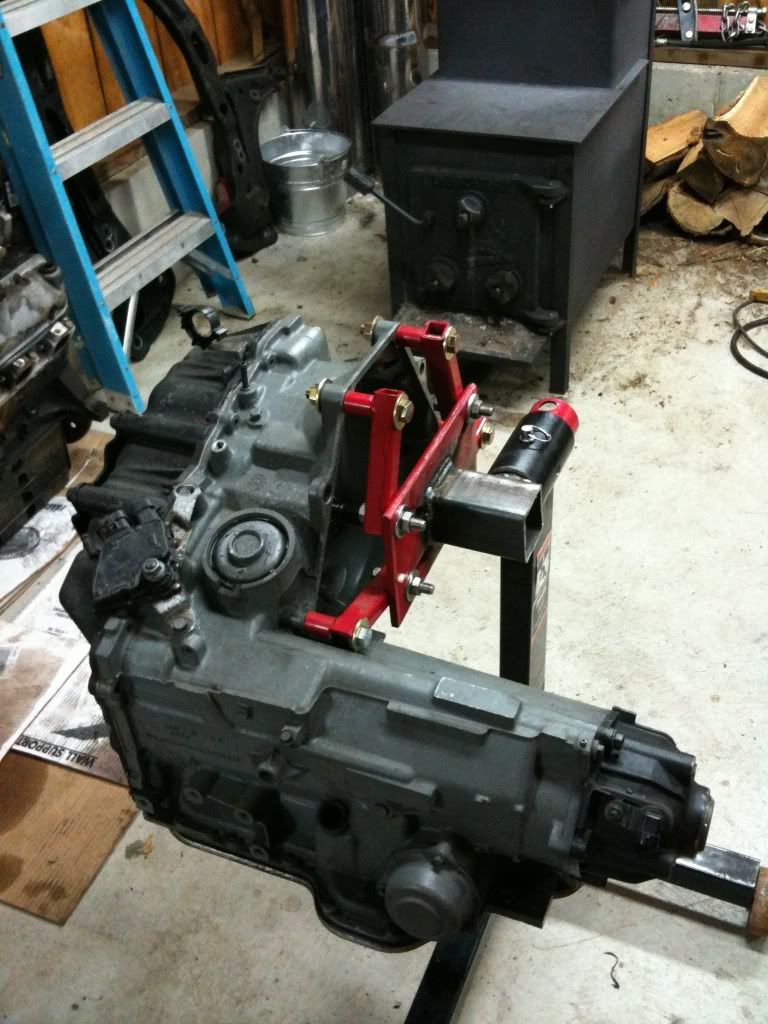
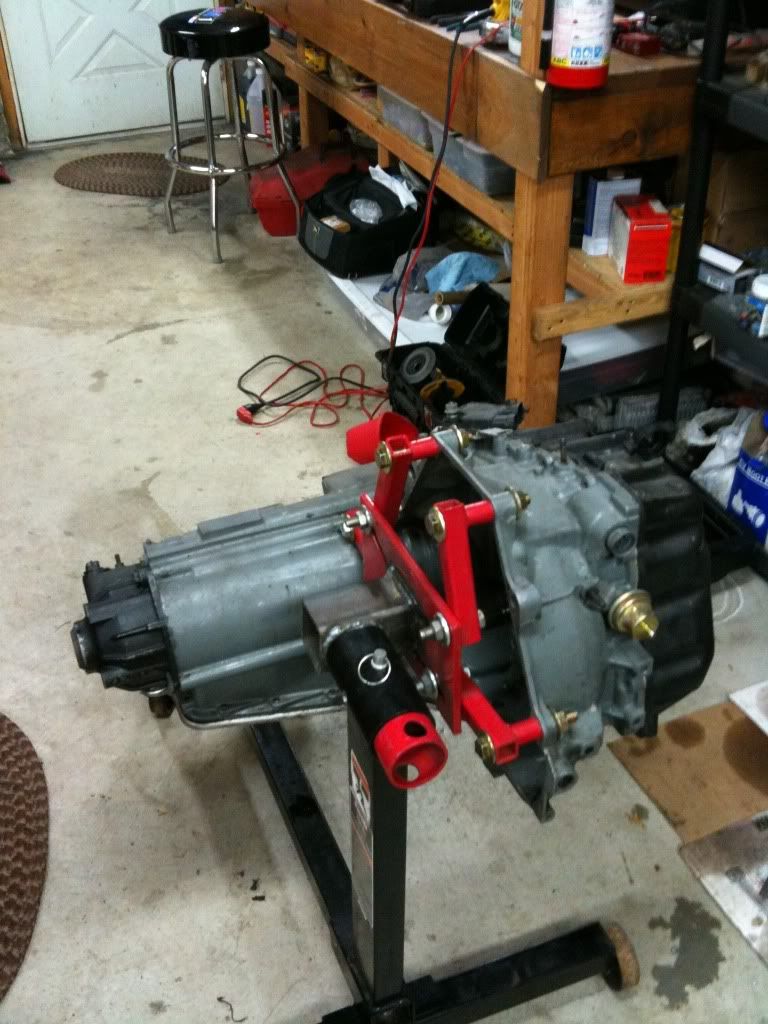

My custom trans stand.
-
3X00-Modified
- Administrator
- Posts: 10920
- Joined: Thu Jul 05, 2007 9:18 am
- Location: Brooklyn CT
Re: My 96 Build
Some more updates...
Coated the head studs with some BBQ paint this time. I'm hoping that plus the fact that the car will no be stored inside will prevent the issues I had before.

Also used antiseize on the block threads instead of the moly lube since those are only put in hand tight.

Trasmission valves I replaced.

The wear I had on the 2nd drum teeth.

Installing V-band clamps to get rid of my damn 3-bolt ones


Trans ready to go


Engine in on Thursday evening the 15th.

Next chance I got to work was Saturday... Found out I may need to helicoil a exhaust thread or two... The rear header wouldnt hold one of my bolts but a stud worked in its place, so if it begins to leak I'll need to fix those threads. Also pulled the threads out of the tensioner hole, but that was due to using the wrong/short bolt. A longer one tightened up good, but I may helicoil that soon too.
Trans in and doing PS pump install


And of course... It runs.... AFTER I fucked up the plug wiring... LOL... its been so long I put #2 on #6 and vice versa... I got a loud exhaust backfire when I tried to start it and I was like OH crap! what did I do wrong. After a few min of looking at it I realized my idiot newb mistake.

Enjoy.
Still gotta finish exhaust, and then install the N-body brakes and bleed them, and fix my intake. So not complete yet, but I'm glad to have it 90% back together.
Any progress is good progress.
Coated the head studs with some BBQ paint this time. I'm hoping that plus the fact that the car will no be stored inside will prevent the issues I had before.
Also used antiseize on the block threads instead of the moly lube since those are only put in hand tight.
Trasmission valves I replaced.
The wear I had on the 2nd drum teeth.
Installing V-band clamps to get rid of my damn 3-bolt ones
Trans ready to go
Engine in on Thursday evening the 15th.
Next chance I got to work was Saturday... Found out I may need to helicoil a exhaust thread or two... The rear header wouldnt hold one of my bolts but a stud worked in its place, so if it begins to leak I'll need to fix those threads. Also pulled the threads out of the tensioner hole, but that was due to using the wrong/short bolt. A longer one tightened up good, but I may helicoil that soon too.
Trans in and doing PS pump install
And of course... It runs.... AFTER I fucked up the plug wiring... LOL... its been so long I put #2 on #6 and vice versa... I got a loud exhaust backfire when I tried to start it and I was like OH crap! what did I do wrong. After a few min of looking at it I realized my idiot newb mistake.
Enjoy.
Still gotta finish exhaust, and then install the N-body brakes and bleed them, and fix my intake. So not complete yet, but I'm glad to have it 90% back together.
Any progress is good progress.
-
Money pit Beretta

- Registered User
- Posts: 6411
- Joined: Thu Jul 26, 2007 11:36 am
- Location: Kansas
Re: My 96 Build
Thought you were runinng a 3400 upper. Don't the rear cylinders run lean with the 3500 upper? Wouldn't that be the worst thing with NOS? Just asking because I don't know.
Nice head work!
Nice head work!
keep'em flying!
-
3X00-Modified
- Administrator
- Posts: 10920
- Joined: Thu Jul 05, 2007 9:18 am
- Location: Brooklyn CT
Re: My 96 Build
There is no tested proof to any of that so I just opted for the 3500 upper when using the Nitrous since the tb adapter has a fogger port directly in it, rather than being just in the intake tract.
-
Money pit Beretta
- Registered User
- Posts: 6411
- Joined: Thu Jul 26, 2007 11:36 am
- Location: Kansas