DTMAce's Z26 project - DD usage for the time being - 6-8-12
Re: Howdy all
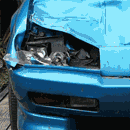
Still working on it though. Spent a few minutes yesterday removing the wipers and cowl, looking over what I had to fix. Today I spent time vacuuming the whole area out, and started in with a scraper and a screwdriver. Remember how I said I didn't see any rust. I was a bit wrong, but thankfully it isn't too bad...
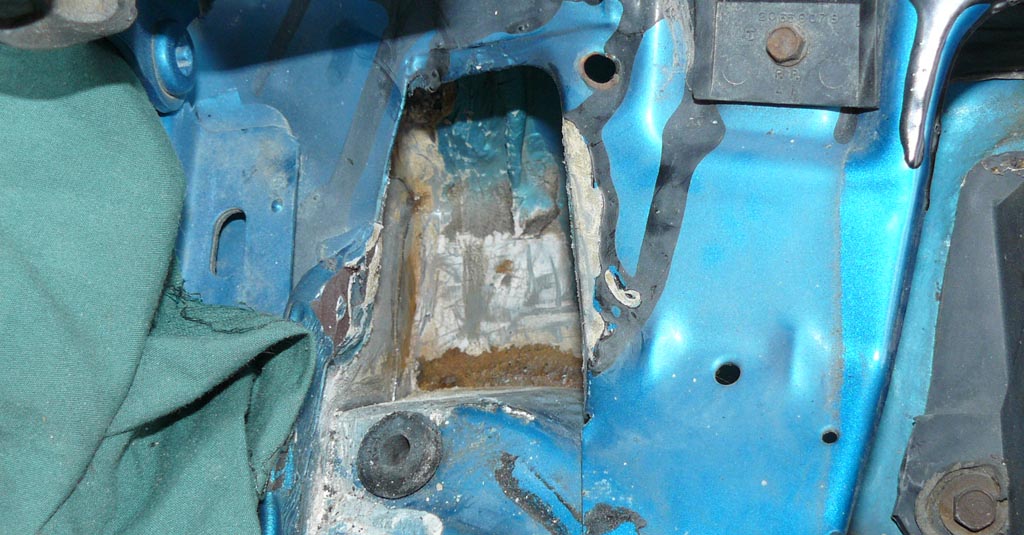
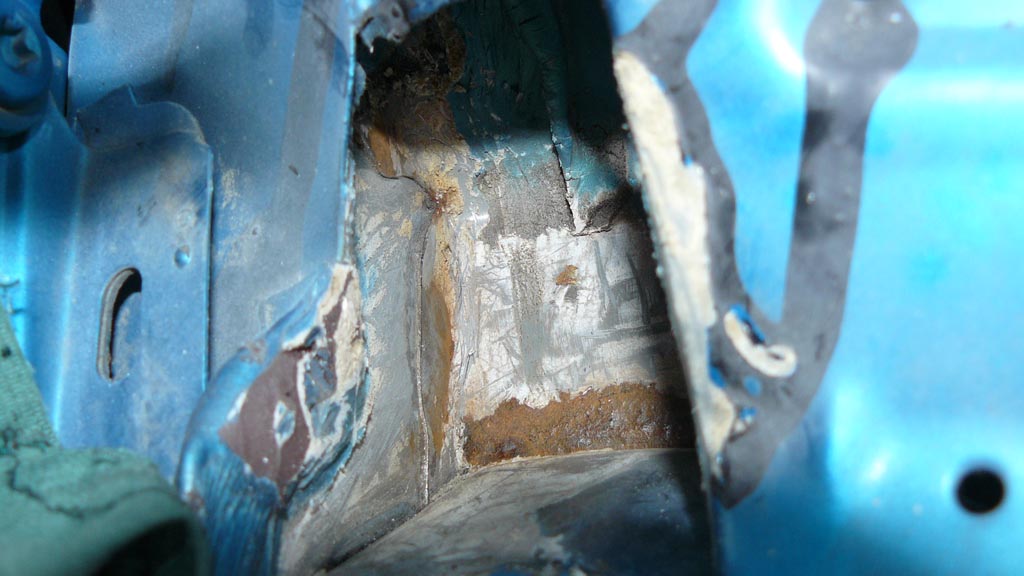
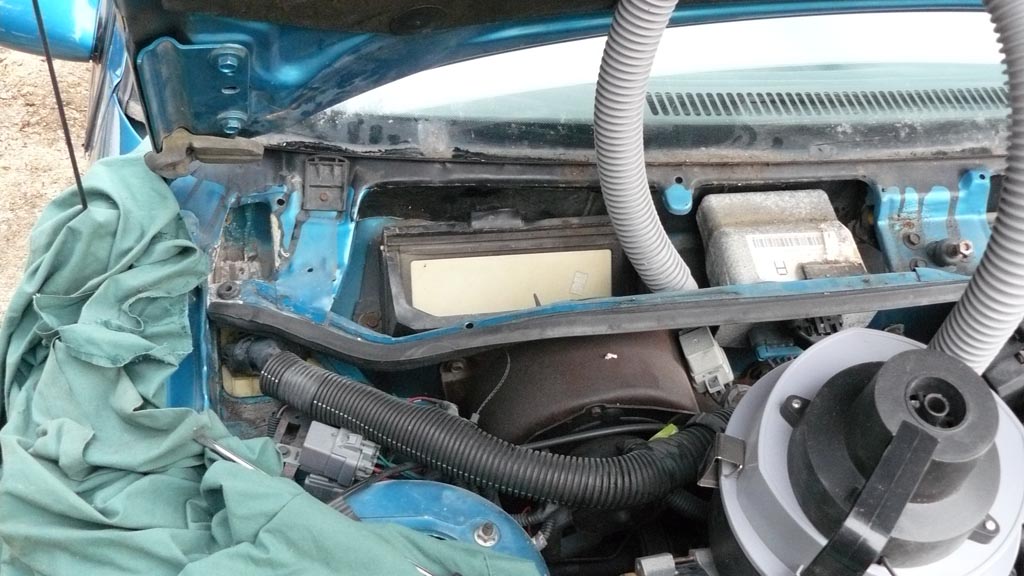
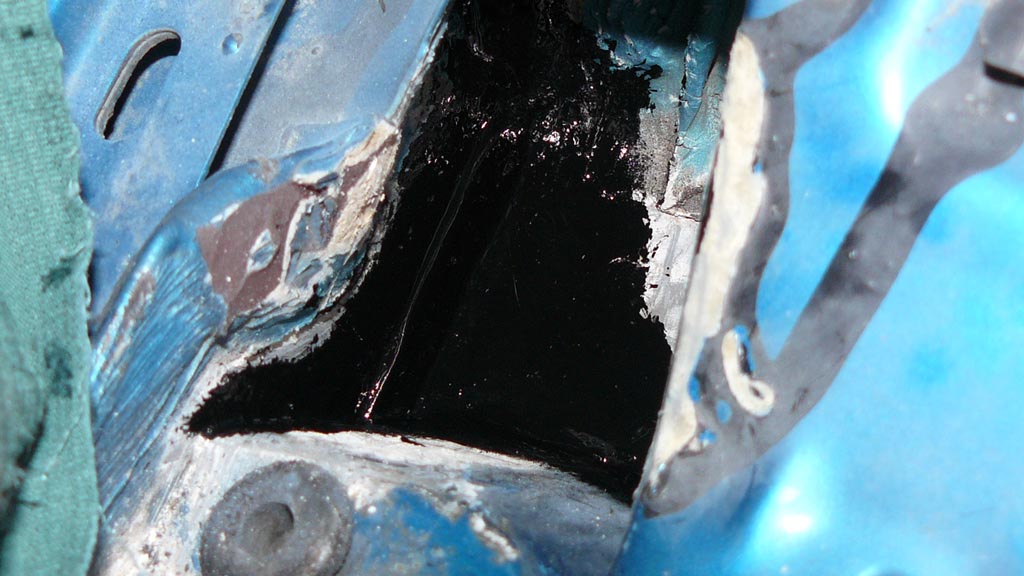
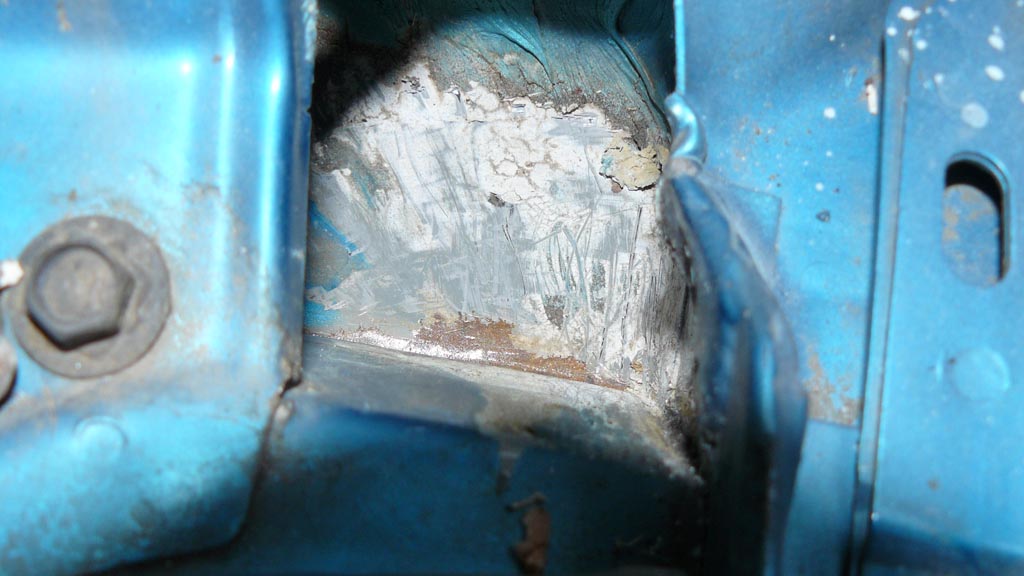
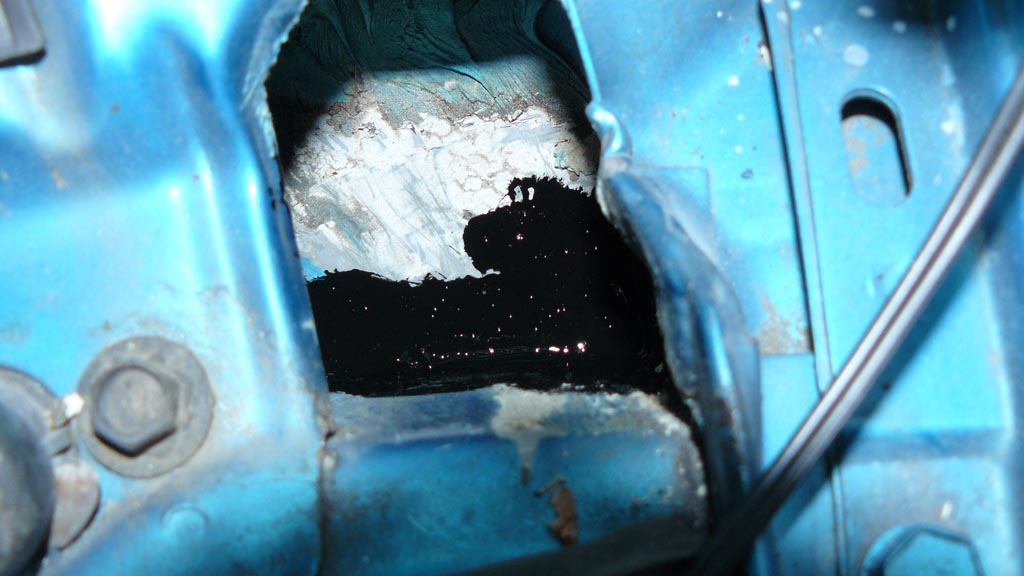
What I have done, is remove the old sealant, then cleaned the area with a wire brush, then hit it with some black rust-o-leum. Now all I have to do is once that is dry put on some 3M Heavy Drip Check Sealer. I think that should cure these areas, however I have lots more to deal with. Pretty much the entire center to driver's side (from the airbox, under the wiper motor to the driver corner) will have to be redone, as well as areas between the fenders and the firewall and around the harness entries. At least so far those areas don't look too bad rust wise yet. Will know more once I start scraping. Fun. I already hate doing this.
Then it will be on to the engine, I bought my LIMG kit today, permadry plus from felpro. Looks simple enough. Still going to be a bit of work.
Thanks for checking in guys, I was starting to worry that some of ya weren't seeing my updates! lol I can't even log into bnet to update my posts there, been trying the last few days, tried clearing the site cookie, everything. No luck, won't let me log in. Odd.
Anyways, stay tuned, lot of stuff going to be happening to this thing before the 24th.
Re: Howdy all
Well today I spent a few hours working on the Z. Finished sealing the cowl area, cleaned and reinstalled the cowl pieces, then the wipers.
After that, I tackled the trunk. Vacuumed the whole thing, found another small rust hole in the bottom that I missed earlier, but no time to fix it right now. Put back all the carpet pieces, cleaned everything, put the sub back into the trunk and hooked it up and re tuned it. Re installed the trunk light. So now the trunk is done.
Next will be to clean the interior. I really don't think I am going to have time to get the carpet replaced before the meet. I will be lucky if I have time to get the LIMG done. That is happening this coming Sun-Mon. At the same time with some help, the car will be getting a bit of polish work done to the paint, fillers, head and tail lights. (we have yet to do this since the clear was put on). Then a full wash and clean, scrub the wheels, etc, make it look purdy! Will probably put in the new steering wheel, shifter console and knob, armrest, ashtray, etc. If I have time I will do the carpet. I really wish I had thought to get some new seat rails for the side tracks. Mine are not totally junk but rusty bad. They work at least, but barely.
Overall though she looks damn good considering. Any suggestions to fix a rock chip? This is the original windshield in this car, never been replaced since I bought it new. Has plenty of pits and teeny chips though. But this one rock chip is right in my viewing section, and rather annoying.
For those of you reading this on BNET, I just posted like 4 posts of updates, so you may want to flip back a page in case you missed some. Enjoy, more updates to follow. I ended up fixing my login problems by switching to Netscape (yes I still have it for website testing). Works fine so far.
Re: Howdy all
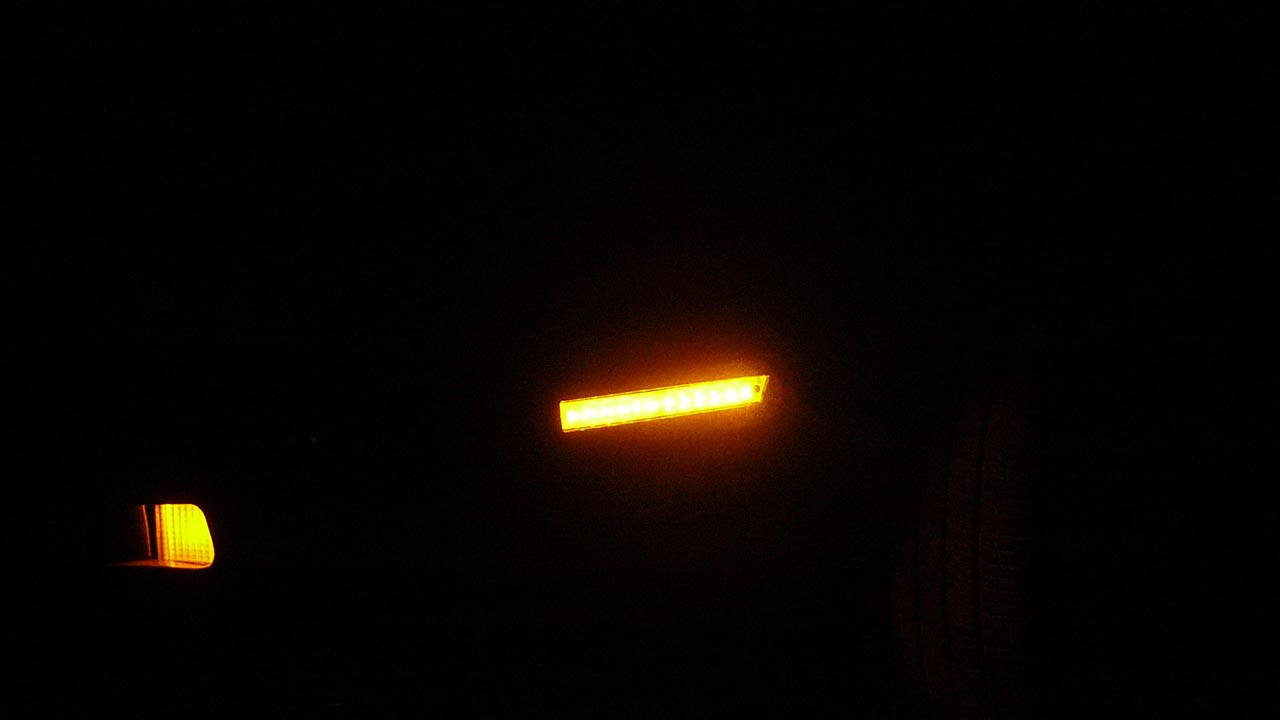
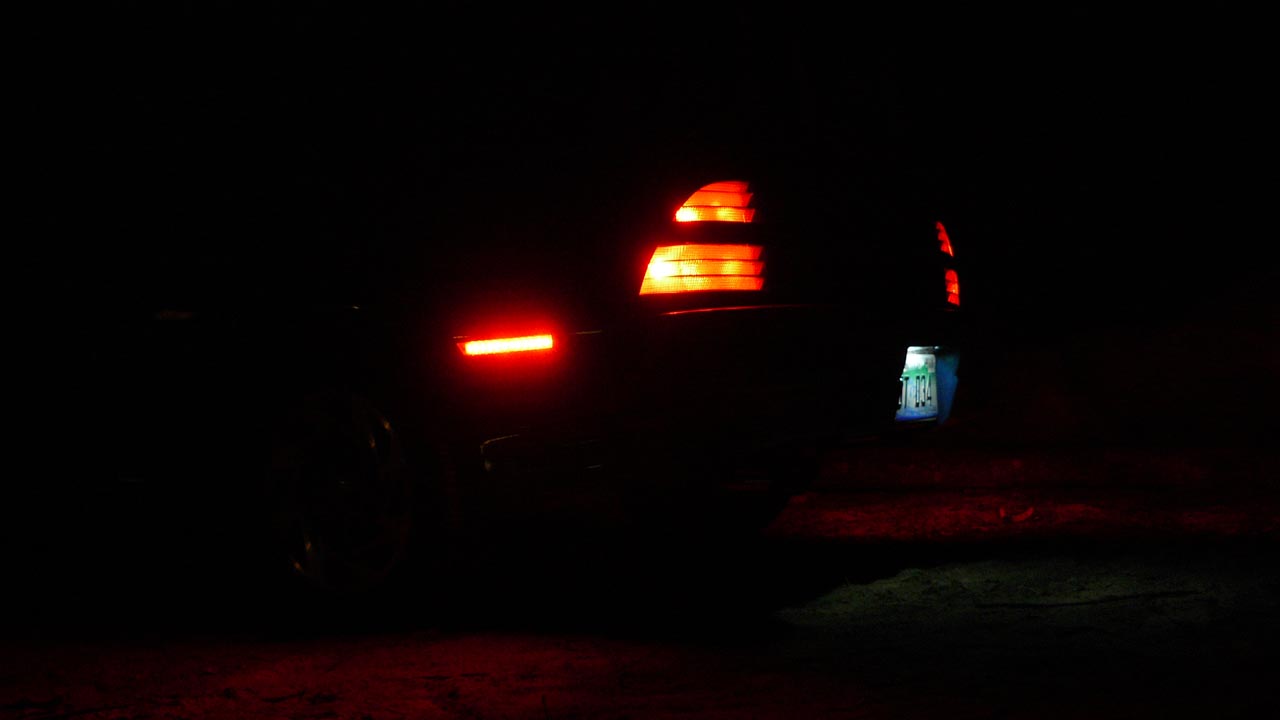
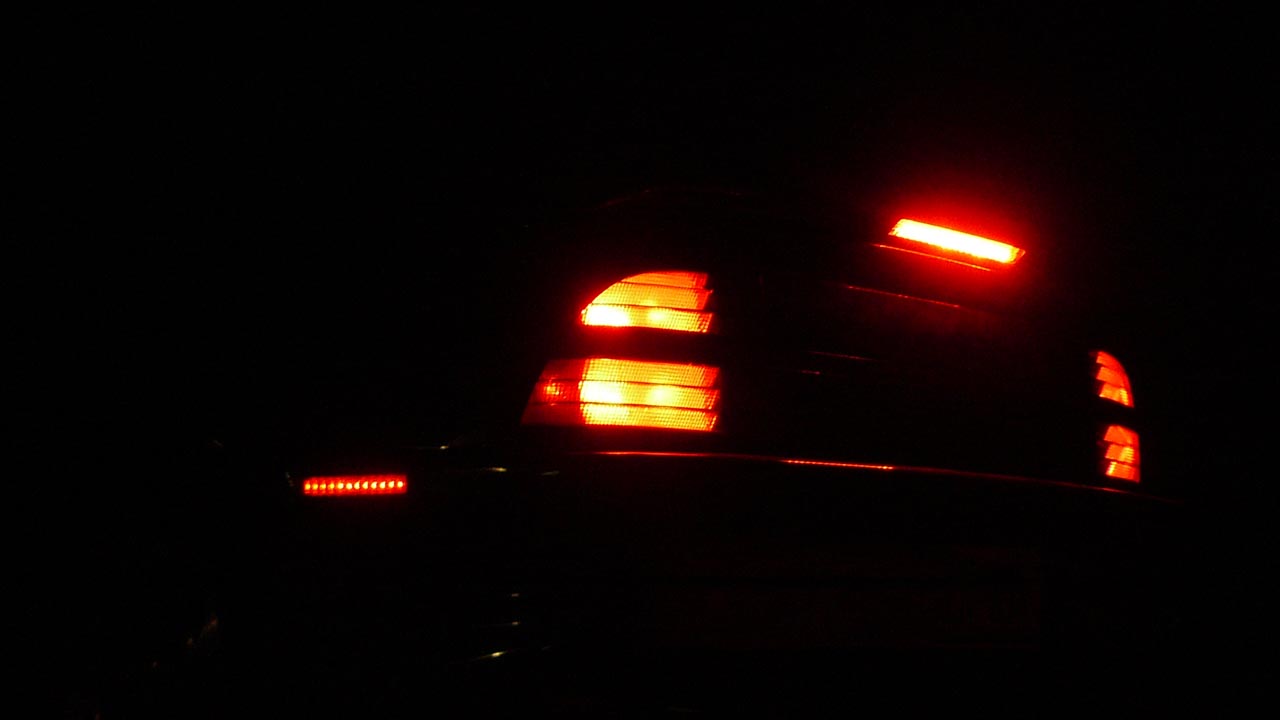
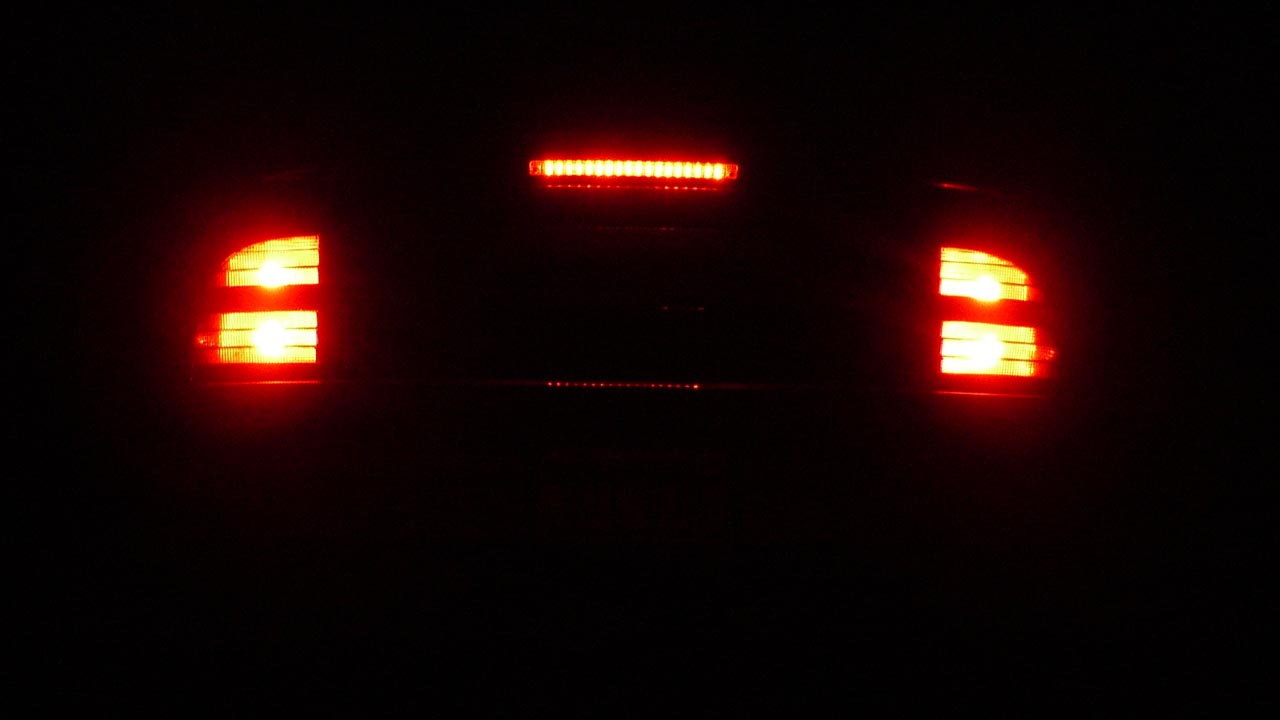
Night lighting pics with ALL LED external lighting. Front, rear, license plate, custom markers and 3rd brake. Still building these for anyone that wants them. See my LED thread in my sig.


Enjoy!
Enjoy!
94' Z26 Project - 95' Base Project - Custom LED Light Conversions!
Chosen Proposal Submission & Committee Member for Beretta Fest 2012 in Traverse City Michigan


Chosen Proposal Submission & Committee Member for Beretta Fest 2012 in Traverse City Michigan
-
Money pit Beretta

- Registered User
- Posts: 6411
- Joined: Thu Jul 26, 2007 11:36 am
- Location: Kansas
Re: Howdy all
Good to see you back to work. Tell me how the cowl sealing turns out. I thought I had everything sealed but there is a leak now after a big snow. No plans to swap a 3400 intake while your doing the the LIMG?
keep'em flying!
Re: Howdy all
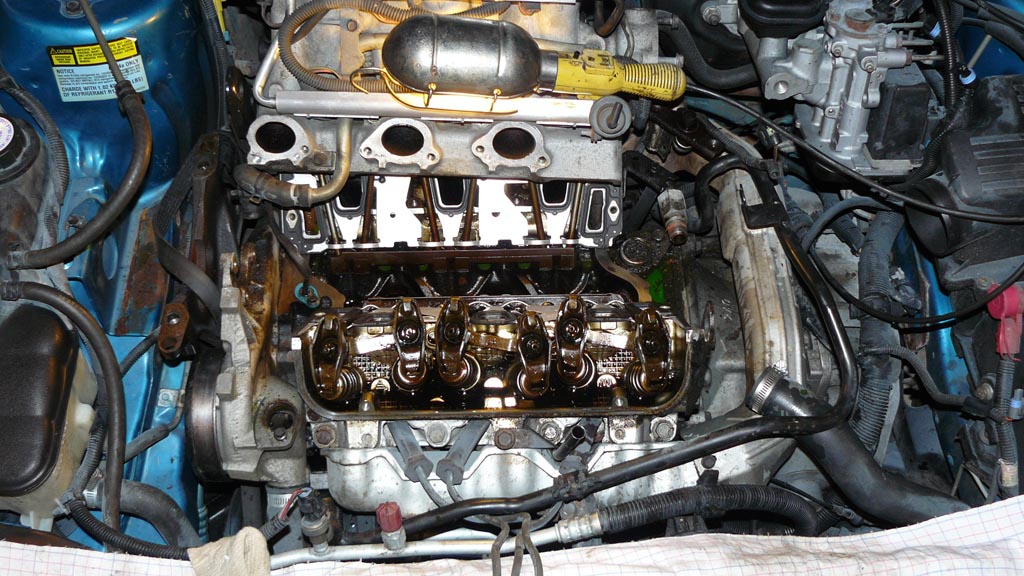
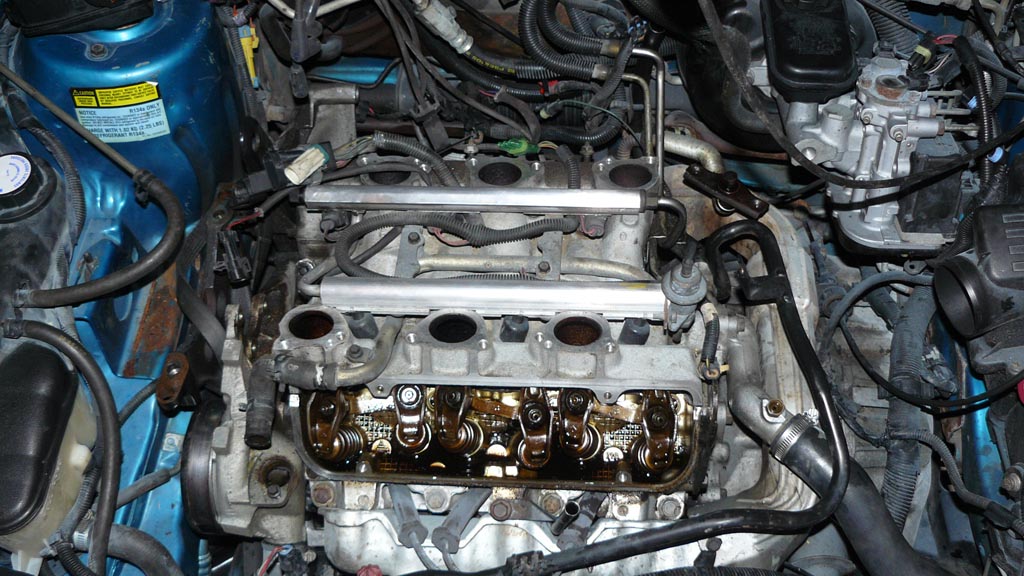
Alight, updates! Working on my LIMG install, started it tonight, hope to have it done TOMORROW.
Here are pics, in order of the work. Keep in mind, I took more pics than are here, I just put up the general ones so you can see the work.
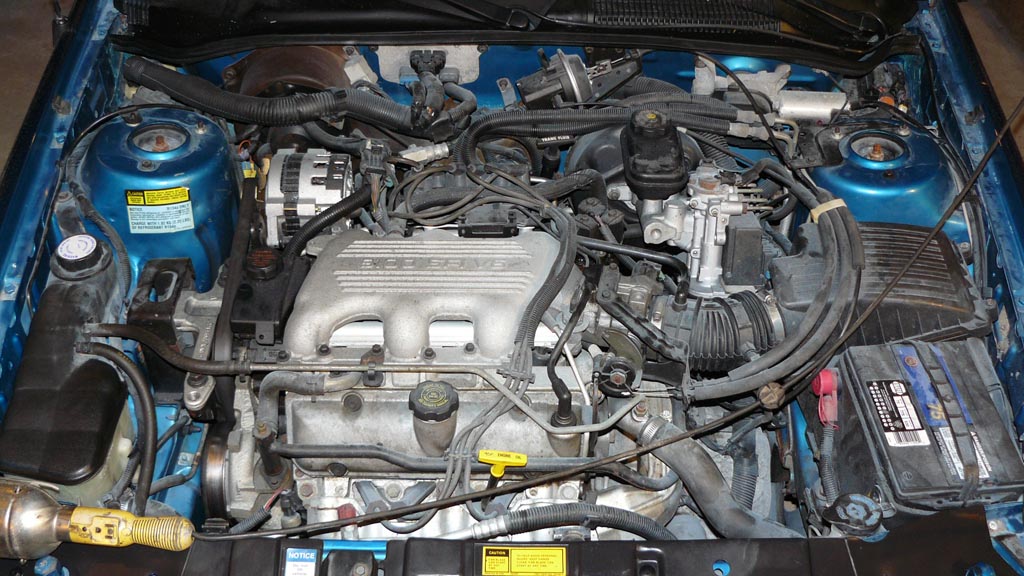
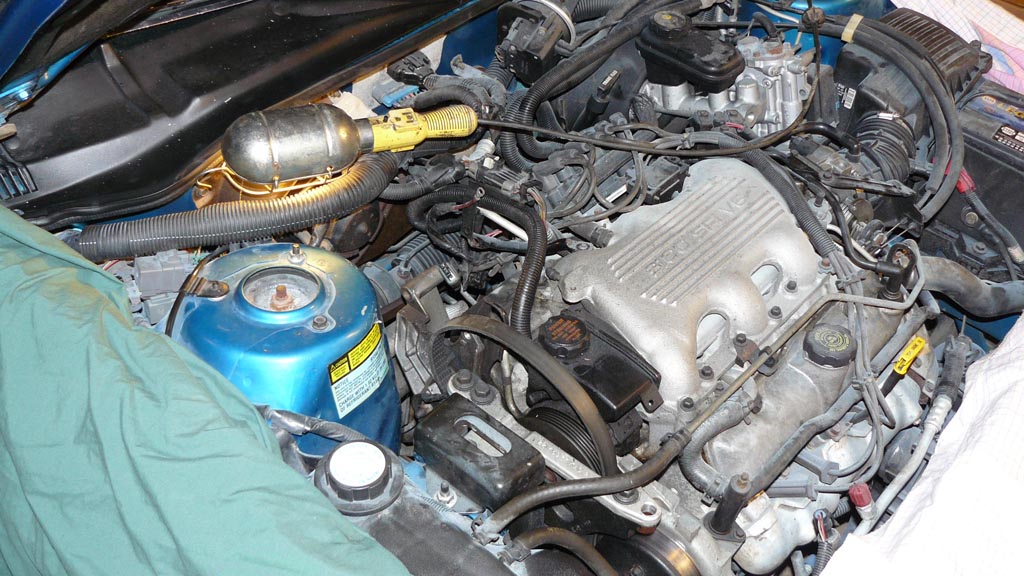
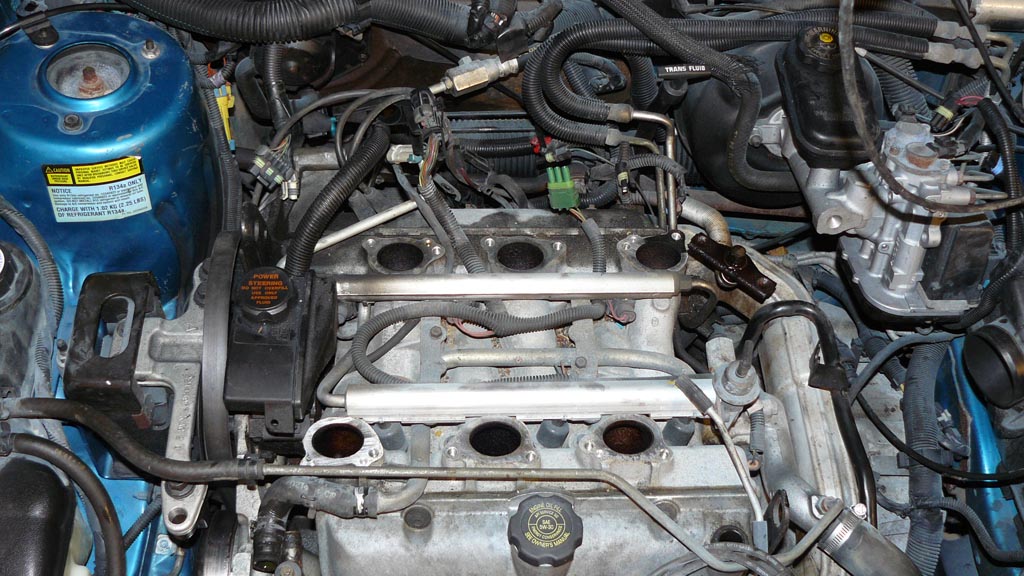
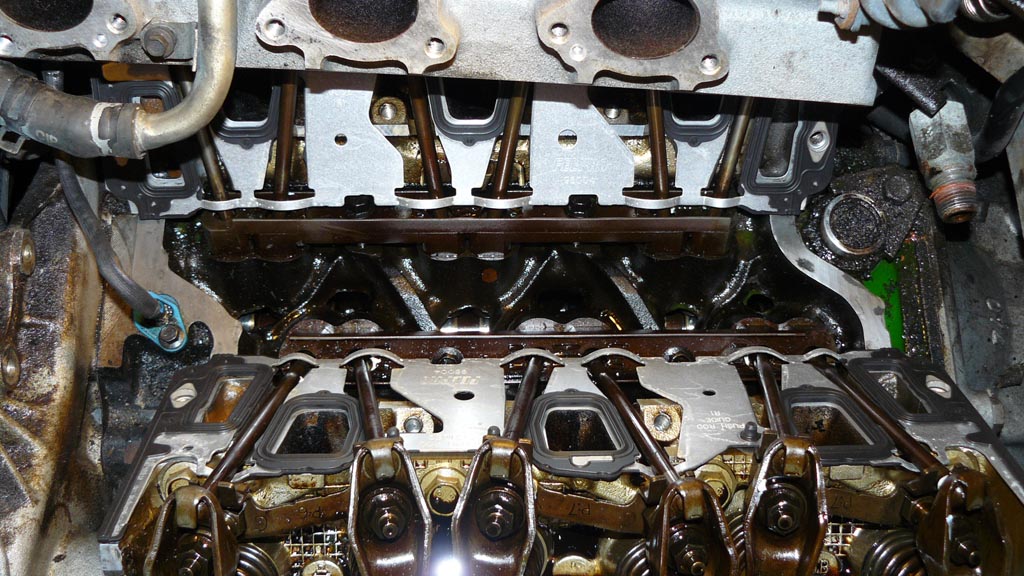
This is after 2 hours of work. Keep in mind, I have NEVER done this before, and I am doing it by myself. Now I have to work on a laptop for a bit.
I have plenty more to tear down, I know. But so far it hasn't been too bad, just tedious... Trying NOT to take more apart then I have to, and being very careful to keep track of where everything goes, even have a cardboard box that I have the bolts stuck in, in the order they came from the plenum, etc.
No I am not using a book, or instructions, or anything. Just winging it.
In answer to your question MPB, no not rebuilding it more than it is now. Just want to fix the leak and continue on. It always ran well for me the way it was. If she blows up, then I will just swap out the whole motor. :p
Here are pics, in order of the work. Keep in mind, I took more pics than are here, I just put up the general ones so you can see the work.
This is after 2 hours of work. Keep in mind, I have NEVER done this before, and I am doing it by myself. Now I have to work on a laptop for a bit.
I have plenty more to tear down, I know. But so far it hasn't been too bad, just tedious... Trying NOT to take more apart then I have to, and being very careful to keep track of where everything goes, even have a cardboard box that I have the bolts stuck in, in the order they came from the plenum, etc.
No I am not using a book, or instructions, or anything. Just winging it.
In answer to your question MPB, no not rebuilding it more than it is now. Just want to fix the leak and continue on. It always ran well for me the way it was. If she blows up, then I will just swap out the whole motor. :p
-
3X00-Modified

- Administrator
- Posts: 10920
- Joined: Thu Jul 05, 2007 9:18 am
- Location: Brooklyn CT
Re: Howdy all
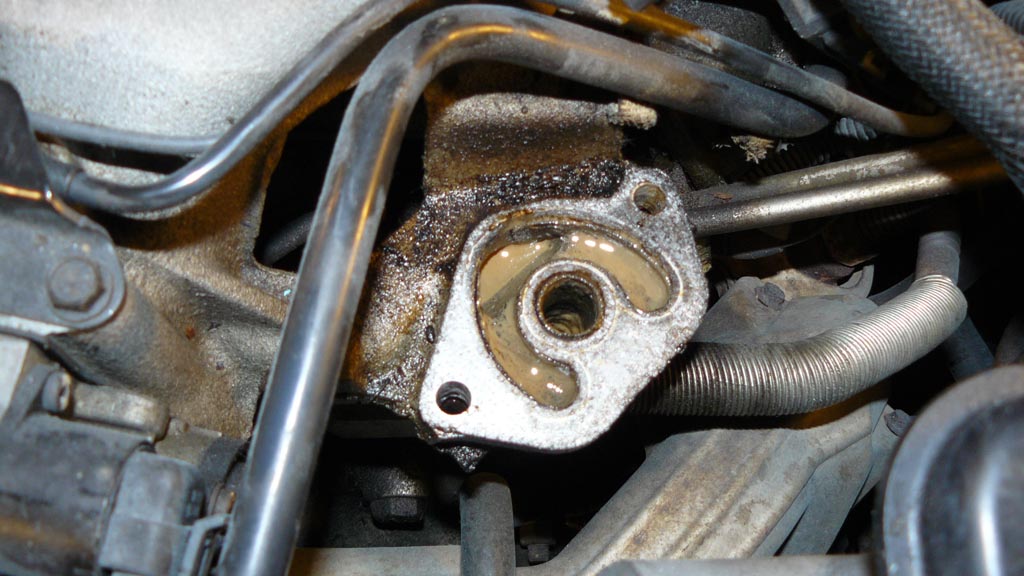
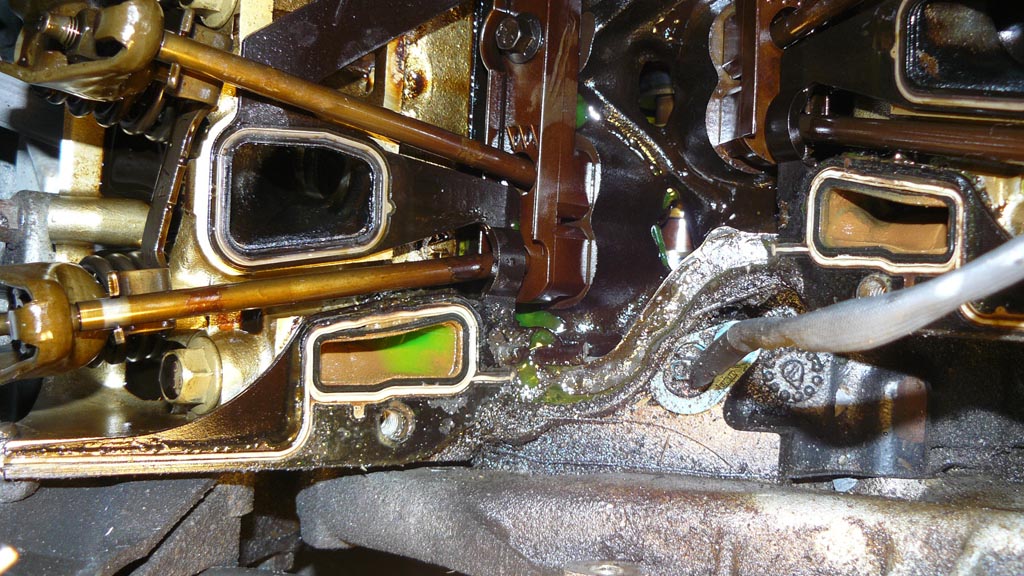
Chocolate milk in the EGR is not a good thing... that means that you were getting oil and coolant mixed... I'll be curious to see what the underside of your LIM looks like.
Progress looking good so far though.
Progress looking good so far though.
-
Money pit Beretta
- Registered User
- Posts: 6411
- Joined: Thu Jul 26, 2007 11:36 am
- Location: Kansas
Re: Howdy all
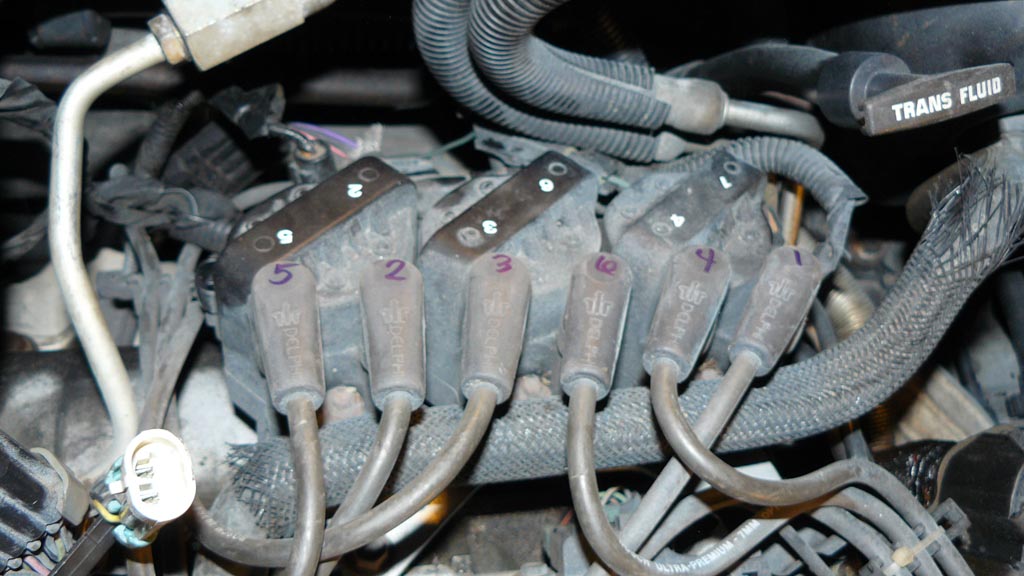
Are those the OEM plug wires? Once again tell me how it goes. I'll be doing a 3400 intake swap and it's my first on a FI V6. My 3100's LIMG is also leaking, so I thought what the hell, I'll try the swap. I can tell you that your saving alot of money by sticking with the stock set up.
keep'em flying!
Re: Howdy all
No, they are not the original OEM wires, but they are supposed to be the stock replacements. 3rd set btw. Putting in the 3rd set of plugs when I do this too.
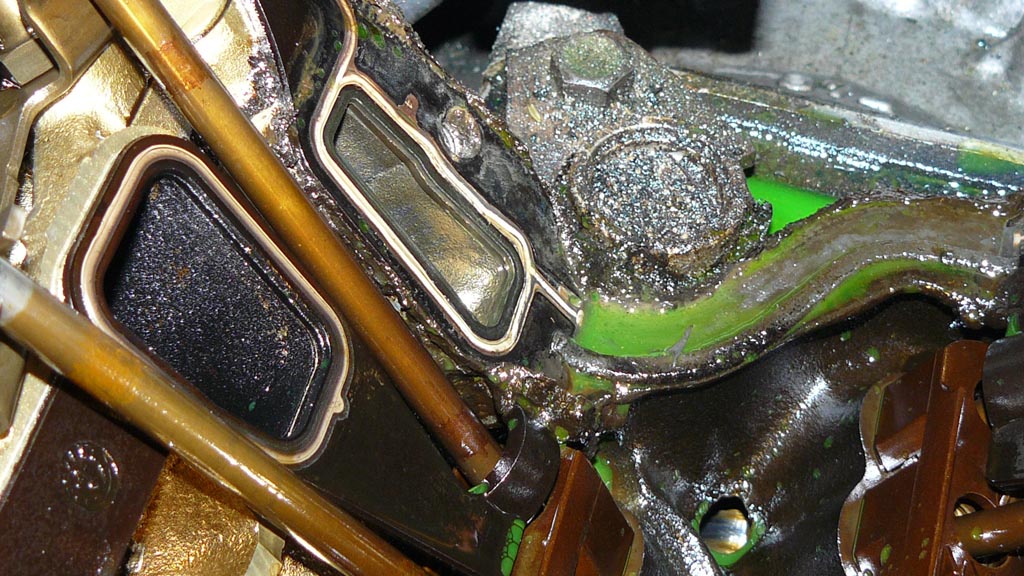
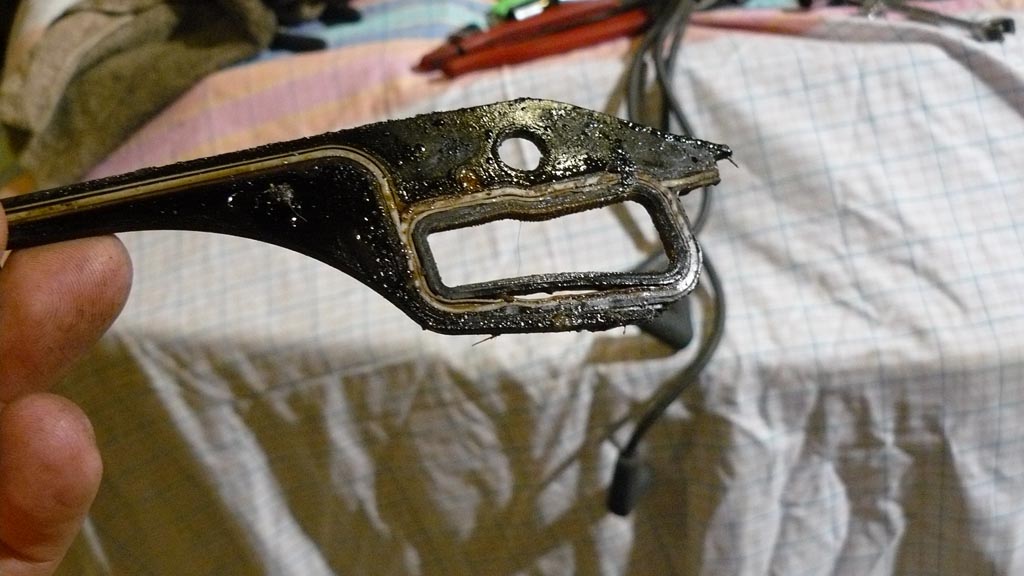
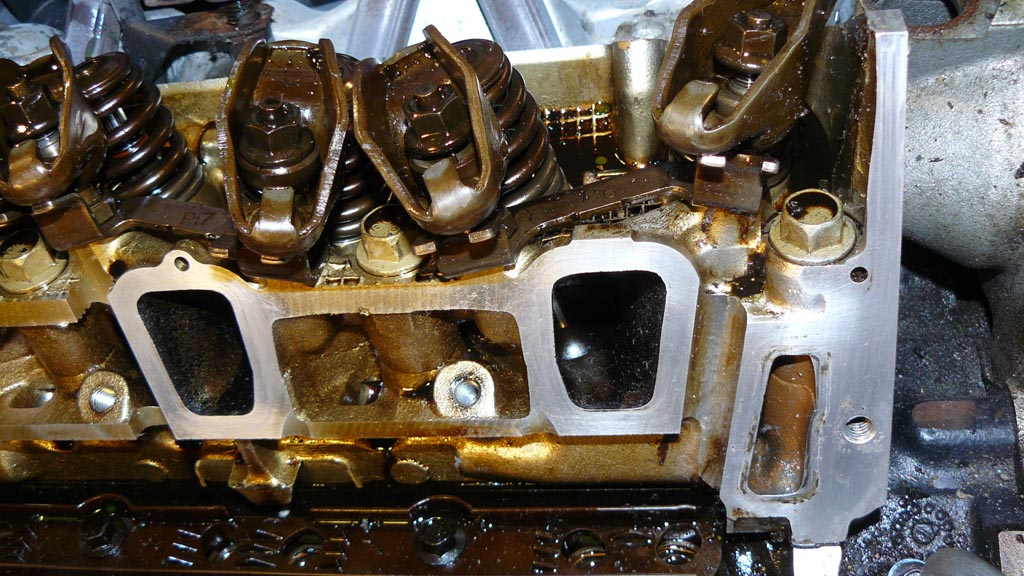
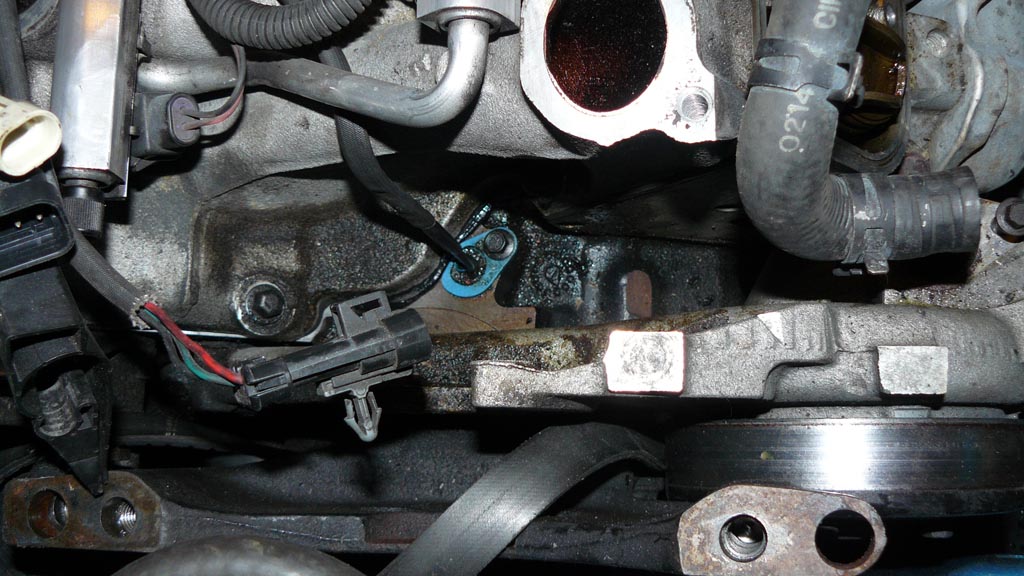
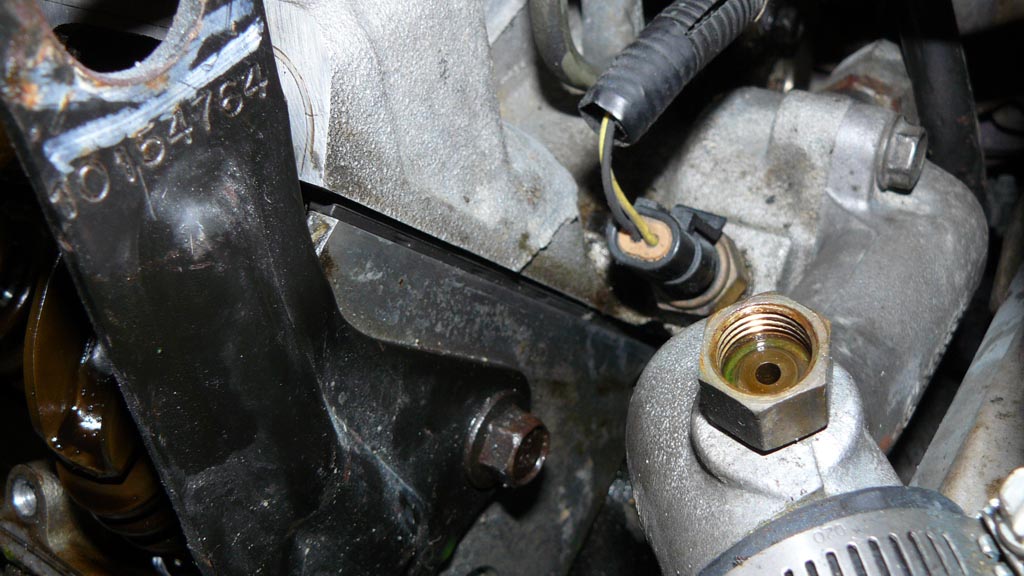
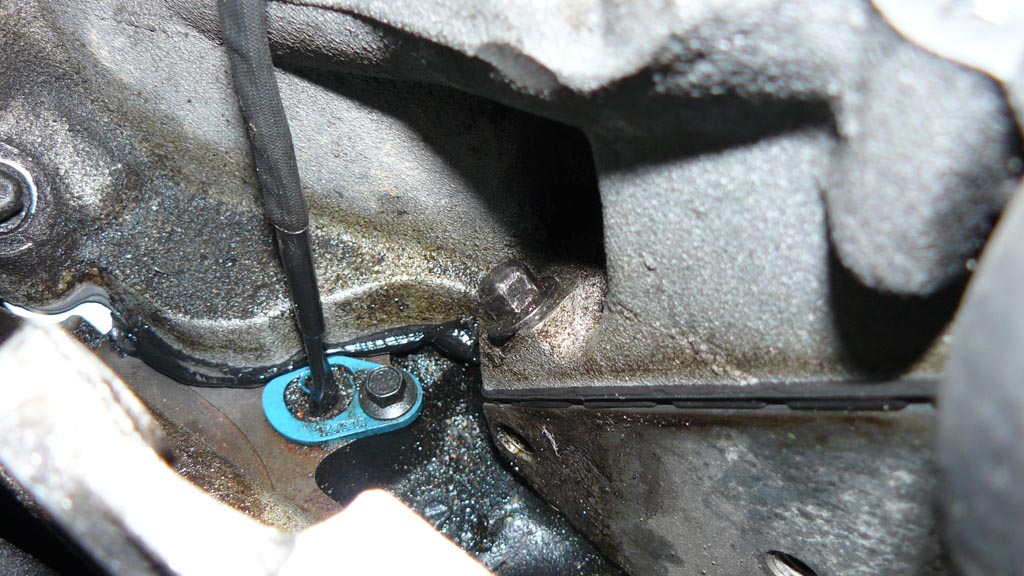
More pics for you guys. Dang it was messy around the bottom on the driver's side. Gasket was definitely trash, as you can see from the bottom pic and the first couple. Looks like the cam may be scored, not sure yet if the marks on it are normal or not. Will update later. Not too worried about it either. Like I said, fix the leak, drive it till it blows up. Then drop in a 3400/3500.
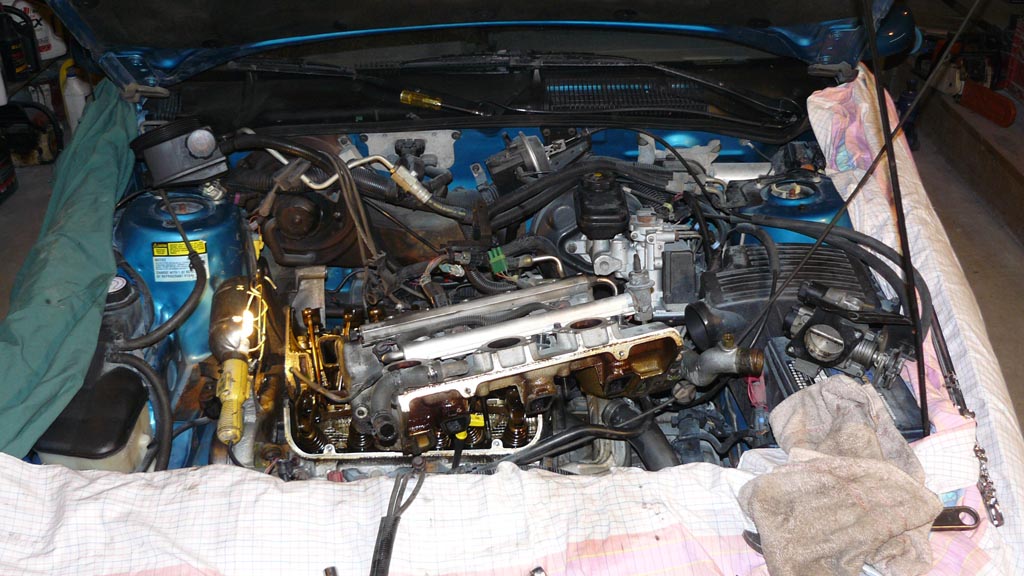
Will keep you guys updated. Tired and going to bed. Will start cleaning and assembling in the morning, after I review any thoughts you guys n gals have.
More pics for you guys. Dang it was messy around the bottom on the driver's side. Gasket was definitely trash, as you can see from the bottom pic and the first couple. Looks like the cam may be scored, not sure yet if the marks on it are normal or not. Will update later. Not too worried about it either. Like I said, fix the leak, drive it till it blows up. Then drop in a 3400/3500.
Will keep you guys updated. Tired and going to bed. Will start cleaning and assembling in the morning, after I review any thoughts you guys n gals have.
-
3X00-Modified
- Administrator
- Posts: 10920
- Joined: Thu Jul 05, 2007 9:18 am
- Location: Brooklyn CT
Re: Howdy all
Cam is fine.
It's hard to kill a roller cam.
It's hard to kill a roller cam.
Re: Howdy all
Ok, got back home, went right back to work on it. More updates from tonight, starting to go back together! Finally!

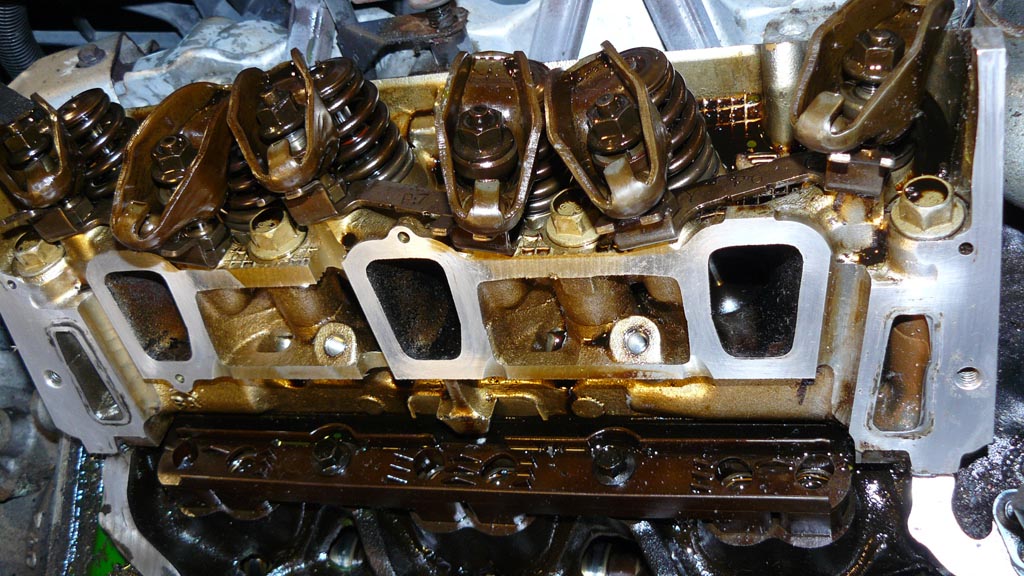
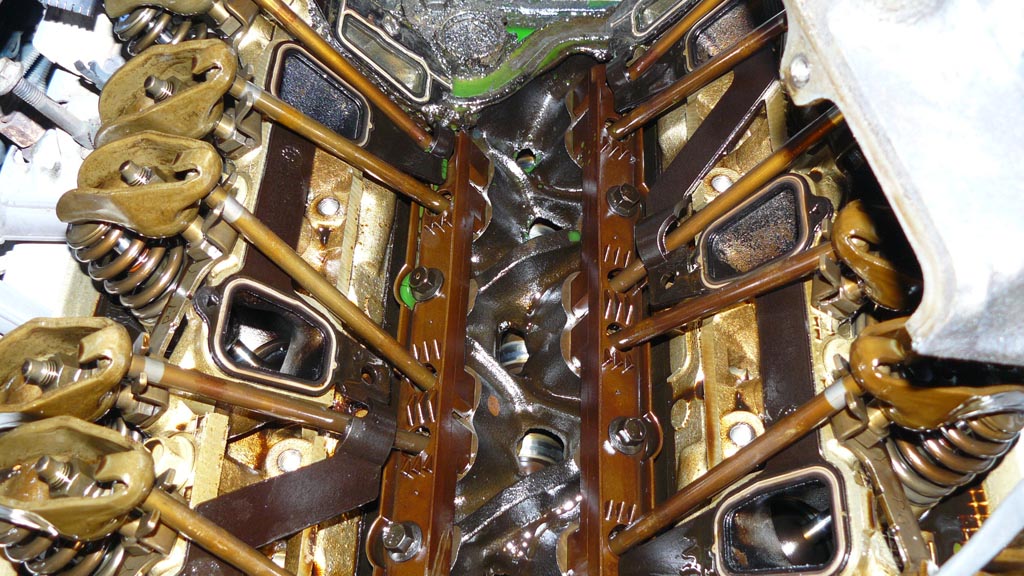
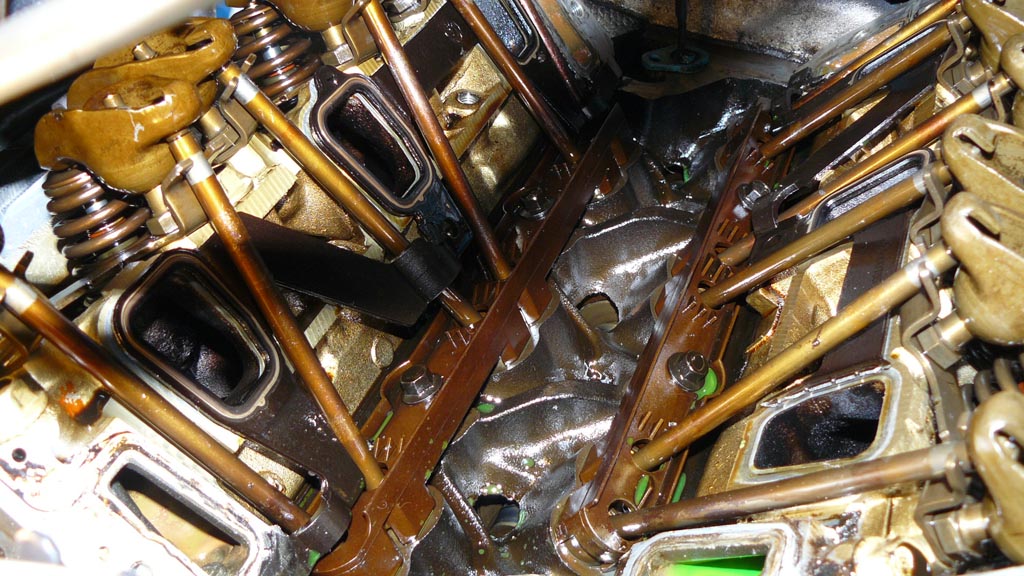
Had to work on the coolant port areas quite a bit. No pits on my heads at all though! Just a bit of an impression. Looks like the FelPro's actually sit outside the original gasket location.. Works for me. What I didn't realize was, I had to only pull 3 rods to take the old ones off, but you had to remove all the rods to put these new ones on. lol Oh well. Used some assembly lube, put the rods back in. Just have to torque them, finish cleaning the LIM and put her together! Yay! With any luck it will be done tomorrow. That will give me a day to play with it, before the meet. Goodie.
Had to work on the coolant port areas quite a bit. No pits on my heads at all though! Just a bit of an impression. Looks like the FelPro's actually sit outside the original gasket location.. Works for me. What I didn't realize was, I had to only pull 3 rods to take the old ones off, but you had to remove all the rods to put these new ones on. lol Oh well. Used some assembly lube, put the rods back in. Just have to torque them, finish cleaning the LIM and put her together! Yay! With any luck it will be done tomorrow. That will give me a day to play with it, before the meet. Goodie.
-
Money pit Beretta
- Registered User
- Posts: 6411
- Joined: Thu Jul 26, 2007 11:36 am
- Location: Kansas
Re: Howdy all
You had to take off all the push rods to get the new gasket on? Dang, thought I could save some time with the way the new ones go over. What did you use to get all the coolant out of the lifter valley? How did you get rid of the pits?
keep'em flying!
Re: Howdy all
Well, with these gaskets, they lay behind every rod. So yeah. No biggie.
As for the coolant, well I had drained the coolant from the radiator a bit first, to be sure the level was below the manifold. I had also opened the upper bypass etc so that the coolant would drain out or at least most of it would. There was still some that went down into the lifter vally but it will be ok. I will be pouring some oil down across the lifters before closing it and changing the oil anyway before starting it. Then change it again after 1000 miles or less. I already lubed the rods, so should be fine.
As for the pits well there wasn't any. There were some impressions from the old gasket, but pitting was very slight. I used a red scotchbright on the mating surfaces, just to make sure they were good and clean, then used a rag with engine degreaser, then wiped that away with some wax & grease remover, then wiped that dry, then set the gasket in place, installed the rods, finger tightened the rockers (making sure they were aligned properly, etc).
All I have left, is to cover the area, flip the manifold over, clean it the same way, install the new T Stat, then assemble.
-
Money pit Beretta
- Registered User
- Posts: 6411
- Joined: Thu Jul 26, 2007 11:36 am
- Location: Kansas
Re: Howdy all
I was talking about paper towels or a shop vac.  I do have some pitting, but fear making it flat and could make it uneven. What did you use to lube the push rods?
What was the Felpro # for the LIMG?
What was the Felpro # for the LIMG?
keep'em flying!
Re: Howdy all
No, I kept most of the dirt out of things rather well. I used just engine assembly lube, you can get it at any parts store. Looks like a giant tube of toothpaste.. LOL
As for the Felpro kit, the number of the whole kit is MS 98004 T. Comes with everything, except 93 and newer style EGR gaskets. Those you have to buy seperately.
You get the following parts with this kit:
2 - 98004 PermaDryPlus Intake Lower Gaskets
1 - 12-3100 EGR Tube gasket
1 - MB 12-3106 EGR Valve Gasket
1 - 35614 Thermostat Seal (I used this on the new T-Stat (Napa Superstat) I bought instead of the one it came with)
2 - 50442 Valve cover <--- These are also PermaDry, no sealant required.
1 - MB 70234 EGR Tube Gasket
1 - 91594 Thermostat Bypass O-Ring
2 - 96436 Intake Manifold Upper Gaskets
1 - 226L RTV Black <--- They give you just enough to do both sides of the manifold end seals.
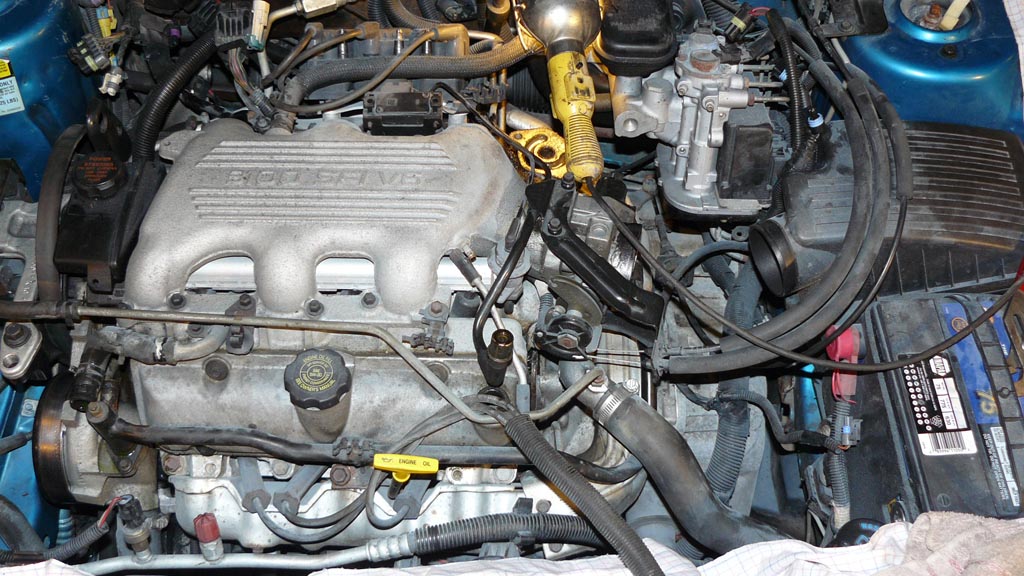
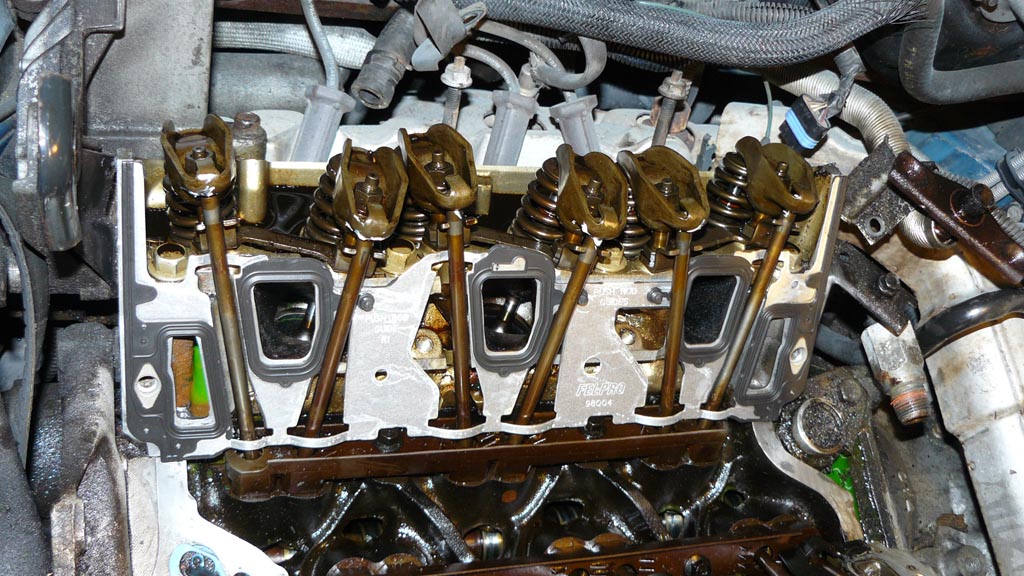
Tonight I managed to get the LIM re installed, torqued down etc. Went fairly smooth. I would have gotten more done, but had an ambulance run at 9:30 so had to stop work. Just got back home a bit ago, thought I would post then I am off to bed.
Enjoy, more to come tomorrow. I hope to have it running by the afternoon! Should go back together pretty quickly.
As for the Felpro kit, the number of the whole kit is MS 98004 T. Comes with everything, except 93 and newer style EGR gaskets. Those you have to buy seperately.
You get the following parts with this kit:
2 - 98004 PermaDryPlus Intake Lower Gaskets
1 - 12-3100 EGR Tube gasket
1 - MB 12-3106 EGR Valve Gasket
1 - 35614 Thermostat Seal (I used this on the new T-Stat (Napa Superstat) I bought instead of the one it came with)
2 - 50442 Valve cover <--- These are also PermaDry, no sealant required.
1 - MB 70234 EGR Tube Gasket
1 - 91594 Thermostat Bypass O-Ring
2 - 96436 Intake Manifold Upper Gaskets
1 - 226L RTV Black <--- They give you just enough to do both sides of the manifold end seals.
Tonight I managed to get the LIM re installed, torqued down etc. Went fairly smooth. I would have gotten more done, but had an ambulance run at 9:30 so had to stop work. Just got back home a bit ago, thought I would post then I am off to bed.
Enjoy, more to come tomorrow. I hope to have it running by the afternoon! Should go back together pretty quickly.
-
3X00-Modified
- Administrator
- Posts: 10920
- Joined: Thu Jul 05, 2007 9:18 am
- Location: Brooklyn CT
Re: Howdy all
Make sure you put a blob of sealant on the V junctions of the upper and lower before you put the valve covers on... it WILL leak there if you dont add something.