How To: Re-do your head liner
How To: Re-do your head liner
Supplies:
2.5 yards of fabric
1 can of Permatex headliner and carpet adhesive
Scisors, blade, or other fabric cutting tool.
Philips head screwdriver
OPTIONAL:
Clothing Iron
Paint Roller
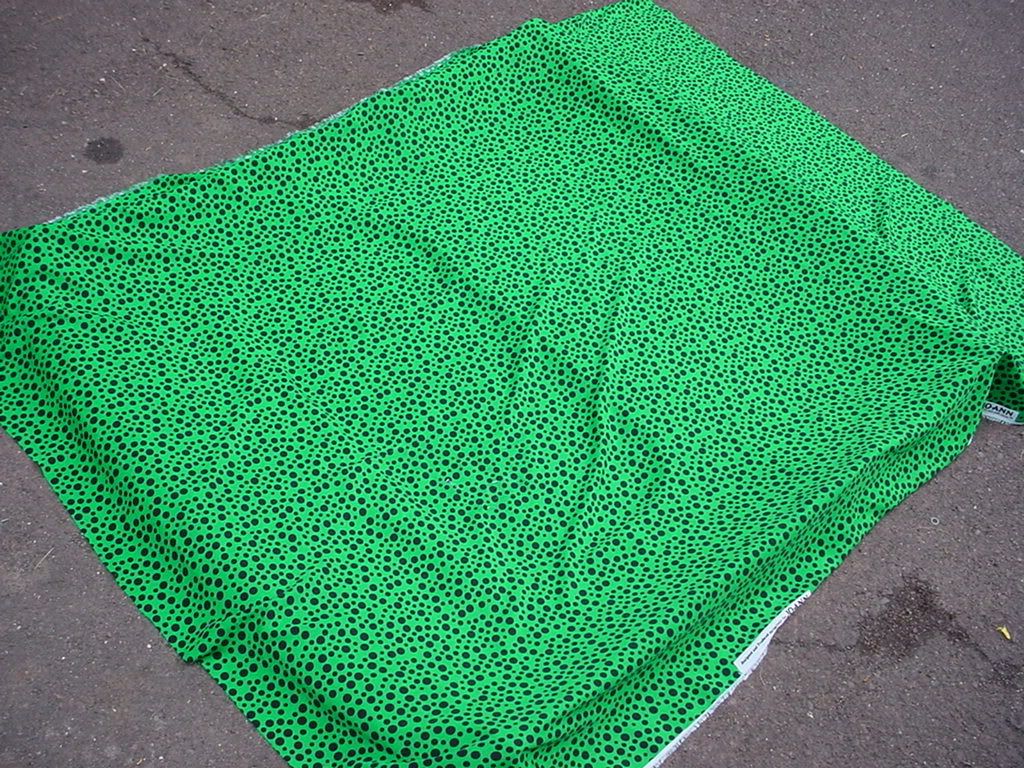
The first thing you need to do is select a fabric that you want to recover your head liner in. You can get it from walmart, craft stores, etc...
The thicker fabrics and ones that have some stretch to them are much easier to use. A fabric that wont stretch makes contouring to the curves in the headliner very difficult.
Remove old head liner:
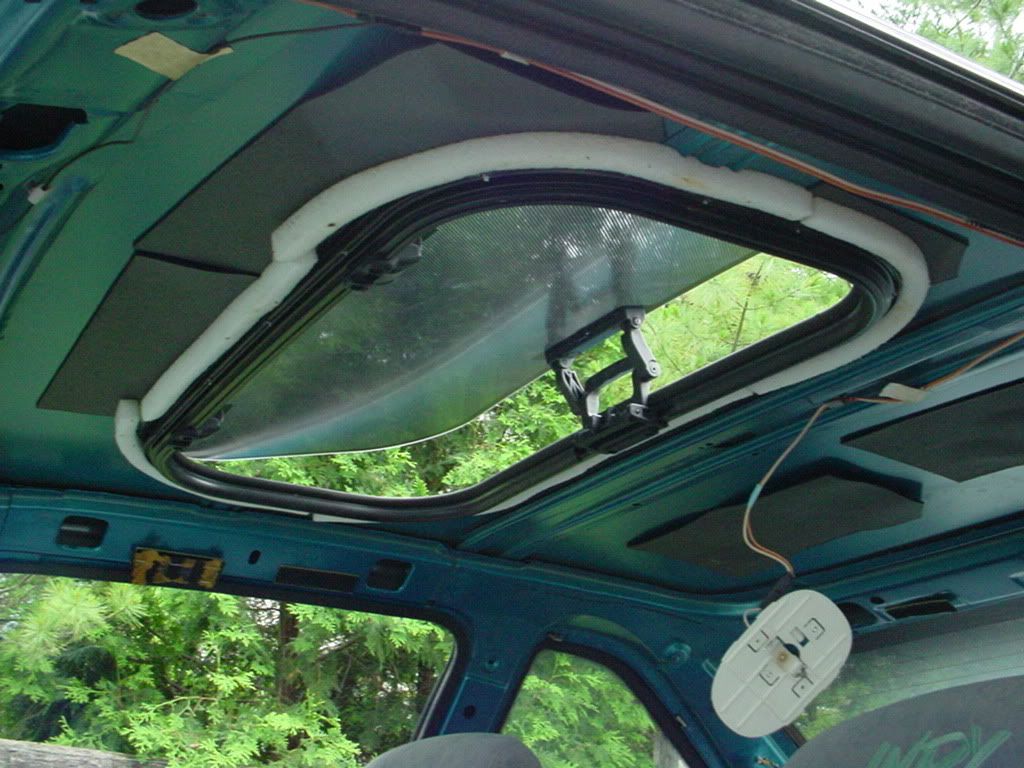
It is held up by the front pillar trim pieces, the rear upper trim pieces, the sun visors, the dome light, and a sunroof if you have one.
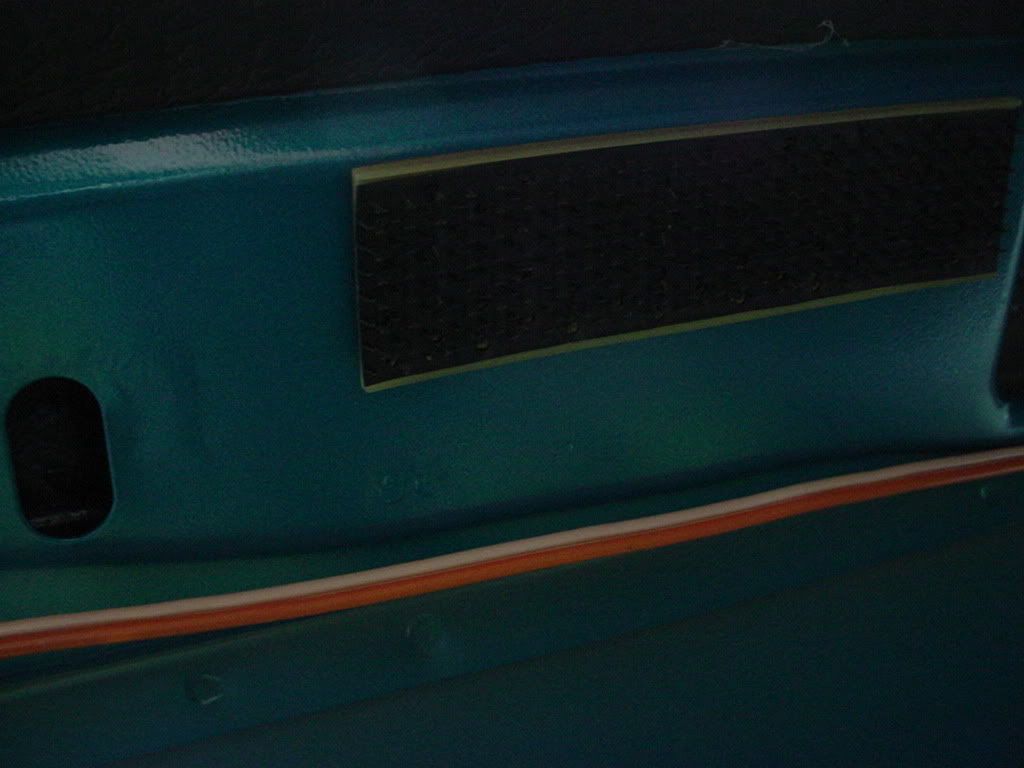
It also has 8 velcro strips around the peremeter. 2 over each door, 2 in the back, and 2 in the front. BE CAREFUL removing these! They can easily be torn out of the headliner backing.
This is what those velcro strips look like.
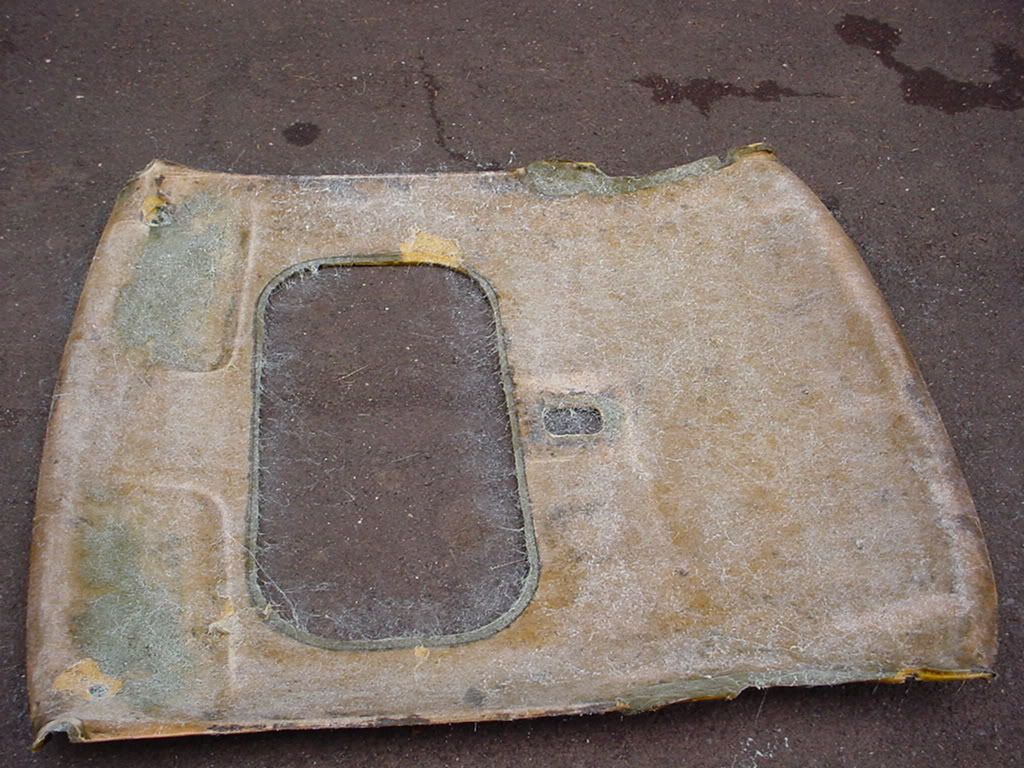
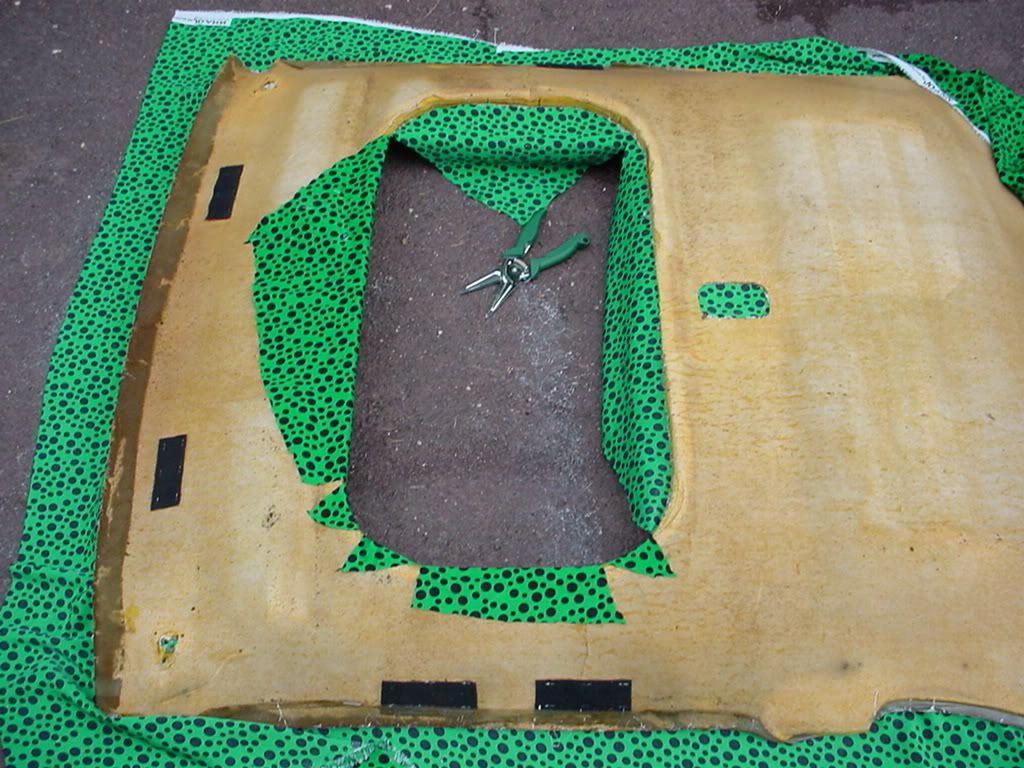
Now that you have the headliner out, you need to tear the old fabric off. Mine was already half off so it just came right off.
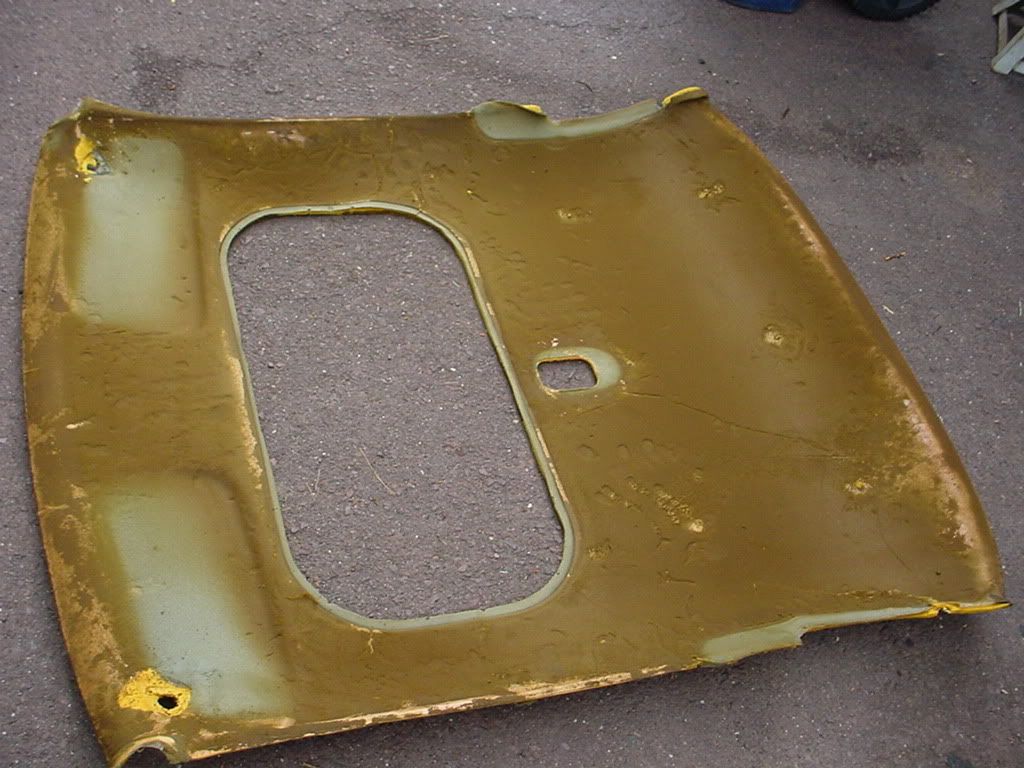
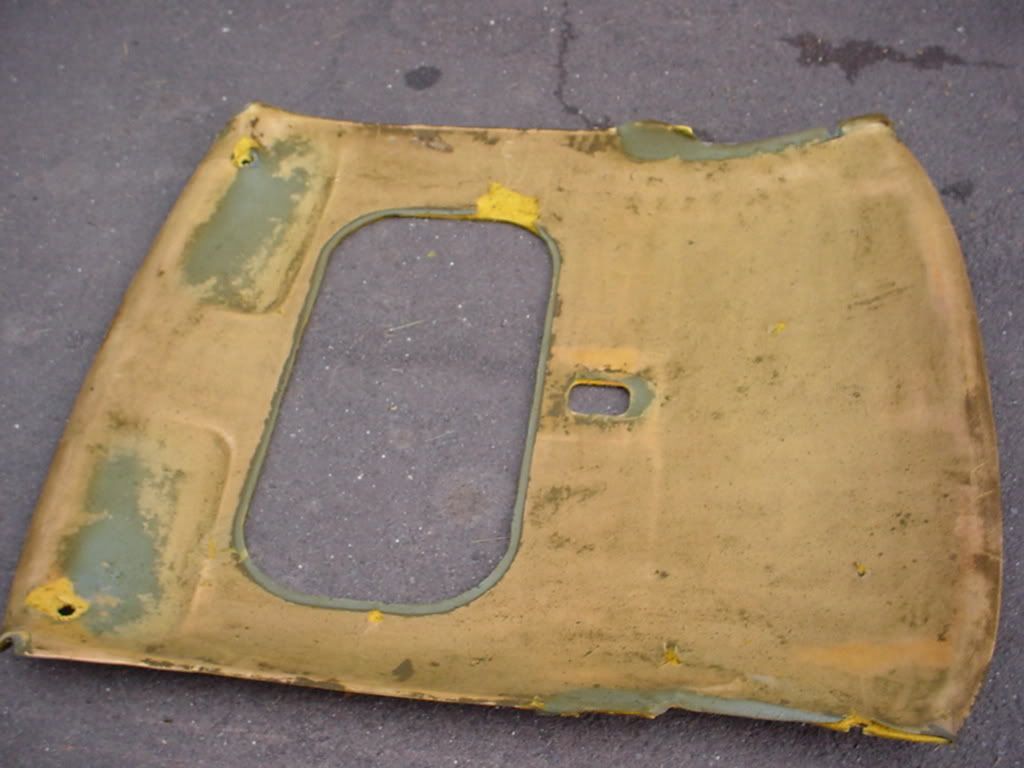
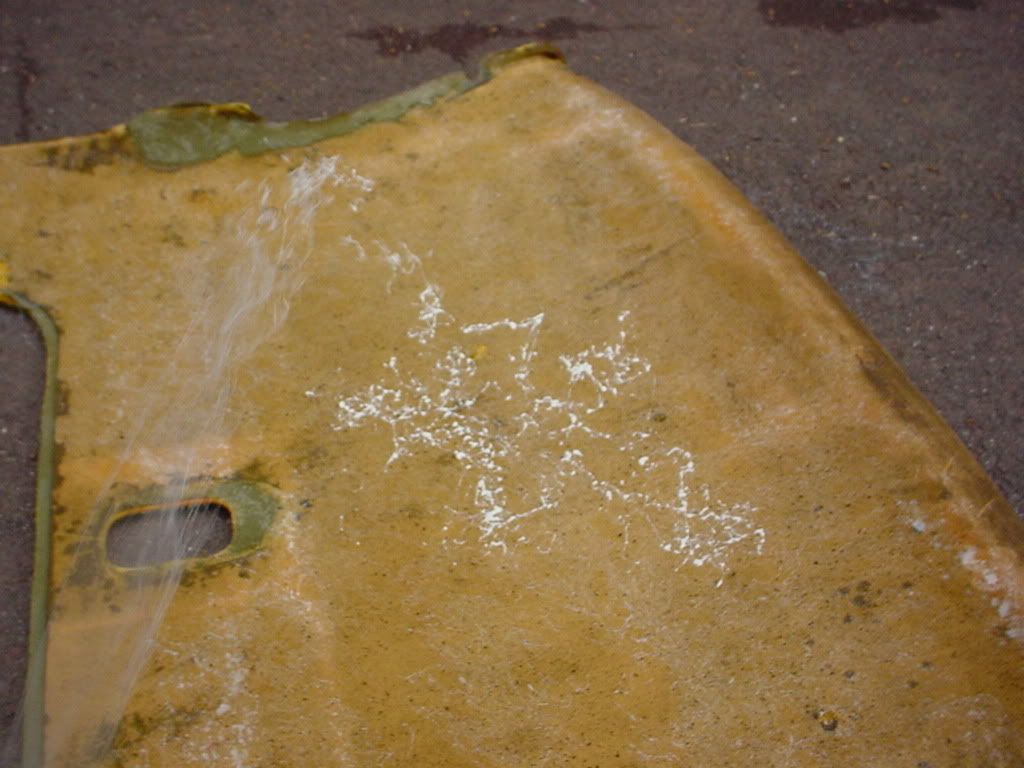
You will see nasty brown foam all over it. The foam has deteriorated over the years. You COULD leave it on there, but your headliner will sag again probably within a few months.
The best option is to remove all of the bad foam. Its so old that you can just rub it off with your hands like this:

Done:
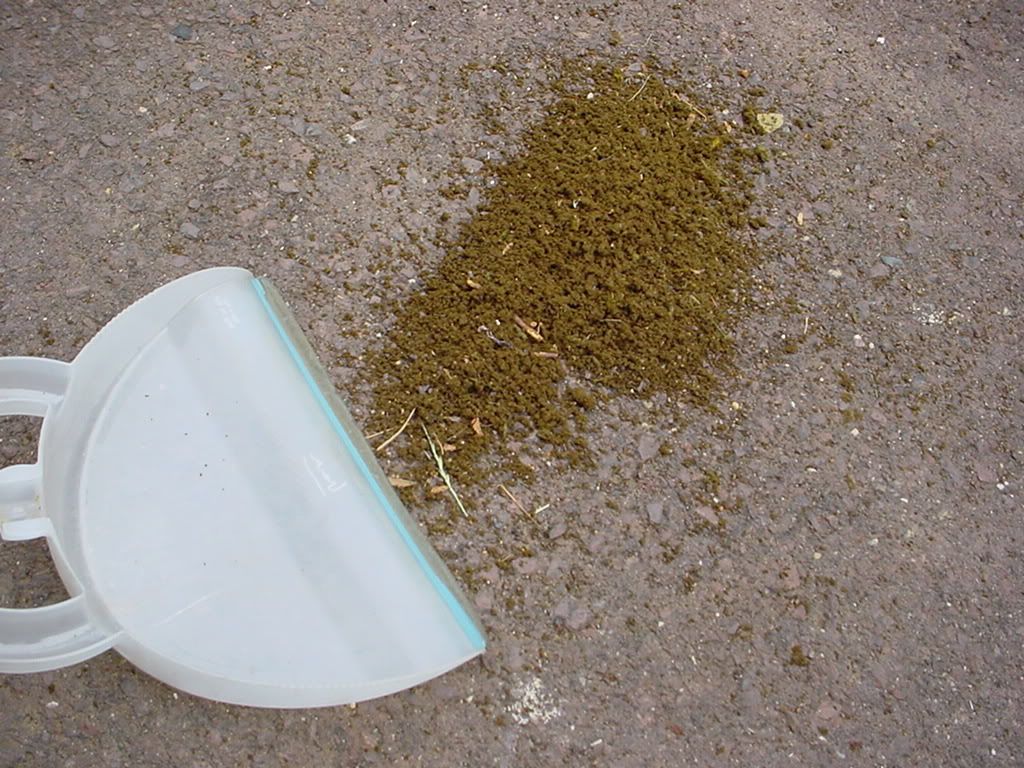
Now sweep the mess up so it doesn't interfere with the rest of the project
IMPORTANT NOTE: If any of your velcro strips ripped off the board during removal, NOW would be the perfect time to staple them back on!
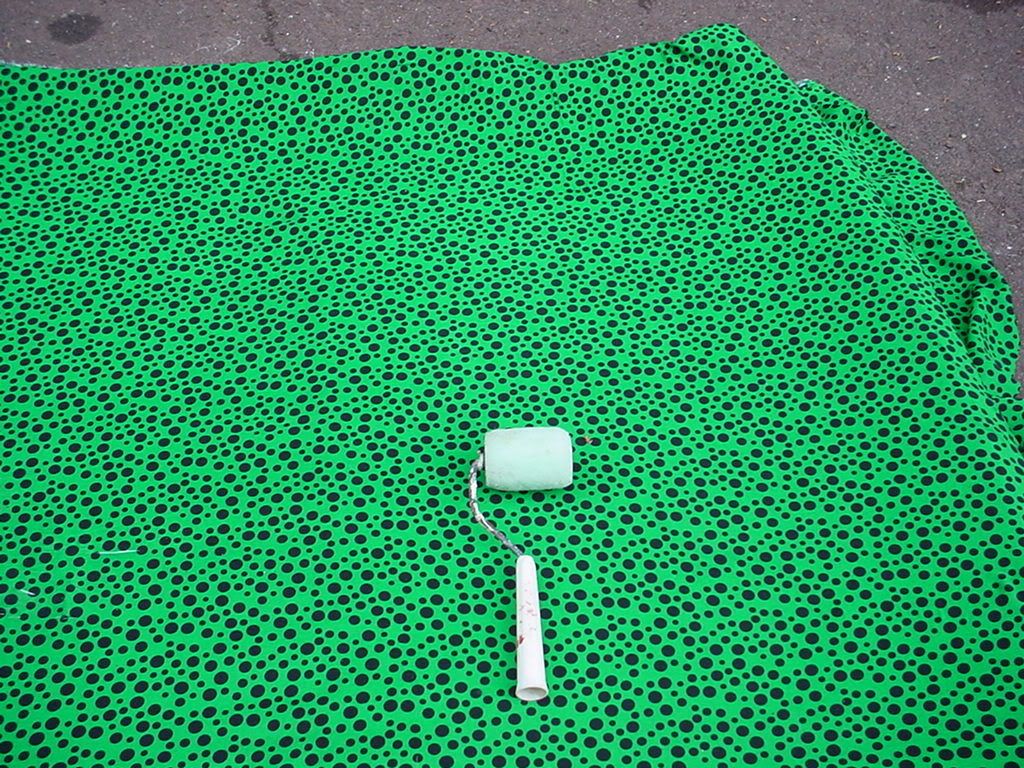
Next step is to test fit your fabric. Just lay it over the board to get a feel for everything.
OPTIONAL: At this time you could now iron your fabric to remove any wrinkles. However, you can work out the wrinkles later, its just more of a pain.
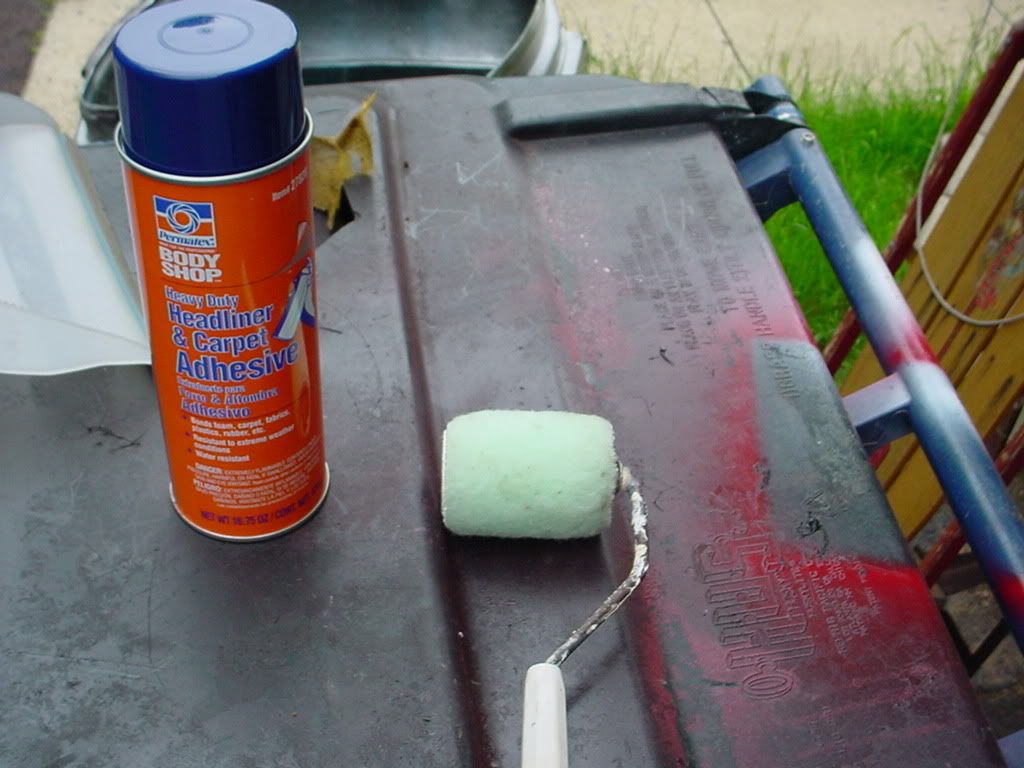
Now its time to apply the glue to the board. It looks like a spider web coming out. I used about a half can on the board. It sinks in a little so put it on heavy!
^^^^^Yeah you like that action shot!!!!
Here is it all glued
Now let that glue set for 5-10 minutes. When you spray it its not even sticky, it needs some time to tack up.
Now comes the most crucial part.
Lay down the fabric just like you did in the mock up.
Immediately start working your way from the center out taking out wrinkles and contouring the fabric to the headliner. You can use a paint roller to help you but honestly hands work best.
You have some time to work with the glue, so don't panic. Get all the wrinkles out and make sure the fabric is bonded to every corner and curve.
Now you can start cleaning it up.
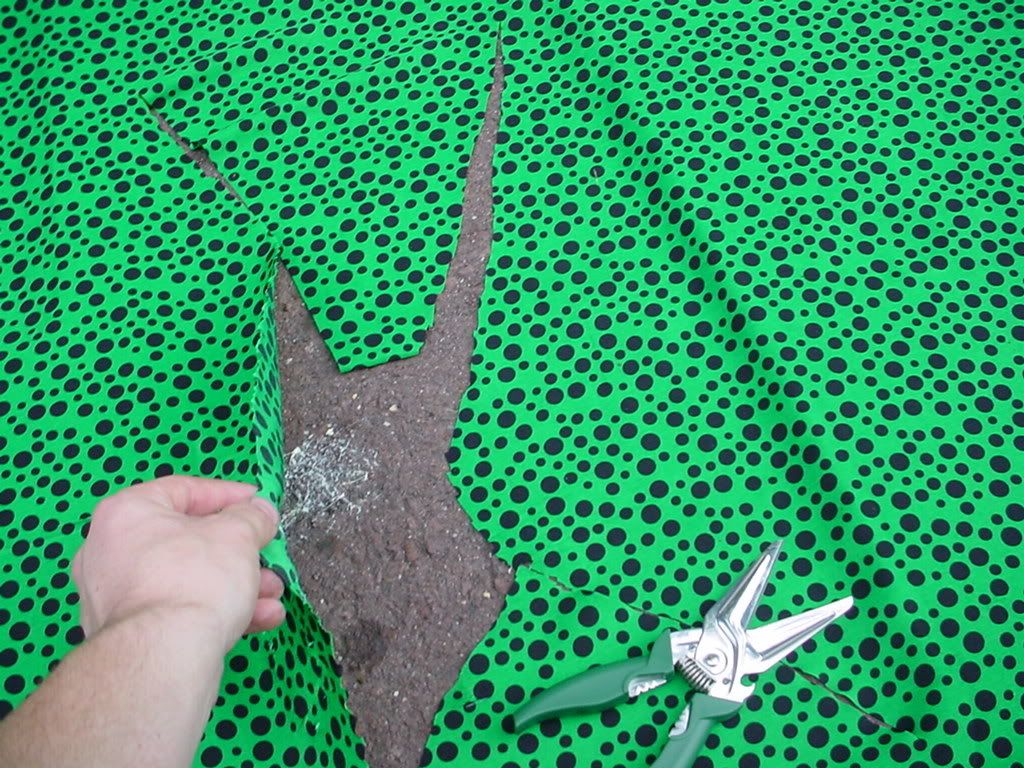
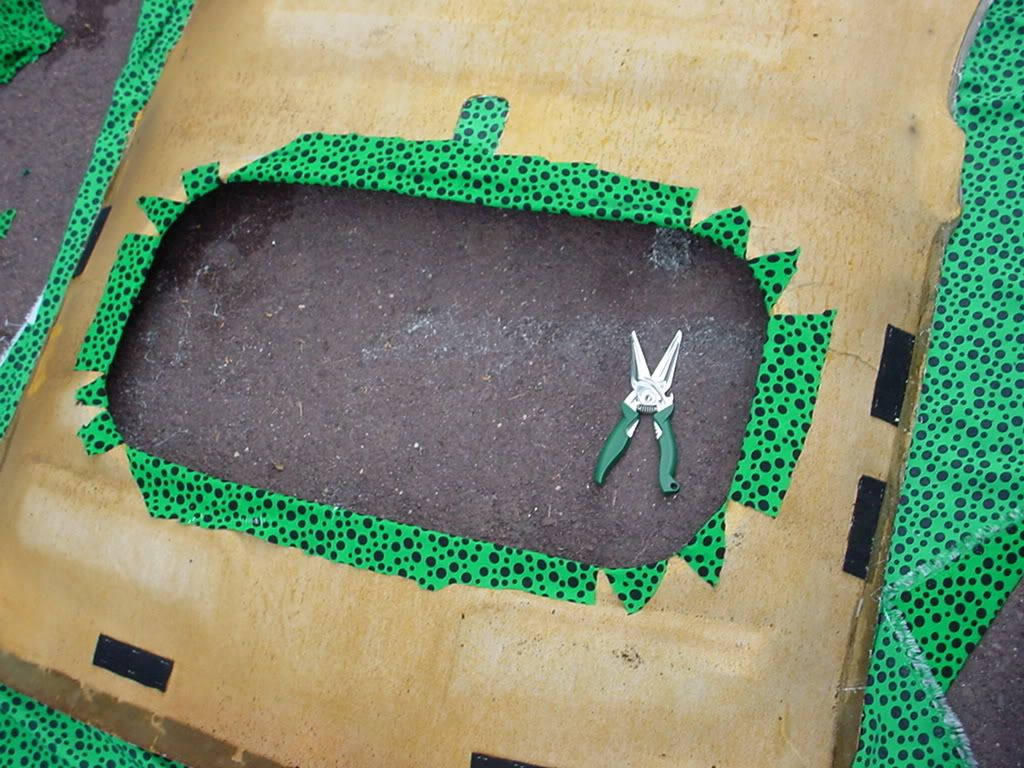
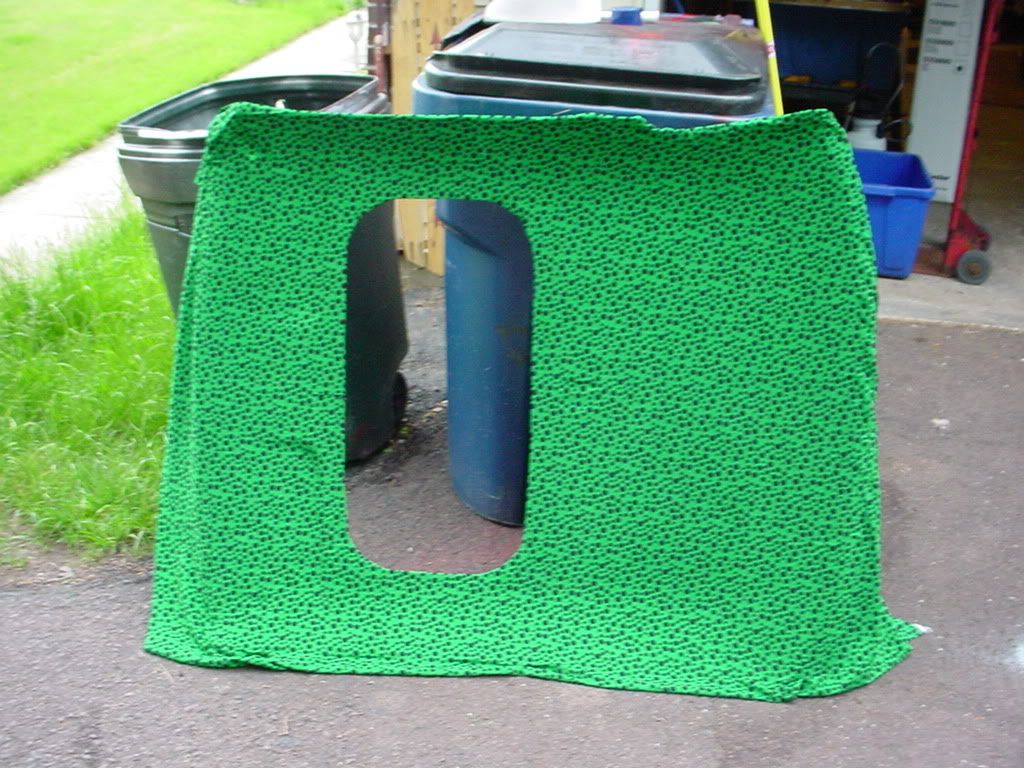
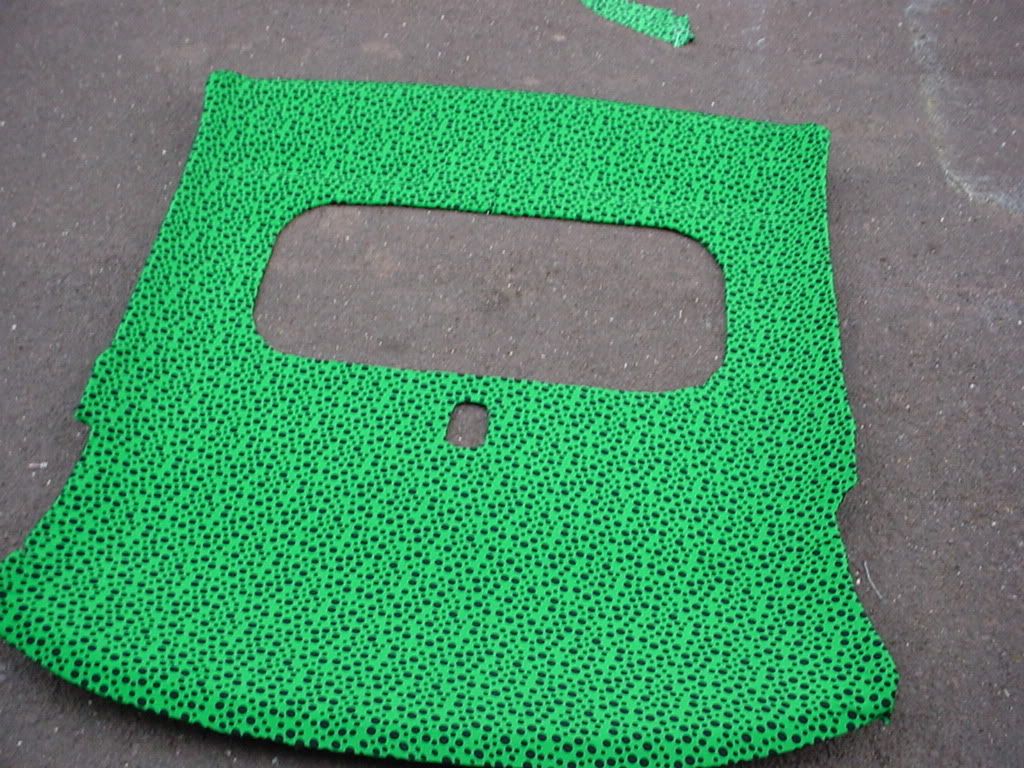
For the sunroof, cut a big X in the fabric. Then you can cut that up into smaller sections so the fabric can be wrapped around and glued to the back side of the board.
2.5 yards of fabric
1 can of Permatex headliner and carpet adhesive
Scisors, blade, or other fabric cutting tool.
Philips head screwdriver
OPTIONAL:
Clothing Iron
Paint Roller
The first thing you need to do is select a fabric that you want to recover your head liner in. You can get it from walmart, craft stores, etc...
The thicker fabrics and ones that have some stretch to them are much easier to use. A fabric that wont stretch makes contouring to the curves in the headliner very difficult.
Remove old head liner:
It is held up by the front pillar trim pieces, the rear upper trim pieces, the sun visors, the dome light, and a sunroof if you have one.
It also has 8 velcro strips around the peremeter. 2 over each door, 2 in the back, and 2 in the front. BE CAREFUL removing these! They can easily be torn out of the headliner backing.
This is what those velcro strips look like.
Now that you have the headliner out, you need to tear the old fabric off. Mine was already half off so it just came right off.
You will see nasty brown foam all over it. The foam has deteriorated over the years. You COULD leave it on there, but your headliner will sag again probably within a few months.
The best option is to remove all of the bad foam. Its so old that you can just rub it off with your hands like this:
Done:
Now sweep the mess up so it doesn't interfere with the rest of the project
IMPORTANT NOTE: If any of your velcro strips ripped off the board during removal, NOW would be the perfect time to staple them back on!
Next step is to test fit your fabric. Just lay it over the board to get a feel for everything.
OPTIONAL: At this time you could now iron your fabric to remove any wrinkles. However, you can work out the wrinkles later, its just more of a pain.
Now its time to apply the glue to the board. It looks like a spider web coming out. I used about a half can on the board. It sinks in a little so put it on heavy!
^^^^^Yeah you like that action shot!!!!
Here is it all glued
Now let that glue set for 5-10 minutes. When you spray it its not even sticky, it needs some time to tack up.
Now comes the most crucial part.
Lay down the fabric just like you did in the mock up.
Immediately start working your way from the center out taking out wrinkles and contouring the fabric to the headliner. You can use a paint roller to help you but honestly hands work best.
You have some time to work with the glue, so don't panic. Get all the wrinkles out and make sure the fabric is bonded to every corner and curve.
Now you can start cleaning it up.
For the sunroof, cut a big X in the fabric. Then you can cut that up into smaller sections so the fabric can be wrapped around and glued to the back side of the board.
Re: How To: Re-do your head liner
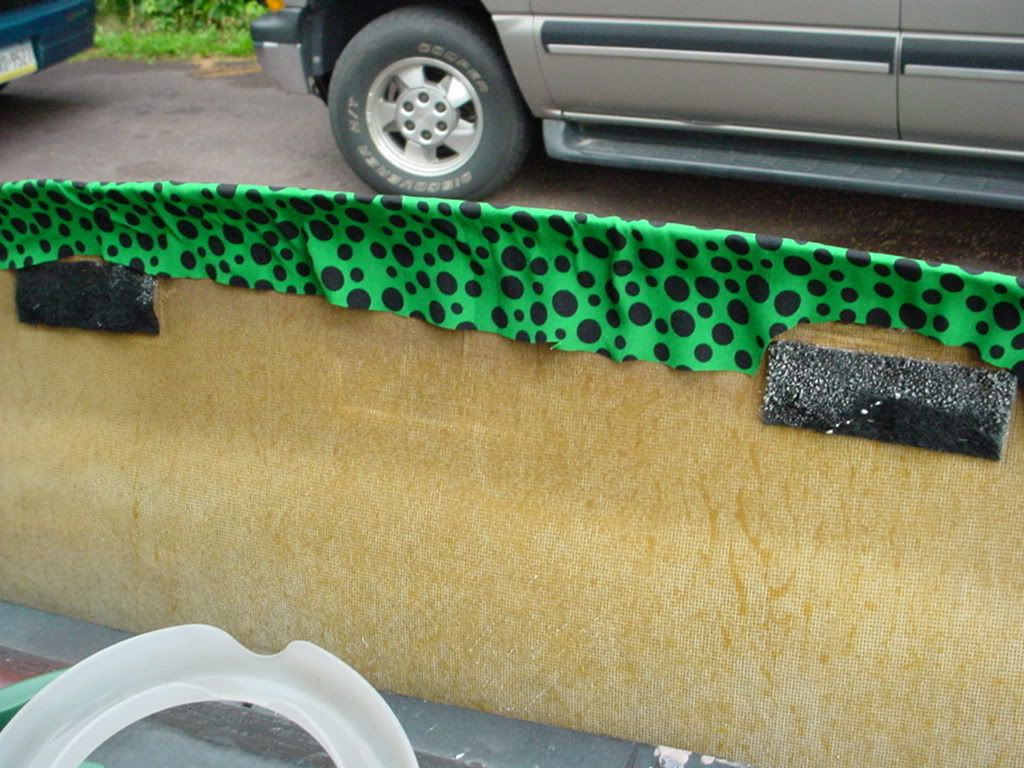
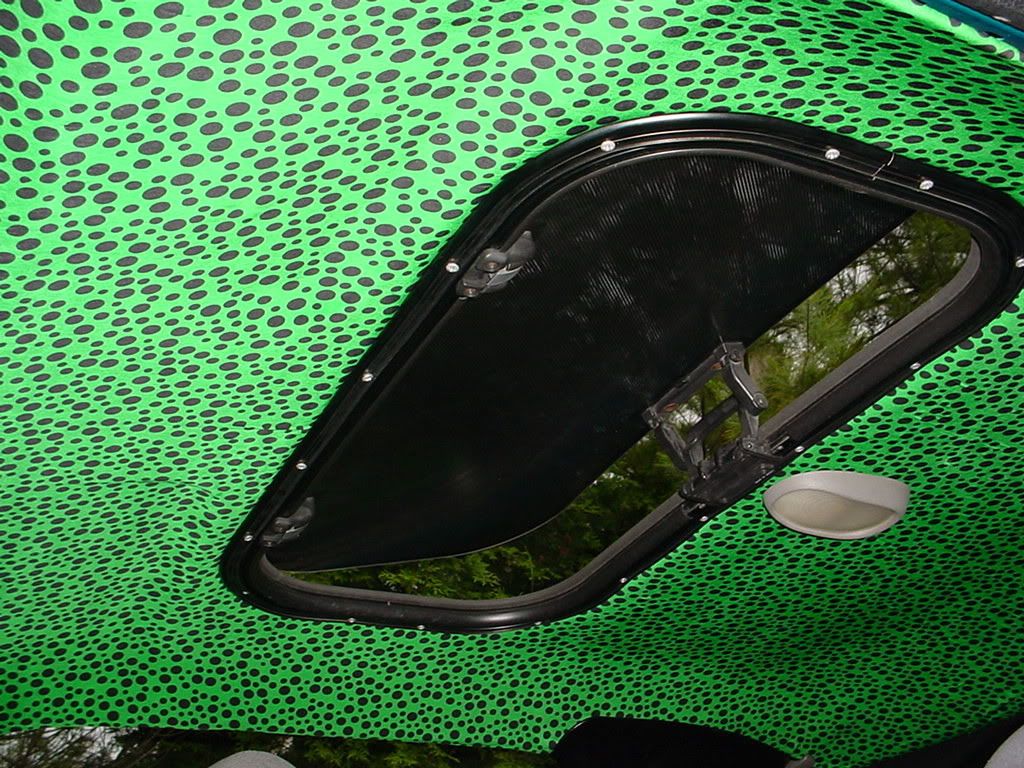
Same process goes for the edges. Just spray it, wait a minute or 2, wrap it, and trim it.

Be sure to trim around the velcro strips!
Heres what it will look like when your done.
Then Re-install it in the car. I only waited an hour after I finished to put it back in and it didnt cause any issues
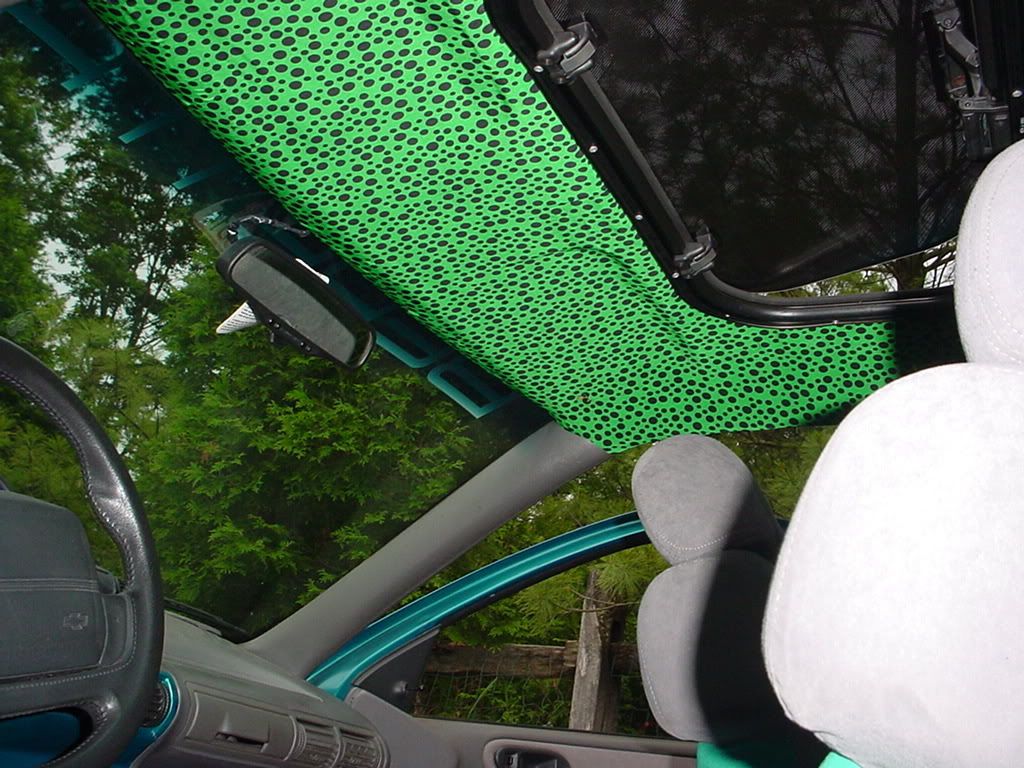
And don't make fun of my fabric selection, it looks sick!
Be sure to trim around the velcro strips!
Heres what it will look like when your done.
Then Re-install it in the car. I only waited an hour after I finished to put it back in and it didnt cause any issues
And don't make fun of my fabric selection, it looks sick!
-
Asylum

- Registered User
- Posts: 3050
- Joined: Wed Mar 31, 2004 9:36 am
- Location: Hamilton, Ontario, Canada
- Contact:
Re: How To: Re-do your head liner
Great write up but MY GOD!
That is just plain horrifyingly UGLY!!

That is just plain horrifyingly UGLY!!
Eric
Asylum Motorsports
"Where we're not happy 'til YOU'RE not happy!
'91 California Quad (Gone with just a bit of "Seller's Remorse".)
'92 3500 GT gone and not really missed. It was fun. Documented 13.47 N/A.
Asylum Motorsports
"Where we're not happy 'til YOU'RE not happy!
'91 California Quad (Gone with just a bit of "Seller's Remorse".)
'92 3500 GT gone and not really missed. It was fun. Documented 13.47 N/A.
-
3X00-Modified

- Administrator
- Posts: 10920
- Joined: Thu Jul 05, 2007 9:18 am
- Location: Brooklyn CT
Re: How To: Re-do your head liner
Pinned, but don't follow all these steps... actually just don't pick the same headliner fabric as he did 


-
Money pit Beretta
- Registered User
- Posts: 6411
- Joined: Thu Jul 26, 2007 11:36 am
- Location: Kansas
Re: How To: Re-do your head liner
I did it because nobody else really likes it. KISS MY ASS haha.
In reality i will probaby do it in some black suade in the future once i get a nice set of visors ro wrap in the same material.
This only cost me 16 bucks.
In reality i will probaby do it in some black suade in the future once i get a nice set of visors ro wrap in the same material.
This only cost me 16 bucks.
-
woody90gtz
- Registered User
- Posts: 4764
- Joined: Thu Jul 11, 2002 8:45 pm
- Location: Walton, NY
- Contact:
Re: How To: Re-do your head liner
$16 too much. haha
Although right now the underside of my roof is a similar color...
Although right now the underside of my roof is a similar color...
91 "SS" - WOT 3400/5spd - 13.29@101.6 - World's fastest N/A FWD Beretta
96 "T56" LS/6spd/8.8 RWD swap - 13.45@104.7 lol
GEARHEAD dezign youtube
96 "T56" LS/6spd/8.8 RWD swap - 13.45@104.7 lol
GEARHEAD dezign youtube
-
Money pit Beretta
- Registered User
- Posts: 6411
- Joined: Thu Jul 26, 2007 11:36 am
- Location: Kansas
Re: How To: Re-do your head liner
Ok........ I just thought your car looked very nice and it was a shame that you did that. Black suede? It looks like everything else is gray in there. Don't forget to brush it from time to time, so you don't get it in your eyes. Barry, you are a very strange man. 
keep'em flying!
Re: How To: Re-do your head liner
My interior is half and half. Carpet and panels are black, dash door panels and seats are gray.
-
Money pit Beretta
- Registered User
- Posts: 6411
- Joined: Thu Jul 26, 2007 11:36 am
- Location: Kansas
Re: How To: Re-do your head liner
I guess that will work then. Still, it's kinda strange.
keep'em flying!
Re: How To: Re-do your head liner
Money pit Beretta wrote:I guess that will work then. Still, it's kinda strange.
.... clearly he is a strange individual.
Re: How To: Re-do your head liner
Its very different. But good job. If you like it, that's all that matters. I am doing mine today. I did my sun visors last night. I took a diff approach and went with black leather, but to each their own.
1996 BERETTA Z26
-
gregtheskin
- Registered User
- Posts: 7
- Joined: Wed Nov 18, 2009 10:24 pm
Re: How To: Re-do your head liner
How did you pull the plastic trim peices out?
-
BerettaMN
- Registered User
- Posts: 186
- Joined: Fri Feb 18, 2011 11:16 pm
- Location: St. Paul Mn
- Contact:
Re: How To: Re-do your head liner
Very nice job, I would go with the oem foam backed fabric though. Some fabrics bleed through.