Leak Fixing, Part II
-
pghturbo88

- Registered User
- Posts: 99
- Joined: Sat Apr 05, 2008 9:16 am
Leak Fixing, Part II
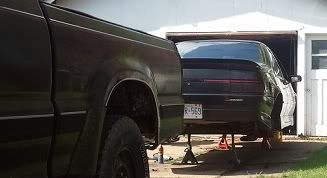
Tore the passenger side apart this spring to find and fix the culprit responsible for puddling in the back footwell. Tip: While you have everything pulled out, DO THE OTHER SIDE TOO! After a summer of no leaks, the fall rains have revealed a leak on the driver's side. So now I get to do it all again. Once again, the water leak diagnostic information on this site has proved invaluable. My other tip is to take an extra ten minutes and remove the wiper motor, it really opens things up in that area for maneuvering around the caulking gun (used polyurethane roofing sealant as I did on the other side). Just need a trip to the parts store to replace the trim fasteners that broke off during removal. Ah, the joys of owning a 23 year old car.
1988 Chrysler LeBaron Convertible 2.2L Turbo (Original Owner)
1989 Beretta GT 2.8L (Original Owner)
1996 Chrysler Town & Country 3.8L
2009 Honda Accord EX Sedan 2.4L (Original Owner)
1989 Beretta GT 2.8L (Original Owner)
1996 Chrysler Town & Country 3.8L
2009 Honda Accord EX Sedan 2.4L (Original Owner)
-
berettaboi
- Registered User
- Posts: 973
- Joined: Sun Mar 23, 2008 10:58 pm
- Location: canananada
Re: Leak Fixing, Part II
funny, i noticed the same thing after i had a new windshield put in, and had them seal up the passenger side... guess i didnt look deep enough at the drivers side... what a piss off.
4th one's a charm, 5th one is, beginnning to sound like this is an addiction...
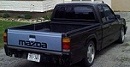
95 black z26, '96 White z26 awaiting new life, and 2.5 mazda trucks
95 black z26, '96 White z26 awaiting new life, and 2.5 mazda trucks