Short Project: Fresh Air Vent water leak from weak seal.
-
SuzukiGhostRider

- Registered User
- Posts: 2464
- Joined: Tue Feb 12, 2008 4:07 am
- Location: Milan NM
- Contact:
Short Project: Fresh Air Vent water leak from weak seal.
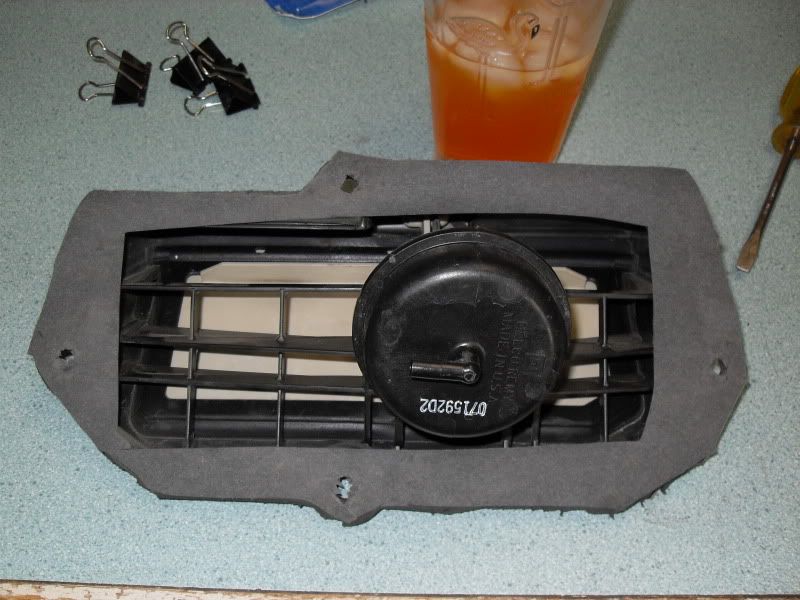
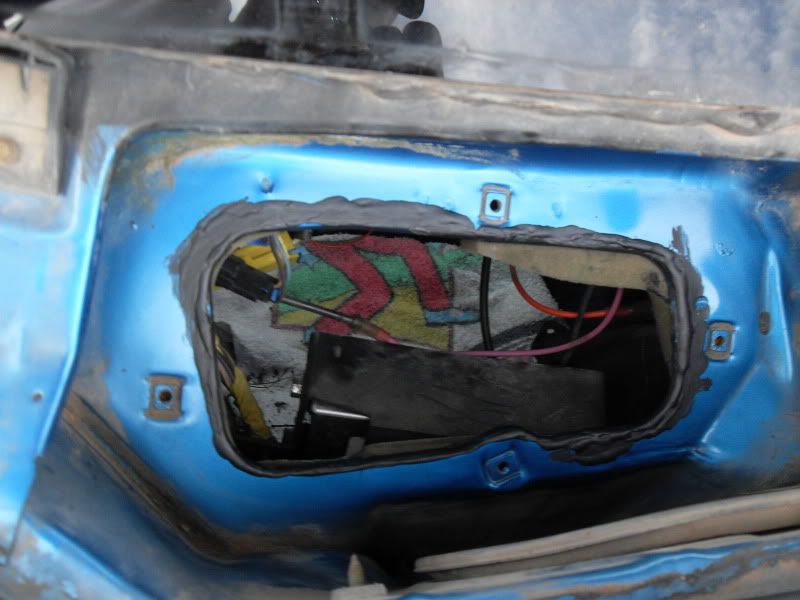
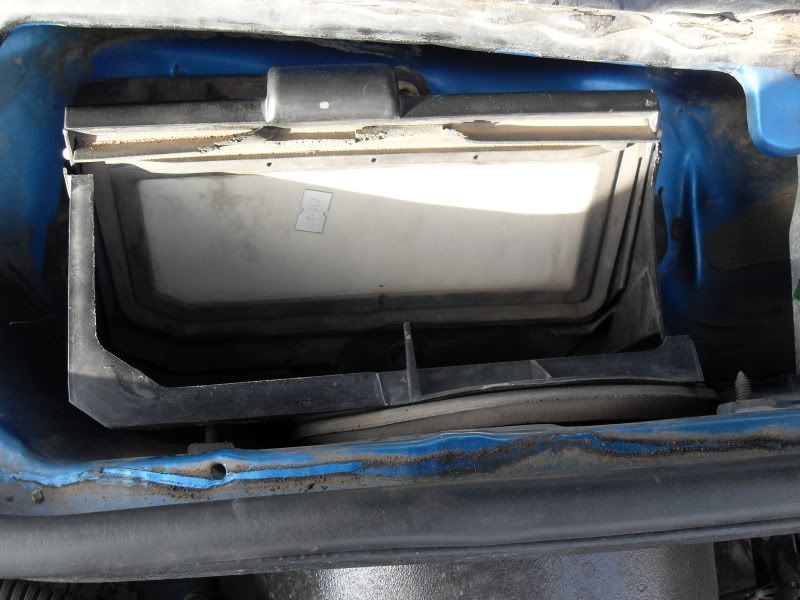
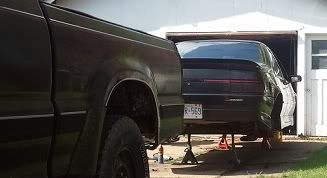
So today, I got a little motivated since my long awaited ECM chips should be in shortly, I hope , and fixed (I hope again,lol) my fresh air vent water leak. I removed the cowl and of course, every clip holding it on , sans one, was dried out and snapped to pieces upon removal of said clips. Got the fresh air vent out and took some gasket maker material I have and cut a new gasket out , trimmed to fit excellent on the outer edges and overlap on the inner edges.
I then took some GREAT stuff by Permatex that is a rubber atv basically , and adhered the new seal to the existing foam/rubber type seal The reason I did it like this is the existing seal was OK, but it was sandwiched a bit thin at the corner it had been leaking from. So, my reasoning was between the new seal on top and plenty of the rubber atv on both sides of the gasket as well as on the body where the vent bolts down SHOULD keep it from leaking anymore. I hope.
I know I'm no arteeest when it comes to cutting gaskets, but I think it works!
So , at any rate, pics below show new gasket installed, and rubber permatex on body and of course final installation. I know a few clips are missing in the finished pic, but trust me, they're in there now. Had to go get new ones. $2.49 for FOUR! What the hell.... Anyhow, enjoy, comment, whatever.
I'm HOPING like hell this fixed my water leak as I'm 100% positive it was coming from the fresh air vent seal. That Permatex rubber ATV is AWESOME! Sets up quick, forms nicely and seems to stick well, and it's supposed to be a waterproofer. So, if all is well, after I give it a day or so to cure, we'll see if I got if fixed. We're supposed to get hit with rain/snow Tuesday, so we'll find out then for sure.


Re: Short Project: Fresh Air Vent water leak from weak seal.
So that's what that is. Neat.
I think that's the one spot my car didn't leak from at some point haha. Hope it works!
I think that's the one spot my car didn't leak from at some point haha. Hope it works!
-
heavywoody
- Global Moderator
- Posts: 1991
- Joined: Sun Nov 03, 2002 4:10 pm
- Location: Concord, NC
- Contact:
Re: Short Project: Fresh Air Vent water leak from weak seal.
Looks good. Another sealant that would work good in this area is ribbon sealer (same stuff that is used in the tail lights of our cars and headlights of many cars).
Geoff
95 Z26 Turbo 3400 5spd - R&D Project
Beretta Preservation Society - Director of Acquisitions

95 Z26 Turbo 3400 5spd - R&D Project
Beretta Preservation Society - Director of Acquisitions
-
3X00-Modified

- Administrator
- Posts: 10920
- Joined: Thu Jul 05, 2007 9:18 am
- Location: Brooklyn CT
Re: Short Project: Fresh Air Vent water leak from weak seal.
I used the butyl windshield rope to do mine.
-
SuzukiGhostRider
- Registered User
- Posts: 2464
- Joined: Tue Feb 12, 2008 4:07 am
- Location: Milan NM
- Contact:
Re: Short Project: Fresh Air Vent water leak from weak seal.
Well, we have failure. I tested it and it still leaked.
Then it occurred to me and I checked on something. Only one of the bolts had had the rubber washer half ass attached when I pulled the unit. Yup, that's where it was leaking. Through the bolt holes and then running to the lower corner making it LOOK like the seal. And while I'm on the subject... WTF was GM thinking, using a FOAM "seal" to keep water out.... Really?? Wow...
So I went back and looked over the FSM pics again and realized I'd only HALF gotten the right idea on location of the sealant. GM specifies to put sealant AROUND the housing once mounted in place AND under the gasket. Spread between the body and plastic creating a water seal by doing so. Ok, so what's the point of the "seal" at this point? Not a damn thing except a sound deadener to prevent rattling I guess. So today I got more sealer , this time WINDSHIELD sealant from VersaChem.
Yesterday, I pulled the box, pulled the paper seal I'd made, laid down a fresh layer of rubber sealant from Permatex all around the edges just like above, and this time, laid it fairly thick around the bolt holes too. There are little "castle" towers coming down from the housing, so I figure they would mash into this layer creating a new "seal" around the bolt holes.
As an added measure today I used the VersaChem windshield sealant and went all around the upper and side edges molding it to body and plastic housing,effectively eliminating any gap wso. I was liberal with it, but not sloppy. The lower edge is almost impossible to get with the two housing pieces installed,BUT by the time any water goes around the top and both sides and hits the lower edge it's on a 60* or better incline towards the drain. It would quite literally have to go uphill to get in the bottom side of the unit. I was careful to have a continuous line all around one side to the top to the other side and wrapped the sides around the lower corners.
NOW I'm pretty confident I should have permanently sealed this damn leak.... I hope..... Pray with me..... 
I got done while temps were decent , re-installed everything, took it for a drive (code hasn't been showing up lately, further proof the E-PROM is whack) and got home. About 3 hours later, we started getting walloped by our first snow storm of the year. Really came down for awhile. So, in a bit, I'll go look and see, but I'm betting on a dry floor~!
Forgot a pic of the "new" layer of sealant, but use your imagination. Pic above with a layer of black sealant around the housing,lol.
Then it occurred to me and I checked on something. Only one of the bolts had had the rubber washer half ass attached when I pulled the unit. Yup, that's where it was leaking. Through the bolt holes and then running to the lower corner making it LOOK like the seal. And while I'm on the subject... WTF was GM thinking, using a FOAM "seal" to keep water out.... Really?? Wow...
So I went back and looked over the FSM pics again and realized I'd only HALF gotten the right idea on location of the sealant. GM specifies to put sealant AROUND the housing once mounted in place AND under the gasket. Spread between the body and plastic creating a water seal by doing so. Ok, so what's the point of the "seal" at this point? Not a damn thing except a sound deadener to prevent rattling I guess. So today I got more sealer , this time WINDSHIELD sealant from VersaChem.
Yesterday, I pulled the box, pulled the paper seal I'd made, laid down a fresh layer of rubber sealant from Permatex all around the edges just like above, and this time, laid it fairly thick around the bolt holes too. There are little "castle" towers coming down from the housing, so I figure they would mash into this layer creating a new "seal" around the bolt holes.
As an added measure today I used the VersaChem windshield sealant and went all around the upper and side edges molding it to body and plastic housing,effectively eliminating any gap wso. I was liberal with it, but not sloppy. The lower edge is almost impossible to get with the two housing pieces installed,BUT by the time any water goes around the top and both sides and hits the lower edge it's on a 60* or better incline towards the drain. It would quite literally have to go uphill to get in the bottom side of the unit. I was careful to have a continuous line all around one side to the top to the other side and wrapped the sides around the lower corners.
NOW I'm pretty confident I should have permanently sealed this damn leak.... I hope.....
I got done while temps were decent , re-installed everything, took it for a drive (code hasn't been showing up lately, further proof the E-PROM is whack) and got home. About 3 hours later, we started getting walloped by our first snow storm of the year. Really came down for awhile. So, in a bit, I'll go look and see, but I'm betting on a dry floor~!
Forgot a pic of the "new" layer of sealant, but use your imagination. Pic above with a layer of black sealant around the housing,lol.
-
berettaboi

- Registered User
- Posts: 973
- Joined: Sun Mar 23, 2008 10:58 pm
- Location: canananada
Re: Short Project: Fresh Air Vent water leak from weak seal.
good to hear, i have to pull my driverside apart still... maybe tomorrow night...
4th one's a charm, 5th one is, beginnning to sound like this is an addiction...
95 black z26, '96 White z26 awaiting new life, and 2.5 mazda trucks
95 black z26, '96 White z26 awaiting new life, and 2.5 mazda trucks
-
SuzukiGhostRider
- Registered User
- Posts: 2464
- Joined: Tue Feb 12, 2008 4:07 am
- Location: Milan NM
- Contact:
Re: Short Project: Fresh Air Vent water leak from weak seal.
So, the last attempt failed. The following was my third and final (as well as successful) attempt.
Sorry I haven't updated this. The car really pissed me off last time and I decided to walk away for a few days that turned into a few weeks,lol. Sometimes you just gotta tell the car to piss off....
Anyhow, I was right about the bolts. They were the remainder of the leak. I sealed them up with some windshield sealant over the top completely covering them (lol) and went all back around the top and sides of the unit checking for gaps or weak spots and filling any I found in. It's not ghetto, but it's not "pretty" looking either. It's hard to stay pretty with sealant. However, I did manage to keep it uniform and fairly neat.
That said, (after allowing a full 24 hour cure time) I dumped a BUNCH of water directly down the windshield, into the fresh air screen on the cowl piece, etc today and not ONE drop of water or even a HINT of moisture inside the car. It would appear I've won this time!
The only leak the car had was this fresh air vent assembly. Everything else appears to be rust free (shiny blue paint actually) and leak free.
So, SOLVED!
I also installed my "new" used ECM chip today to fix my code 43 issue from my other thread. That too , is working great now, and appears resolved as well!

Re: Short Project: Fresh Air Vent water leak from weak seal.
I have replaced the gasket in these with the GM one. The newer GM ones seem to hold a little better.

1990 Beretta GTZ 1995 Beretta Z26 1996 Beretta Z26
-
3X00-Modified
- Administrator
- Posts: 10920
- Joined: Thu Jul 05, 2007 9:18 am
- Location: Brooklyn CT
Re: Short Project: Fresh Air Vent water leak from weak seal.
I think the original GM one held just fine till it got 12+ years of age as well... that's the biggest problem.