the white car project | update 6.3.2012

Re: the white car project
Time for an real update.
Got the bump steer kit machined. First I was about to re-use the stock joints in upside-down mounting, but what would had been more work (have to remove struts for machining), so I took the other option and went with uniballs (heim joints), these need no modifications to stock strut bodies.
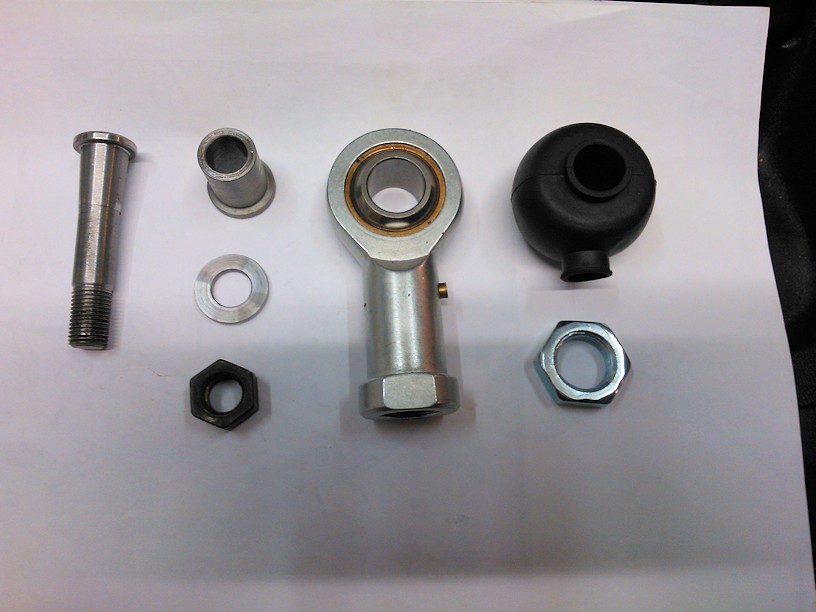
Here's whats included.
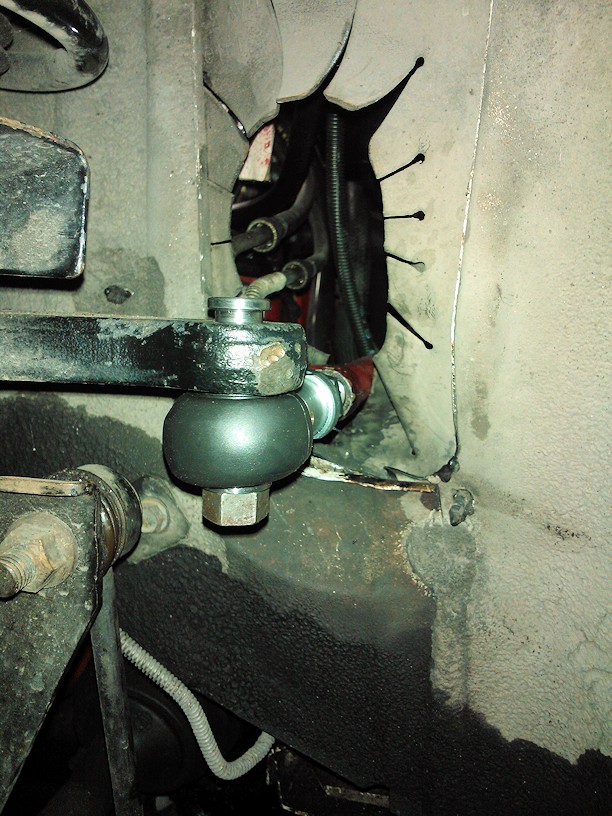
Mounted, need to drill hole for cotter pin, but it's good to go.
And the height difference in tierod mounting compared to stock joints.
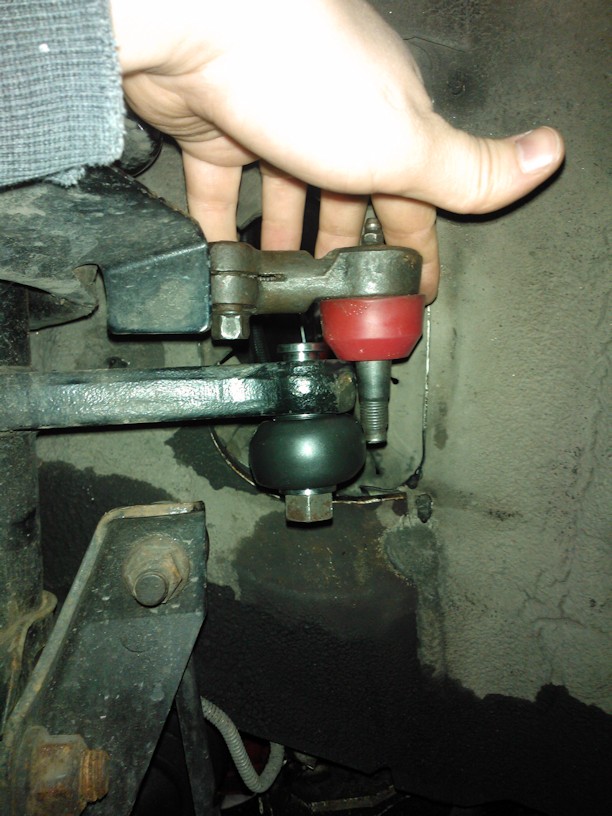
Btw, the stock joints actually do have little angle built into them, that might be recommenced for easier steering feel.
The nylon bushings at inner tierod ends may actually be a bad idea, since last 1/2 turn is really hard to do without power assist.
And that's even with tires not touching the floor. The suspension geometry gets tricky near the limiter, and the inner bushings do not give enough play.
I've already found the limits of stock strut mounts with my current setup They are visibly suffering every time I turn the wheel, and make popping noises near the limiter when the strut top mounting wants to move.
I'm going to have do create a cure for that, I think precise fit washers may just do.
Got the bump steer kit machined. First I was about to re-use the stock joints in upside-down mounting, but what would had been more work (have to remove struts for machining), so I took the other option and went with uniballs (heim joints), these need no modifications to stock strut bodies.
Here's whats included.
Mounted, need to drill hole for cotter pin, but it's good to go.
And the height difference in tierod mounting compared to stock joints.
Btw, the stock joints actually do have little angle built into them, that might be recommenced for easier steering feel.
The nylon bushings at inner tierod ends may actually be a bad idea, since last 1/2 turn is really hard to do without power assist.
And that's even with tires not touching the floor. The suspension geometry gets tricky near the limiter, and the inner bushings do not give enough play.
I've already found the limits of stock strut mounts with my current setup They are visibly suffering every time I turn the wheel, and make popping noises near the limiter when the strut top mounting wants to move.
I'm going to have do create a cure for that, I think precise fit washers may just do.

Re: the white car project | update 2.21.2012
you had that bolt machined from scratch?

1990 Beretta GTZ 1995 Beretta Z26 1996 Beretta Z26
Re: the white car project | update 2.21.2012
You need to use heim joints on the inside of the tierods too.
Since I am using stock steering on the drift car I will be playing with stock steering ALOT
Since I am using stock steering on the drift car I will be playing with stock steering ALOT
Re: the white car project | update 2.21.2012
There is a slight issues with that, you will need add spacer that will bring the mounting locations front at least 1", quite possibly even more, to get enough clearance to use straight tie rods.Barry wrote:You need to use heim joints on the inside of the tierods too.
-
3X00-Modified

- Administrator
- Posts: 10920
- Joined: Thu Jul 05, 2007 9:18 am
- Location: Brooklyn CT
Re: the white car project | update 2.21.2012
I think he means to use the factory arms and just cut off the stock end and adapt on a heim joint.
Re: the white car project | update 2.21.2012
Use an end like this, but with a spacer on the stud to bring you to the correcty alignment.
http://www.mcmaster.com/#rod-ends/=gcx6yg
Probably best to use a straight shaft.
Weba, and chance you can get more of those tapered studs you had made?
http://www.mcmaster.com/#rod-ends/=gcx6yg
Probably best to use a straight shaft.
Weba, and chance you can get more of those tapered studs you had made?
Re: the white car project | update 2.21.2012
Nope, I had 0 plans for mass-production since there are like.. 2-3? Beretta owners with shortened struts. This obviously won't work with stock length ones since lifting tires of the ground would put weight on the tie rods resting at the sheet metal. Mine just barely misses the hole's edge.
But it's very simple to make.
Just give the machinist guy the stock joint as cone reference ask him to do a longer stud version of it.
You want to have the cone part to be bit longer so you can be sure that it tightens all the way down with no play.
I recommend 12mm thickness for the stud, as it's the biggest that fits to the hole on the strut arm (and the arm is 20mm thick for reference)
My set is a bit prototype, it has no pre-drilled hole for a pin.
And I'd also improve the design by adding a shape on 'top' of the stud, that could be hold with tool while turning the nut.
Btw, the joint size is massive for a car this size. Even the thread on the tierod is M18 x 1.5. Also means bushing inside the joint.
Motorsport-graded joints in this size ain't cheap either. MUCH cheaper way would be mounting the stock joints upside-down, for that you need simple bushing and a washer, and bench-drill the struts, then you would also have the offset of stock joints, just use left side on right and vise versa.
Re: the white car project | update 2.21.2012
I have to shorten my steering arms anyway so I might as well start fresh with a smaller tierod and non tapered holes. My struts will be short as well. No need for all that factory droop.
I think I will try heim joints in the inside and outside with a custom tierod
I think I will try heim joints in the inside and outside with a custom tierod
Re: the white car project | update 2.21.2012
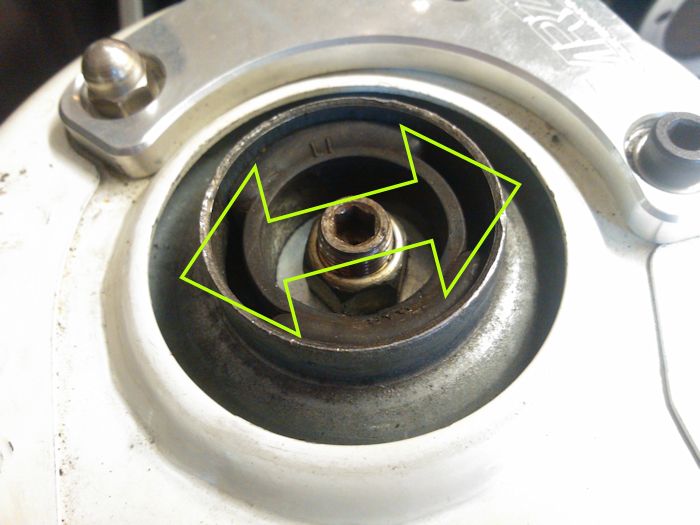
I added a washer under the strut nut, to stop the under load movement I had there when turning near the limiter, works perfect and the steering is also easier now.
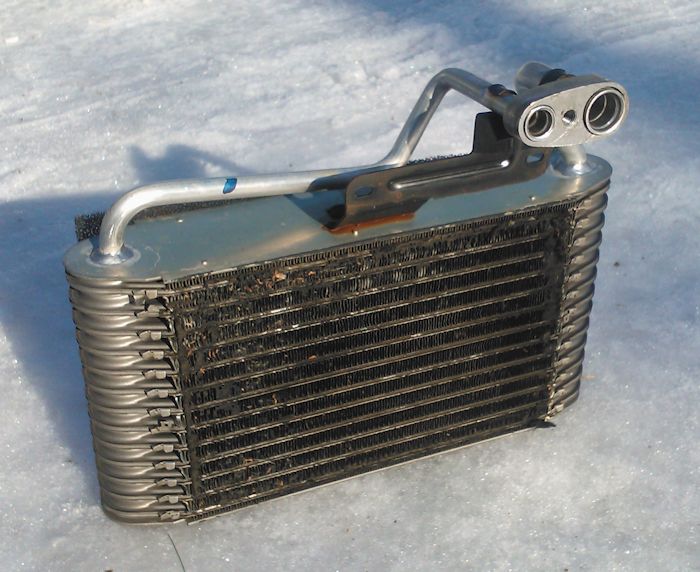
I remembered that this car still had the AC core on place even after all these years, so I finally removed this.
Other than those, I replaced new timing belt, few gaskets and 2 lifters I suspected were faulty.
Car is now next to ready for summer, I need to re-adjust the steering to make it better and then it's only missing emission test for this year
-
Money pit Beretta
- Registered User
- Posts: 6411
- Joined: Thu Jul 26, 2007 11:36 am
- Location: Kansas
Re: the white car project | update 6.3.2012
So would that washer help all Beretta's?
keep'em flying!
Re: the white car project | update 6.3.2012
Most likely not, I'm pretty sure only my custom-everything setup was affected.
But if you have 87-91(?) mounts that look like these, have someone turn the wheel and look for excess movement of the mounting. Also popping noises may tell that there is too much play.
My mounts are NOS GM parts with very little mileage btw.
But if you have 87-91(?) mounts that look like these, have someone turn the wheel and look for excess movement of the mounting. Also popping noises may tell that there is too much play.
My mounts are NOS GM parts with very little mileage btw.
-
Money pit Beretta
- Registered User
- Posts: 6411
- Joined: Thu Jul 26, 2007 11:36 am
- Location: Kansas
Re: the white car project | update 6.3.2012
Well I have a 95, but I swear there was some popping. I'm not sure if my mounts are good anyway. Just would like to be sure before I go after the mounts and the control arm bushings. To me anything that will help this poor car is worth doing.
keep'em flying!
Re: the white car project | update 6.3.2012
I drove to emission test and back today, no way it's going to pass that in current form, too much overlap.
I may have to install that 3" stainless cat I have laying around.
Also the POS lifters are making horrible noise, I may have to go back to stock there.
I may have to install that 3" stainless cat I have laying around.
Also the POS lifters are making horrible noise, I may have to go back to stock there.
Re: the white car project | update 6.3.2012
OMG that work you have done with this. Very nice car, I love it.
Beretta Gt 2,8 -88
Re: the white car project | update 6.3.2012
Small update
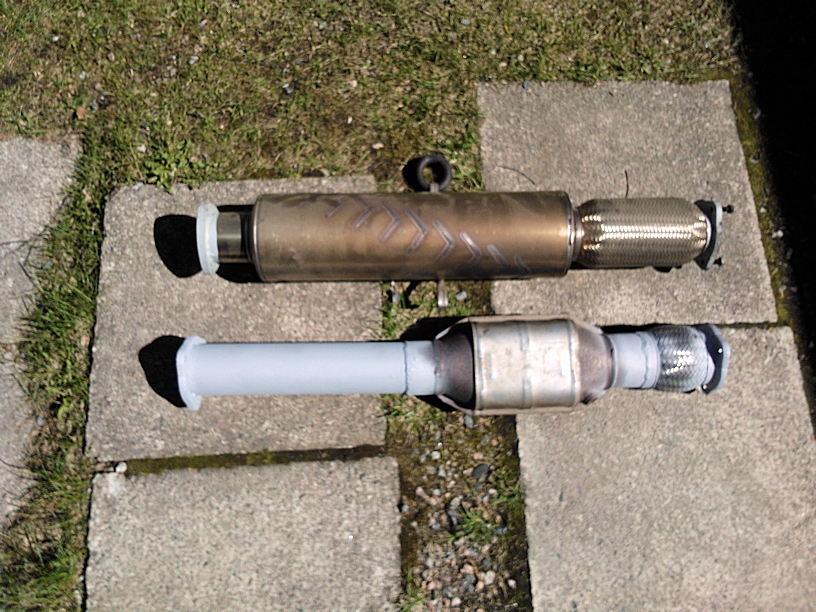
Cat pipe ready to replace the muffler pipe, now I have more hope dealing with the overlap.
But, Instead of just driving to inspection, I may have to replace those Sealed Power(tm) Failifters with stock ones. Biggest mistakes ever with this project was to get the lighter ones, and second biggest was not to replace them All when I engine apart last winter They do work, but they are incredibly loud and sounds like a time bomb.
Cat pipe ready to replace the muffler pipe, now I have more hope dealing with the overlap.
But, Instead of just driving to inspection, I may have to replace those Sealed Power(tm) Failifters with stock ones. Biggest mistakes ever with this project was to get the lighter ones, and second biggest was not to replace them All when I engine apart last winter