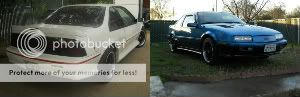
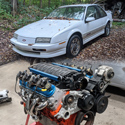
GT to Z26
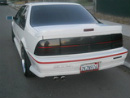
GT to Z26
I just bought the Z26 side skirts but when I was in the junkyard I found it kind of difficult to remove the braces were the sideskirts sit. how do you remove them and how do you intall them?
Chevrolet Beretta GTU/GT
-
MY91GT(Z)
- Registered User
- Posts: 1261
- Joined: Sun Mar 12, 2006 12:11 am
- Location: Rochester New York
- Contact:
Re: GT to Z26
you can use a drilll to get the rivets off or like some of us and use hammer with chisel or screwdriver if thats whats in your bag
Re: GT to Z26
You remove them with a drill hopefully (drill out the rivets) or a hammer and chisel will work too, just a PITA. Then to mount them, you have to locate where they go on the body, drill holes and rivet them back onto the car. The mounts do not glue on, screw on, or any other means of fastener. The real trick, is to make DAMN sure you locate them in the CORRECT places before drilling and riveting. That way the skirts will mount correctly. You also have to either use self tapping screws to attach the bottom of the skirts or drill a pilot hole and use a regular sheet metal screw. It won't hurt to use some sort of sealer around the rivet and screw holes to keep water out of those areas either. Just don't use silicone, they sell stuff at Auto part stores for this.
Good luck.
Good luck.
94' Z26 Project - 95' Base Project - Custom LED Light Conversions!
Chosen Proposal Submission & Committee Member for Beretta Fest 2012 in Traverse City Michigan


Chosen Proposal Submission & Committee Member for Beretta Fest 2012 in Traverse City Michigan
Re: GT to Z26
Here is a pic of the clips as they look mounted....

94' Z26 Project - 95' Base Project - Custom LED Light Conversions!
Chosen Proposal Submission & Committee Member for Beretta Fest 2012 in Traverse City Michigan
Chosen Proposal Submission & Committee Member for Beretta Fest 2012 in Traverse City Michigan
-
woody90gtz
- Registered User
- Posts: 4763
- Joined: Thu Jul 11, 2002 8:45 pm
- Location: Walton, NY
- Contact:
Re: GT to Z26
Your fender bracket is missing! 
Take your time getting them lined up. Mine aren't perfect and it bugs me.
Take your time getting them lined up. Mine aren't perfect and it bugs me.
91 "SS" - WOT 3400/5spd - 13.29@101.6 - World's fastest N/A FWD Beretta
96 "T56" LS/6spd/8.8 RWD swap - 13.45@104.7 lol
GEARHEAD dezign youtube
96 "T56" LS/6spd/8.8 RWD swap - 13.45@104.7 lol
GEARHEAD dezign youtube
-
3X00-Modified

- Administrator
- Posts: 10920
- Joined: Thu Jul 05, 2007 9:18 am
- Location: Brooklyn CT
Re: GT to Z26
Its a pain, but I got mine pretty good, I was quite proud of myself with how they came out.
Re: GT to Z26
Okay I fully understand how to take them off. I'm a little confused about rivet. what does that mean? what are self taping screws? what sealer should I use and what screws do I use to put the brackets?
Chevrolet Beretta GTU/GT
-
woody90gtz
- Registered User
- Posts: 4763
- Joined: Thu Jul 11, 2002 8:45 pm
- Location: Walton, NY
- Contact:
Re: GT to Z26
I didn't do mine, so I don't know how much of a pain it is...but I assume it involves taking good measurements.3X00-Modified wrote:Its a pain, but I got mine pretty good, I was quite proud of myself with how they came out.
91 "SS" - WOT 3400/5spd - 13.29@101.6 - World's fastest N/A FWD Beretta
96 "T56" LS/6spd/8.8 RWD swap - 13.45@104.7 lol
GEARHEAD dezign youtube
96 "T56" LS/6spd/8.8 RWD swap - 13.45@104.7 lol
GEARHEAD dezign youtube
Re: GT to Z26
Rivets are an old fashioned means of permanently fastening two items together. These days, they are more commonly referred to as a pop-rivet. Any auto place will have them.felix92GTZ26 wrote:Okay I fully understand how to take them off. I'm a little confused about rivet. what does that mean? what are self taping screws? what sealer should I use and what screws do I use to put the brackets?
Trick with rivets, is to make sure the rivet you use matches the size of the hole. AND that hole in both the bracket and the car body needs to be the same size. Typical sizes are 1/8 to 3/16 of an inch, but you may need to check to be sure. When you drill out an old rivet, you want to use a bit that is the size of the original rivet, not some huge bit.
Self tapping screws are just that. They thread themselves by making their own threads into the metal, providing you have a pilot or starter hole.
However the ones I am referring to, don't need a pilot hole as they can make their own. But you usually you want to use a drill with the correct sized driver bit (Philips, square, etc) for this, as it requires some force and a few moments before they begin to thread in. Doing them by hand would be near impossible. The screws I am referring to, have a miniature drill bit on the end, before the threads begin.
Otherwise you can drill a pilot hole and use regular self tapping metal screws. Just be sure that any holes you need to drill, you keep from going any farther into the metal than you need to, otherwise you could damage something internally behind the outer panel.
As for sealant, that is optional. But basically it just has to be some sort of car body sealant that doesn't use silicone for an ingredient.
Brackets don't use screws, they use rivets. This is because they won't stick out in the way of things inside the body, as rivets are short.
I would measure (carefully and accurately) where the brackets are mounted on the donor car, then make sure you place them in the exact same location on yours. Often, you can get them placed, secure them with some masking tape (as it won't hurt your paint) then you can drill your holes, install your rivets, then would be ready to mount your skirts. Do the bottom skirt first, THEN the door skirt last.
Yes, my pic doesn't show the fender mount, as I had not installed it at that point since that was the new fender, but its there now. lol
The self tapping screws (self drilling or not) are then used to fasten the bottom and wheel mount locations of your lower skirt. The door piece is usually held in with a plastic push clip type piece, again that can be bought at an auto parts place. Takes 4-6 of them.
Hope it helps.
94' Z26 Project - 95' Base Project - Custom LED Light Conversions!
Chosen Proposal Submission & Committee Member for Beretta Fest 2012 in Traverse City Michigan
Chosen Proposal Submission & Committee Member for Beretta Fest 2012 in Traverse City Michigan